Repairing an elderly Tamron 80-210mm lens (103A)
I’ve had this old but very chunky Tamron 80-210mm Adaptall 2 telephoto zoom lens since the mid 1980s. Only I noticed that the overall image quality had become rather poor. I wanted to find out why. When I shone a small torch through it, I noticed what appeared to be a haze. Despite several cleans I could not remove it.
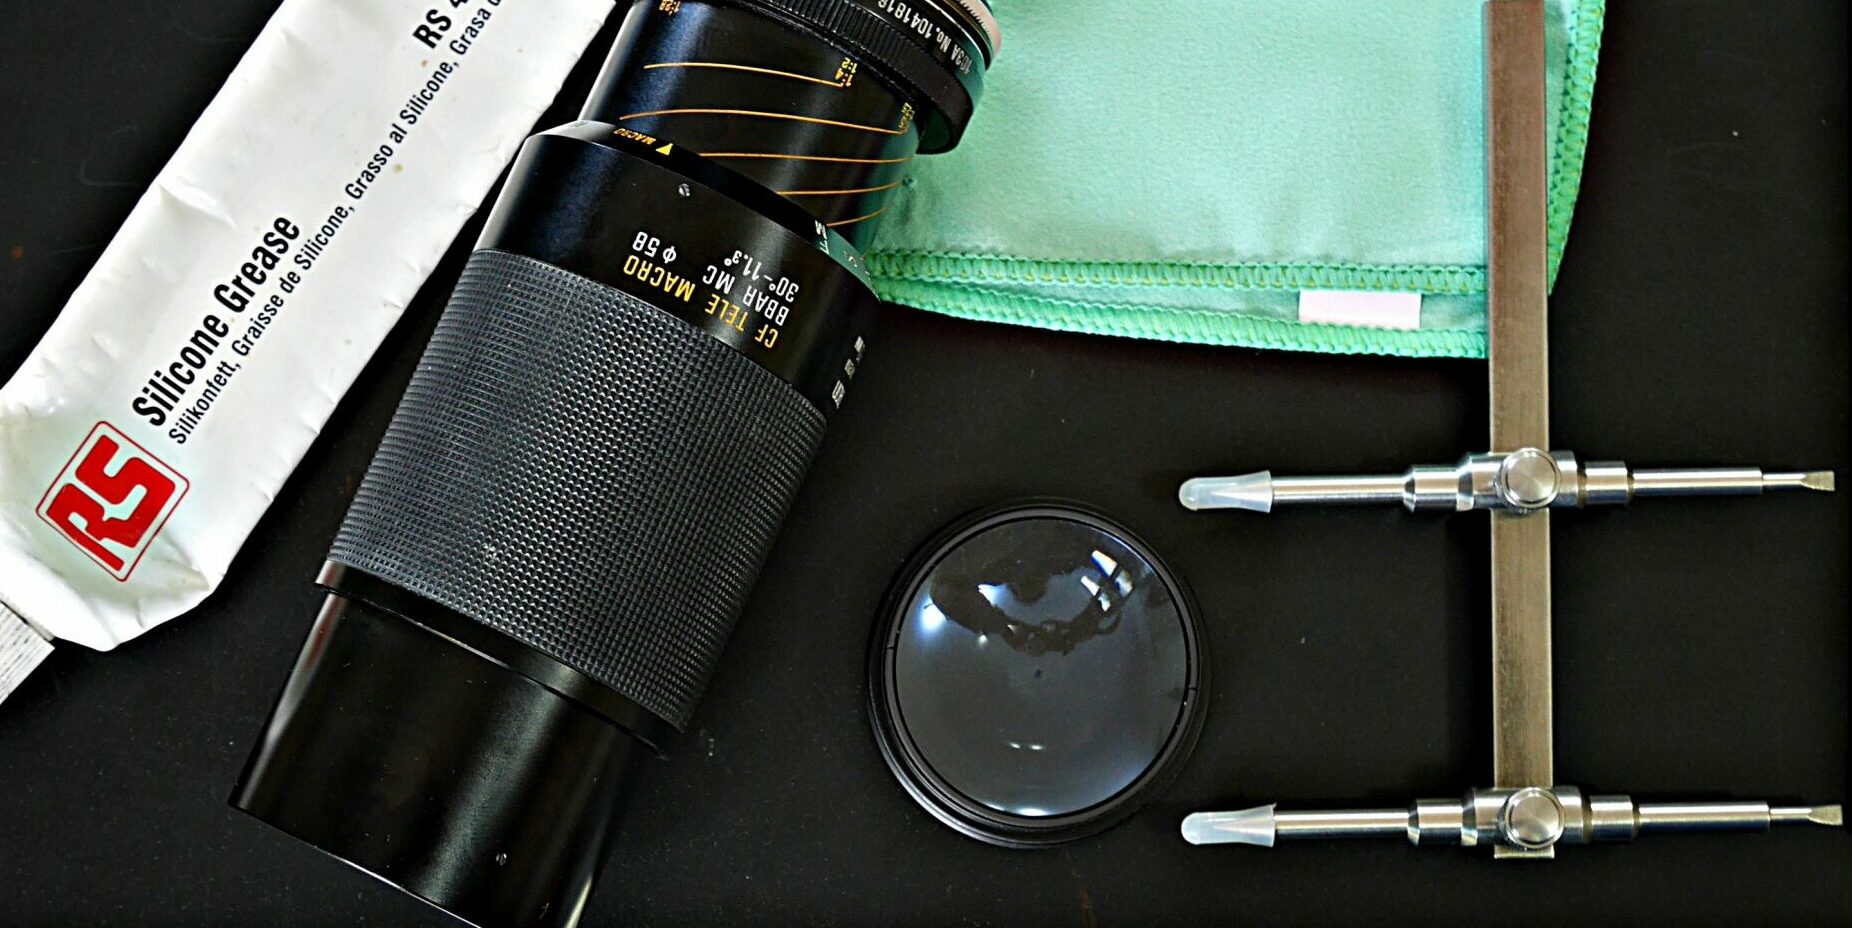
Transpired that the haze was inside of the lens. I suspect that oil/grease had evaporated from the zoom mechanism and had re-condensed on the inside of the glass. Anyway, I carefully dismantled it (which is actually pretty straightforward with the correct tools), cleaned it up with my trusty lens-cleaning solution (33% white vinegar; 33% isopropanol; 34% distilled water), cleaned and lubricated the mech with silicone grease and reassembled it….

Close-up repairing a Tamron 80-210mm lens. End glass removed using special lens tool, available on eBay for about £10.
I originally bought my Tamron 80-210mm second hand in the 1980s for use with my Pentax ME Supers. It fell into disuse when I went digital in the late 1990’s. Things changed again when I went mirrorless a couple of years back. These days I’m using it with an adaptall2 (clone) ->µ4/3 adaptor on my Lumix GX7 for photographing birds in the garden. It’s actually a really nice, easy-to-use lens, especially on a MILC with focus highlighting.

Greedy starlings from my studio window 2016-05-30, taken with rebuilt vintage Tamron 80-210mm MF lens.


Hi, I try to disassemble one of my two 103A, but I can’t manage to unsrew the 2nd frontlens (the one, that is still mounted in your picture above). Do you habe additional pictures of your disassembly. Would be great to get additional informations, beause my experience is (I tested a lot – around 70 – of old manual telezoom lenses) that the 103A ist a really great lens, optically only outperformed by the Tamron CF telezoom, but that is a really heavy lens and I don’t like to carry it.
Thanks, Stefan
Sorry, no I don’t I’m afraid Stefan. All I can tell you is mine came apart very easily, providing I used the correct tool, such as the one shown in the photo. I used the blade end not the pointed end. I made sure the tool was opened fully and pushed well into the slots on the retaining ring, to get maximum grip and ensure it did not slip.
Only other observation, you might try GENTLY heating the metal surround at end of the lens with a suitable hot air blower, if you have one. Whilst I didn’t need to do it with this lens, but I have done this successfully with others. The very slight expansion can sometime break the corrosion between the two threads. But you need to be VERY careful how you do it.
Wow, many thanks for the quick response. With an 8 year old post, I no longer dared to hope to get one :-).
The first two frontlenses had been very easy, because I’m using the same tool, but the next lens (the one with the round holes in the top left corner of the picture) I was not able to remove even with very high forces and I don’t dare to use even higher forces. Heating up shouldn’t help because I would only heat up the inner part of the thread.
I’m sorry Stefan, I don’t know what to suggest. I never took that part out. I didn’t need to. It didn’t need cleaning both sides. I brought it as far forward as the zoom slider would allow and cleaned the area I could get to easily. The other side, away from the greased parts seems fine. Only other thought that occurs to me is that perhaps it is remotely possible it has a left hand thread? Might be worth contacting Tamron to see if there is a service sheet for this. It will probably be much more interested in selling you anew lens. But I have found some manufacturers quite helpful, if you can contact the right people.
Some kind of tiny drops were visible on one lens and when I looked closely, I had the impression that it was affecting the last lens in front of the aperture. So I dismantled the lens from the back and fortunately I was able to fix the problem.
How can I insert images? Maybe it will be interesting for someone how to remove the lenses behind the aperture.
And can you change the title of your post and add the type designation 103A? Then it would be easier to find for others.
Thanks for the “103A” suggestion, I’ll do that in a few moments. With regard to uploading photos, I’m afraid our comment software does not permit that. It was a feature because we don’t want spammers sending us pictures too! Two ways to do this. Either upload the image somewhere else and link to it. Alternatively (and probably a better work around) if you are OK with it, I’ll email you. When you get my mail, you can attach a couple of images to the reply, and I’ll insert them for you manually. I agree, it would be interesting to show those images.
Can you see my email? Then please write me and I will send back the pictures I have made.
Only site admin can see it. Email sent. 🙂
Thank you Stefan, these are the images you kindly sent, detailing the disassembly and infinity adjustment of the Tamron 80-210mm MF lens. This is very useful material. I have copied and pasted the contents of your mail, almost verbatim, with just a few minor edits for clarity…
Disassembly of the rear lens
Infinity adjustment
Additionally to the disassembly of the rear lens, this is how to make the infinity adjustment (I have found nothing about this on the internet).
I hope this will help somebody to keep this wonderful lens alive.
Stefan
Thanks Stefan! Very useful input. In fact, I might even have a crack at this myself some day. G. 🙂
Greetings! I hope you might have some insight into my next step and disassembly. I have the inner lens out, but can’t seem to open the tube that houses the two lenses on either end they seem to be the offending fungus infected lenses.
I’m sorry, but no. I never needed to go that far. However the photos that Stefan (another commenter in this thread) sent in might shed some light on the matter. In particular, the tiny screws that he needed to remove.