Another update: Raspberry π4 for Zoneminder part 3
Raspberry π4 for ZoneMinder
- Part 1 – Raspberry π4 8GB for Zoneminder
- Part 2 – Update: Raspberry π4 8GB for Zoneminder
- Part 3 – Another update: Raspberry π4 for Zoneminder (you are here)
My π4 Zoneminder has been running for just over two months. Overall I’m pretty happy with it. The main issue I had was that the current stable version of Zoneminder 1.34.x was not available for the ARM64 version of Pi OS in the Debian repository. At time of writing, most of the current release of Pi OS is in fact Debian version 10 (Buster), and it comes from the Debian repositories.
Only the slightly older 1.32.x series of Zoneminder is available for ARM64 Pi OS in the standard Debian repositories. To get round this problem, I tried installing Ubuntu 20.04.1 LTS for ARM64 instead. However, I found Ubuntu runs slower than Pi OS on ARM64. So I went ahead with Pi OS for ARM 64 anyway and installed the slightly older version of Zoneminder.
Zoneminder 1.32.x works reasonably well – it’s certainly is good enough. Unfortunately 1.32.x also has some irritating bugs that were fixed in 1.34.x. Fortunately, that is history now
Finding Zoneminder 1.34 for ARM64
Or how I fixed the biggest annoyment of all 🙂
I after a lot of hunting, I finally stumbled-upon a version of Zoneminder v1.34 compiled for ARM64 over at the unofficial Debian Multimedia repo, which seems to work an absolute treat. Here’s how you get it.
Firstly, open a terminal and open the sources.list file for editing, as root…
sudo nano /etc/apt/sources.list
Edit the file so it reads file like this. Note, a little common sense may be required here, if you have other repos enabled or other comments…
deb http://deb.debian.org/debian buster main contrib non-free
deb http://deb.debian.org/debian-security/ buster/updates main contrib non-free
deb http://deb.debian.org/debian buster-updates main contrib non-free

# Uncomment deb-src lines below then 'apt-get update' to enable 'apt-get source'
#deb-src http://deb.debian.org/debian buster main contrib non-free
#deb-src http://deb.debian.org/debian-security/ buster/updates main contrib non-free
#deb-src http://deb.debian.org/debian buster-updates main contrib non-free

# Added by garf 2020-12-11.
# This is the bit that gets the latest ZM.
deb http://www.deb-multimedia.org buster main non-free
deb http://www.deb-multimedia.org buster-backports main
Assuming you already have installed Zoneminder 1.32 all you do now is run the following command in a terminal window…
sudo apt update && sudo apt dist-upgrade
Seeing what’s going on, at a glance
You may wish to check your Pi’s temperature, look at how heavily you are loading your CPU’s. So you might find this little script quite handy…
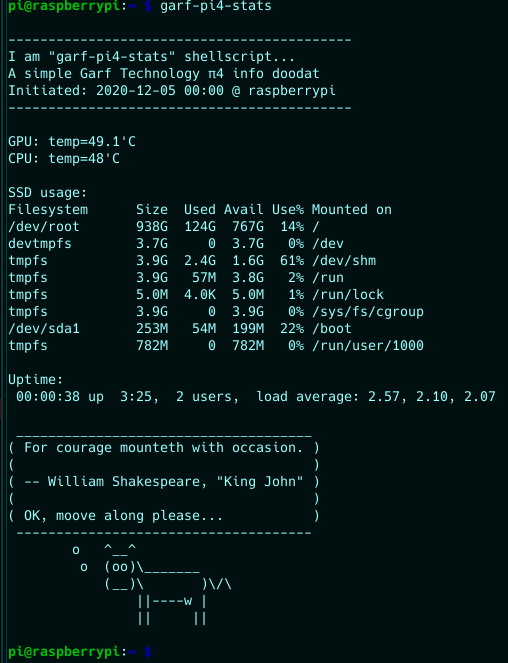
The shell script code for the above is as follows. Copy it from here and paste it into nano, or some other text editor of your choice:-
#!/bin/bash
# Script: garf-pi4-stats
# Purpose:
# Display the ARM CPU and GPU temperature of Raspberry Pi 4
# as well as # users, CPU load averages and hard disk usage.
# Probably works on other Pi's too.
# This is very useful for headless installations,
# to get a view of what's going on when you connect via SSH.
# Orginal author: Vivek Gite <www.cyberciti.biz> under GPL v2.x+
# Tweaked by Garf 2020-11-30 for Pi 4 with some extra
# features added that others may or may not find useful.
# This script comes with no warranties express or implied.
# -------------------------------------------------------
cpu=$(</sys/class/thermal/thermal_zone0/temp)
echo ""
echo "-------------------------------------------"
echo "I am \"garf-pi4-stats\" shellscript..."
echo "A simple Garf Technology π4 info doodat"
echo "Initiated: $(date +"%F %R" ) @ $(hostname)"
echo "-------------------------------------------"
echo ""
echo "GPU: $(vcgencmd measure_temp)"
echo "CPU: temp=$((cpu/1000))'C"
echo ""
echo "SSD usage:"
df -h
echo ""
echo "Uptime:"
uptime
echo ""
cowthink "$(fortune)

OK, moove along please..."
echo ""
# EOF
Assuming you are using nano…
nano ~/bin/garf-pi4-stats
Paste the the code you copied a little earlier (shift+ctrl+v). Save the file (ctrl+x) then chmod the file to make it executable
chmod +x ~/bin/garf-pi4-stats
Note: you need to have cowsay and fortune installed if you want the silly bit at the end
sudo apt install cowsay fortune
Another little problem
I had to reboot my modem rack a few weeks back because our internet connection stopped working. It turned out to be an issue at our ISP’s end. When I powered it all up again, I discovered that the π4 boots significantly faster than our router, therefore it doesn’t get an IP address from the router (!!!).
Fortunately, it is relatively easy to make π4 fall back to a static IP if DHCP fails. It’s explained in the comments at the bottom of /etc/dhcpcd.conf – and works perfectly.
sudo nano /etc/dhcpcd.conf
Power supply
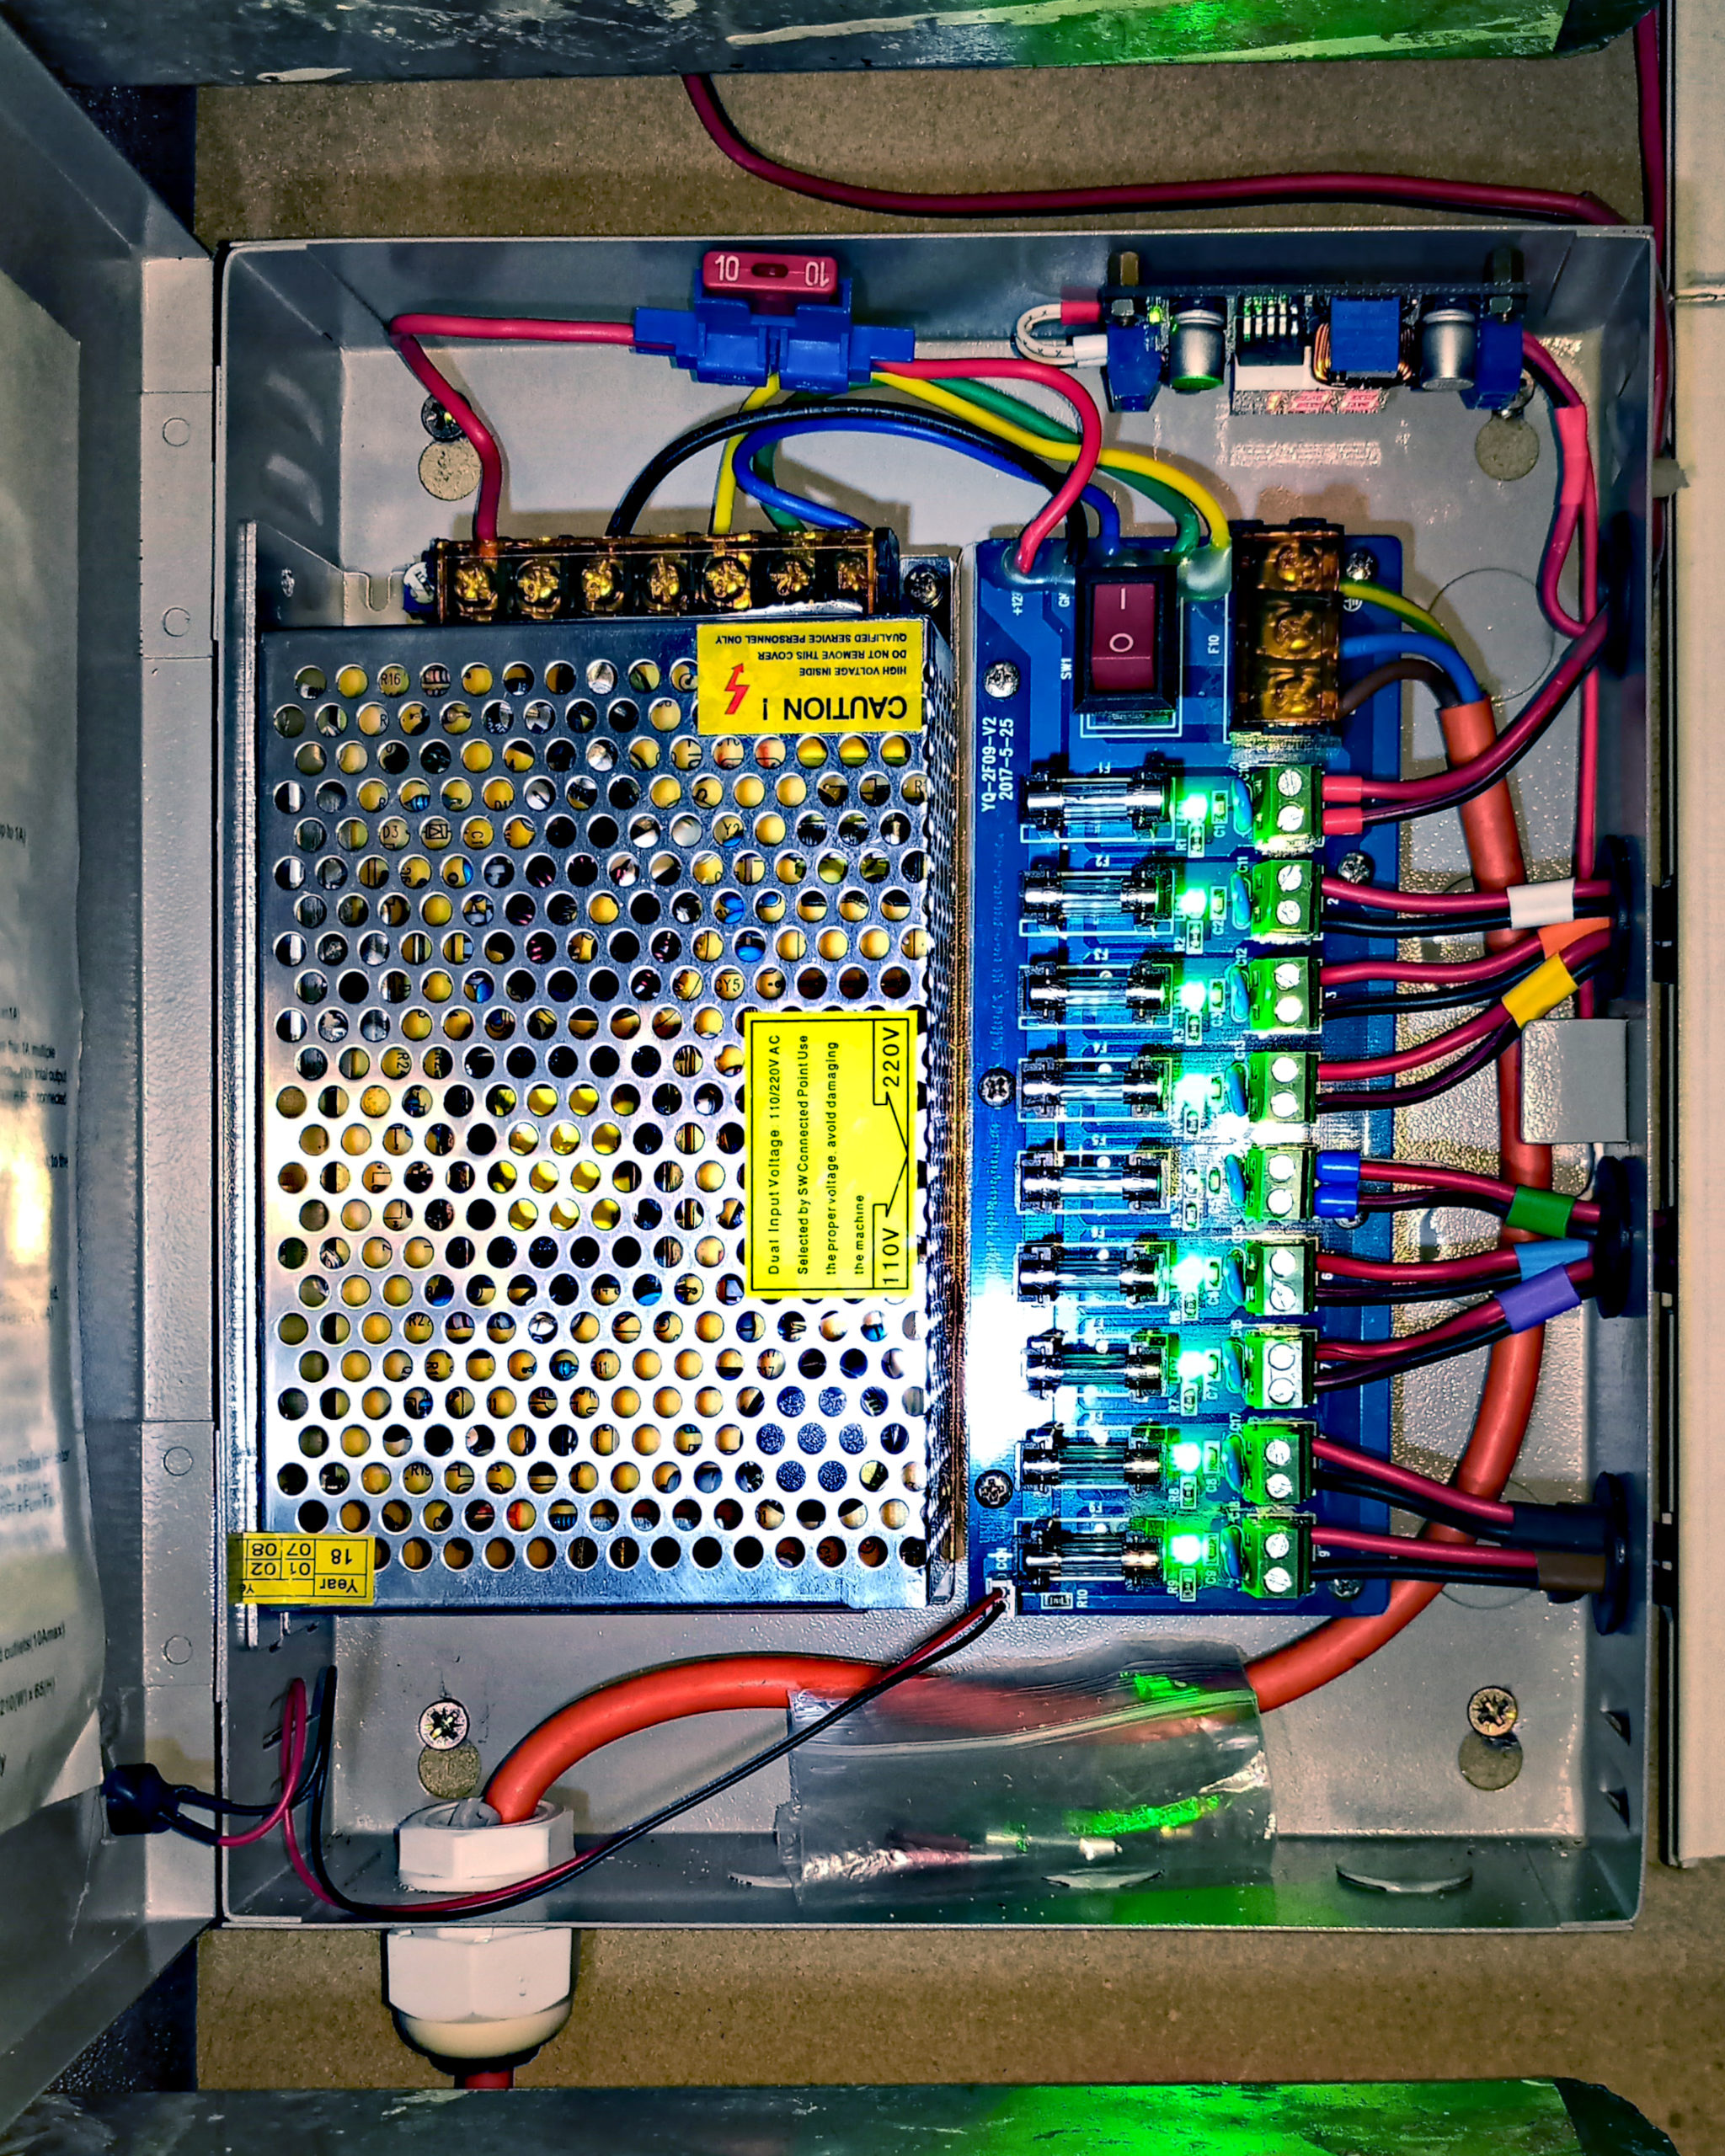
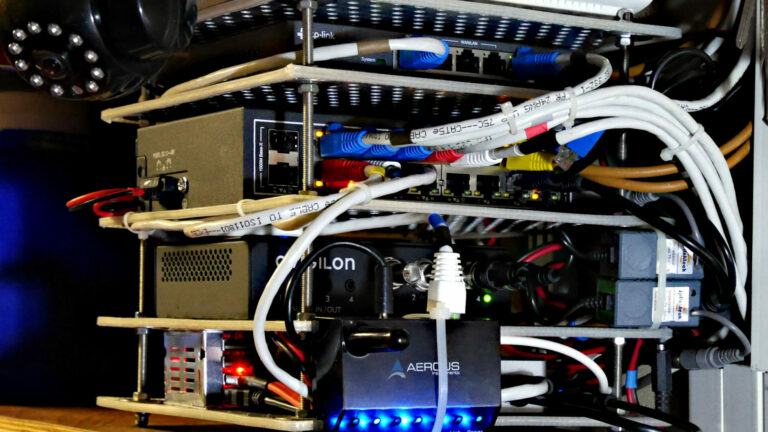
I run the π4, an Avignon A2D x264 converter/encoder (for legacy analog cams), an 8 port Ethernet switch, a TP Link Router, a Draytek broadband/cable modem, four cameras and our door entry system all from the same 12 volt switch-mode steel-cased PSU and fused distribution board, as pictured above. This PSU in turn, gets its mains power from our UPS (uninterruptible power supply).
This particular model has LED indicators to indicate whether the fuses are intact or not. These DC distribution boards are specifically designed for CCTV systems and eliminate the need for loads of wallwarts and extension leads. It’s safer and significantly more energy efficient too. I then use a simple 12v to 5v buck converter to drop the 12 volt PSU output to 5 volts to power the π4.
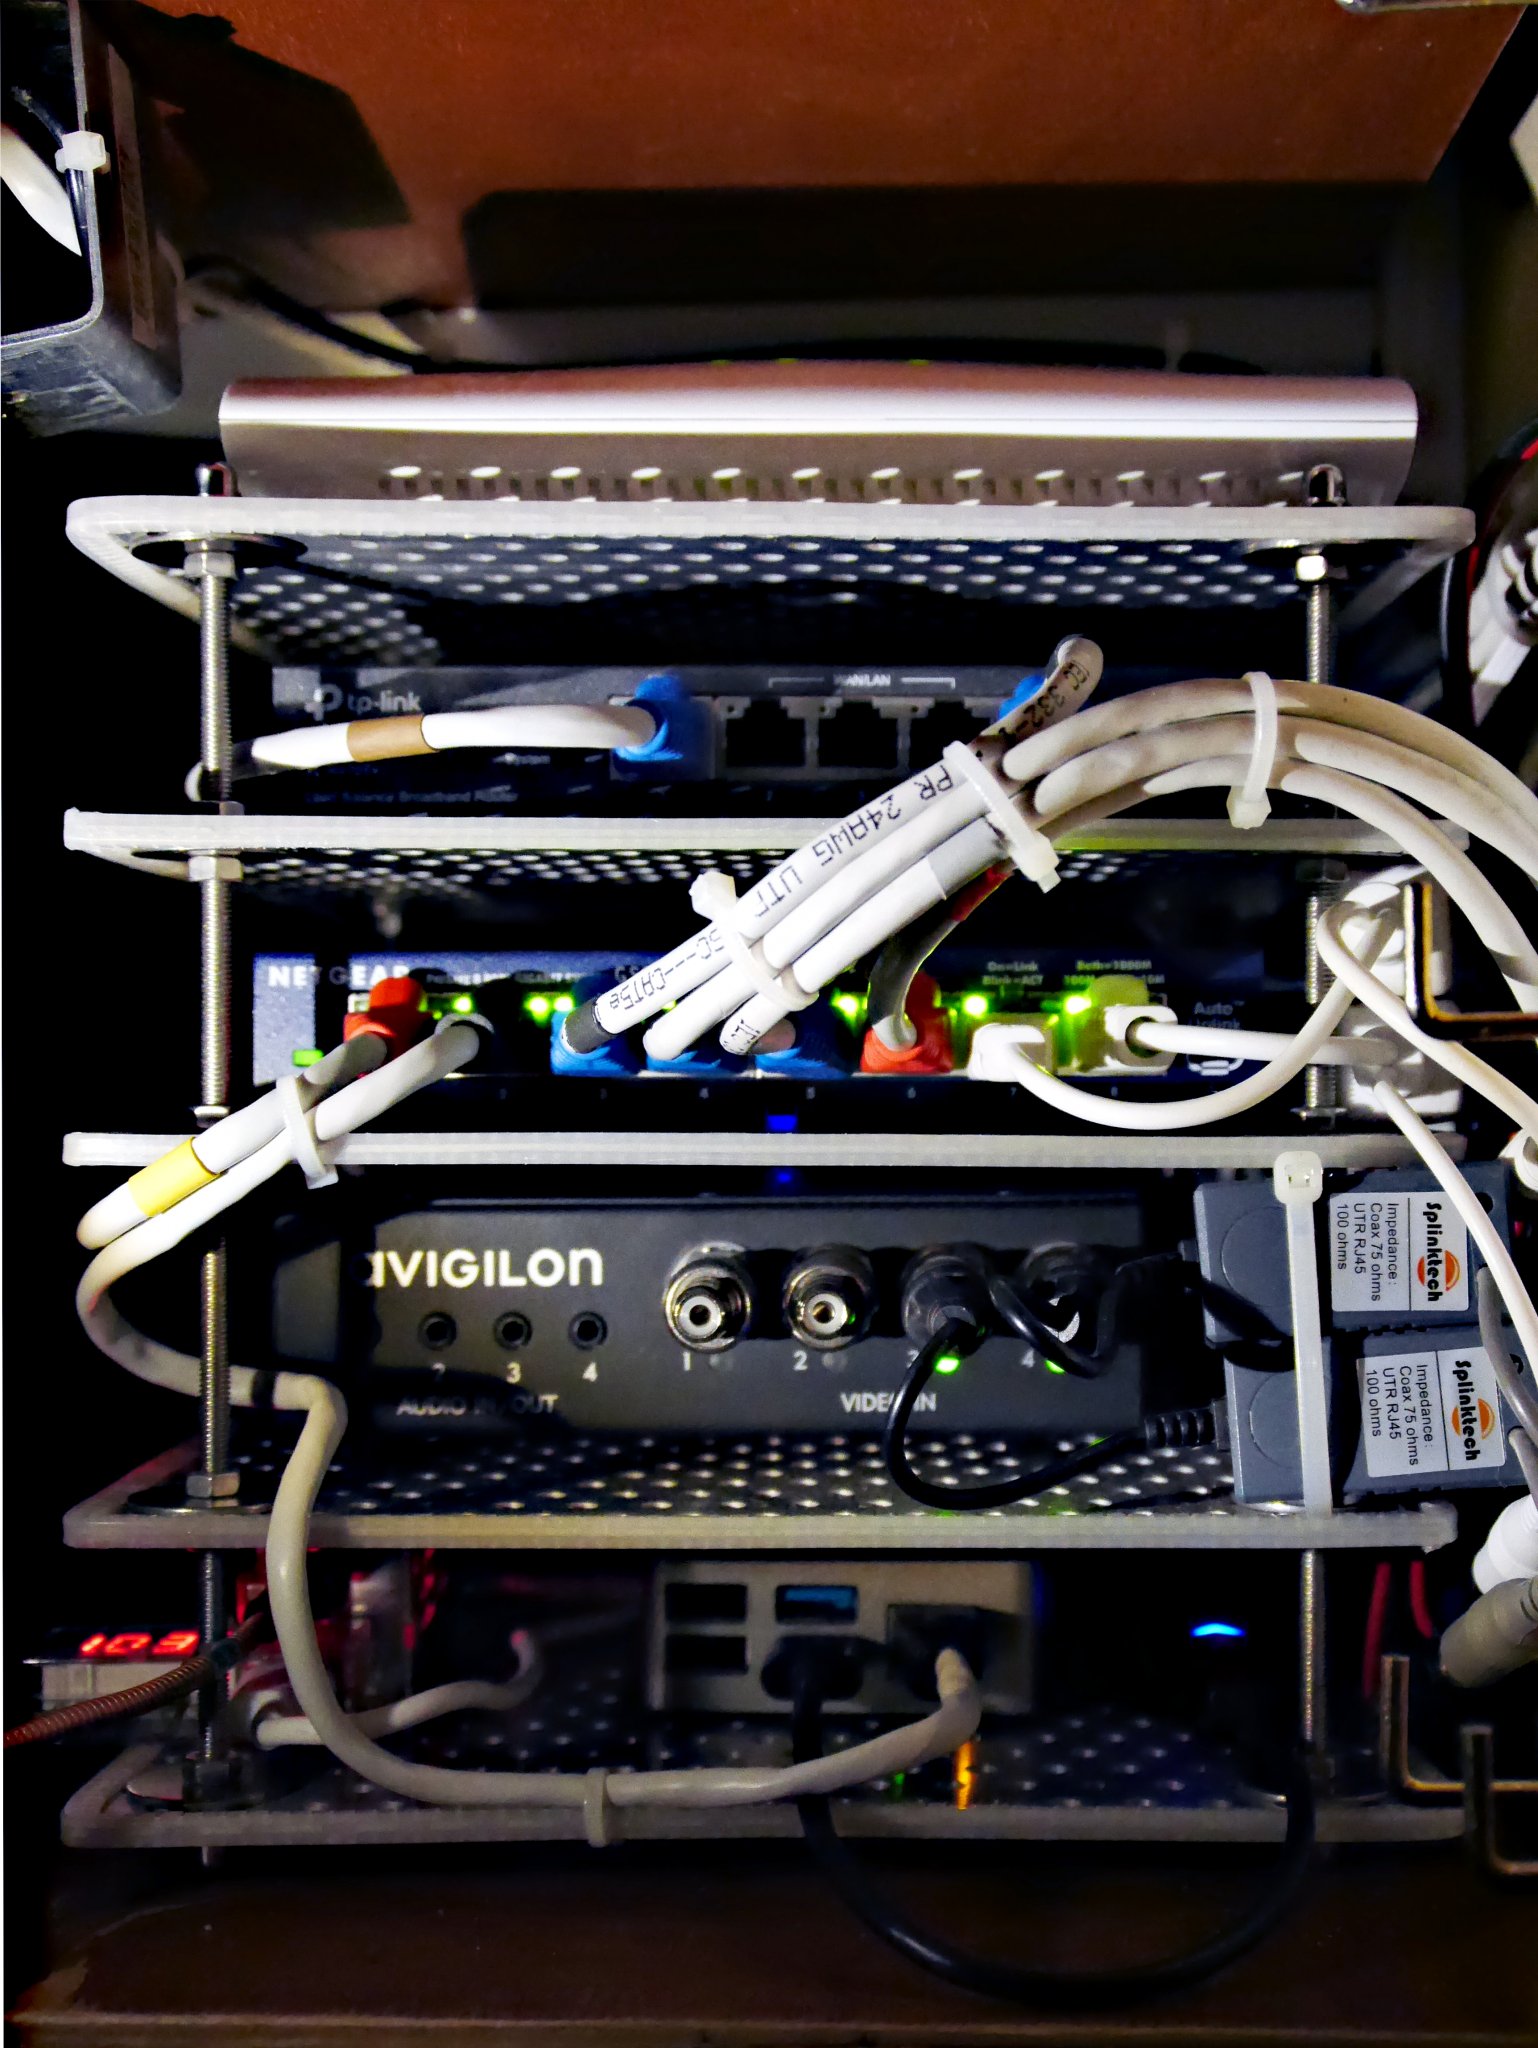
I am measuring the π4’s power consumption quite carefully ATM. You can just see the little USB DMM bottom-far-left of the above image. It averages between 5 and 7 watts – and that includes the 1TB NVMe SSD. The original Zoneminder PC consumed between 40 and 55 watts.
I am successfully running 8 cameras of the following types…
- 2 off 720px x 576px (both recording h.264 pass-through via Avigilon A2D converter – fixed position)
- 2 off dummy 720p x 576px (both “monitor only” via Avigilon A2D converter – fixed position)
- 3 off 1920px x 1080px (all recording h.264 pass-through, IP-type, PTZ)
- 1 off elderly 640px x 480px (“monitor only”, IP-type, PTZ)
Load averages to creep up from around 2 to between 4 and 5 once several people start looking at cameras, but that is to be expected. I am also considering various optimisations, such as increasing the size of /dev/shm so that ZM can make use of more of π4’s 8GB RAM.
Other observations
The thing I least like about my ZM system is having the NVMe disk in a separate case. Granted its not really a major issue because I hardly ever see the set up anyway. My wife can’t understand why it bothers me at all. I only ever see it when I go into the garage. In fact, I really have to peer into the modem rack just to catch a glimpse of either the π4 or the SSK NVMe case at all – as previous photos will bear testament. Nevertheless, it still niggles me!
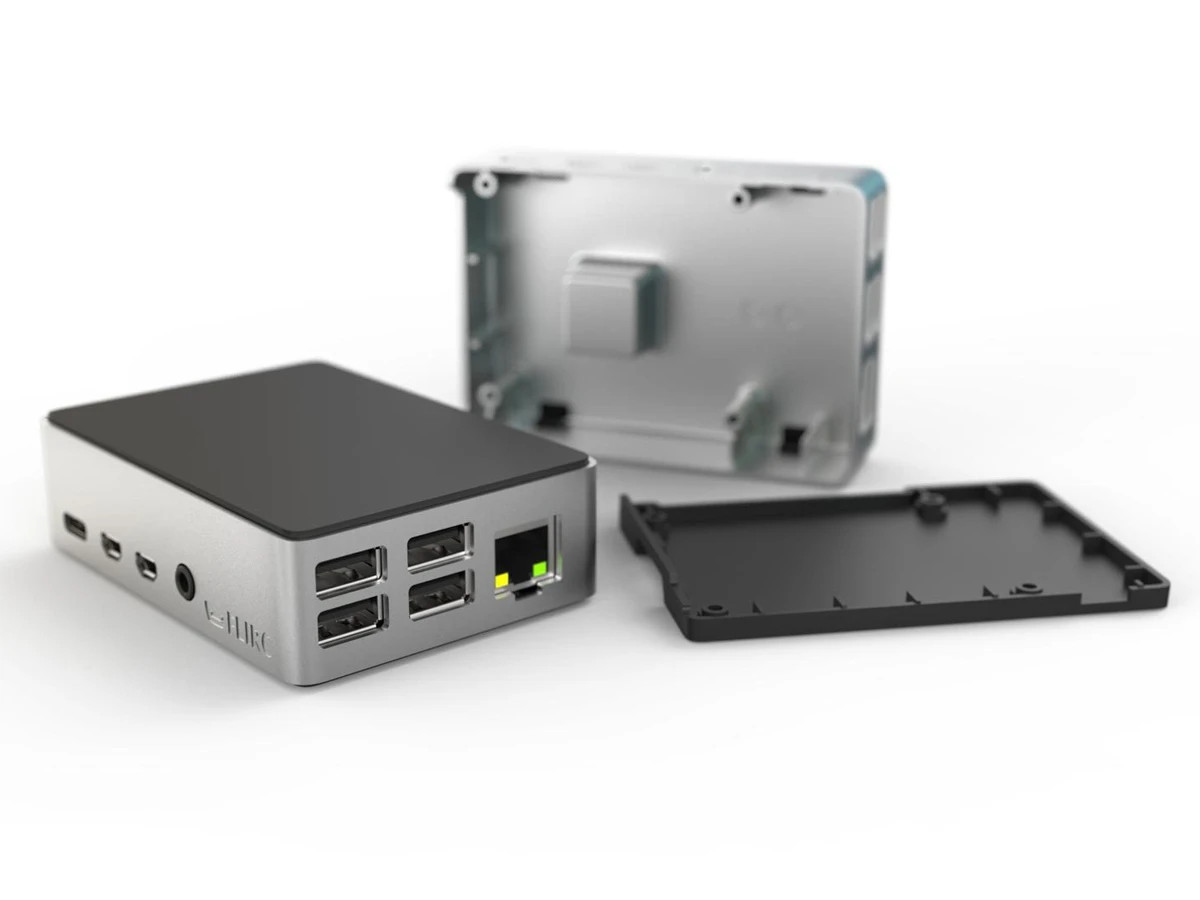
Meantime I have been testing and tweaking my Zoneminder set up to see what happens under various load conditions. Overnight I set all 8 camera streams to maximum resolution and 25 fps. This bumped the load average up to above 7 . This is far too high for a quad-core running a streaming application. However the device temperature and indeed the SSD seem relatively unaffected. The FLIRC π4 case reached 38°C and the SSK NVMe case reached 32°C. Both are cases designed to act as heatsinks. Of course I am cheating here. I’m guessing that placing both devices on a 200mm x 200mm x 1.2mm slab of perforated stainless steel probably has a more than minor effect on dissipating heat!
I set the frame rates for all the cams back to 10fps – not exactly broadcast quality but perfectly adequate for CCTV. The system π4 replaces could barely make 2fps at 640px x 480px! I left the resolution on max: three cams at 1920px x 1080px, four at 720px x 576px and a very old one at 640px x 480px. Uptime is now reporting load averages at a very acceptable: 2.69, 2.34, 2.66 – though obviously these goes up a bit when I start actually viewing video streams. Device case temperatures are now 36°C and 31°C for the π4 and the NVMe respectively.
Conclusion
Just rebooted after 45 days uptime, due to a kernel update. System is retaining just over a month’s video from 6 cameras (3 of which are 1080p) – though, as i said earlier, I have restricted the frame rate to 10 fps. CPU load average generally hovers between 3 & 4 (which is fine for a 4-core CPU). And all the while, it’s consuming around 6 watts of power!
Raspberry π4 for ZoneMinder
- Part 1 – Raspberry π4 8GB for Zoneminder
- Part 2 – Update: Raspberry π4 8GB for Zoneminder




Hey,
I’m looking doing a similar pi 4 based system, Now that you’ve been running it for 18 months do you have any other feedback or suggestions?
Do you think a 4gb pi could do a similar setup? ( I have 2 pi’s one is the 8 gb and the other a 4gb) and about 7 ip camera’s that are all 1080p.
I’d also like to save all the data to a single drive – so I’m not sure if I would need to have a separate pi running a network drive and then have all the pi’s saving to that network drive.
thanks in advance!
-Jason
Thank you for your comment. To answer your questions…
Firstly, you really need 8GiB RAM and you need a 64-bit version of the operating system to access it. I found a 64 bit version of Raspberry Pi OS. This is basically Debian Buster (Debian v11) compiled for ARM64 with a few extra Pi-specific applications. I then upgraded it to Bookworm (Debian v12). These days, you can probably go straight to Bookworm for ARM 64 – you’ll need to check that on the Pi fora.
You also need to do a few ‘cheats’. The most important cheat is to configure your cameras in their Zoneminder settings to use “Passthrough”. This takes the h.264 AVC stream and records it directly to disk, without any transcoding. This saves a massive amount of processing power because you don’t need FFMPEG clunking away in the background. Another useful trick is to reduce the framerate in your cameras’ settings to something sensible. For most practical purposes we found that 10 fps is perfectly adequate.
If you do the above then you should be able to run all seven cameras from a single 8GB Pi. We have six cameras, three @ 1080p, two @ 720 x 576 (D1) via a 4 port Avigilon analog-to-digital converter (though I successfully tested it using all four ports at the same resolution), and one very old Foscam camera running at 640 x 480. We also run WeeWx weather station on the same server. This collects and displays data from an Aercus Weathersleuth weather station. It actually collects data from two sensor clusters via the Aercus transponder. It writes it do the underlying MariaDB database, and generates new graphics for its various charts and dials every 120 seconds.
Ironically, the device which needs the most processing power is the legacy 640 x 480 camera. It only outputs MJPEG. So its stream needs to be transcoded on the fly in order to store its stream as h.264. Much better to store h.264 because h.264 uses significantly less disk space than MJPEG, and the h.264 playback is much smoother.
On our Pi system, we use a single 1TB SSD for the operating system AND the data (as detailed in the text of my first Zoneminder article https://garfnet.org.uk/cms/2020/11/24/my-new-π). The six h.264 streams gives us just over four weeks retention. Every week or so, I rsync the Pi server in its entirety to a 20TB disk attached to my Linux Media Server. Takes a while to do the first backup. But subsequent backups typically only take a few minutes over a Gigabit LAN.
HTH. G. 🙂
Thanks for the reply,
The camera’s that I have can stream straight over the network. They have a high resolution stream and a lower resolution stream. I was hoping the pi 4 could handle monitoring the lower resolution streams for each camera and then when an event occurs (aka something moves in zone that it’s monitoring) have it trigger an event.
Once the pi 4 triggers an event (via monitoring the low resolution stream) the pi would then save the respective high resolution stream until the lower resolution stream (which it is still monitoring for the event) detects the event to be over.
So rather than having the storage fill up with non-stop CCTV streams I would prefer to only have a collection of events.
That is what I’m hoping to be able to accomplish, but reading your comment I’m not quite certain how your setup is running on the pi 4. Is pass through doing any motion detection and only saving events? or if it’s just saving the streams non stop straight to the storage like a classic CCTV stream?
(Hope that makes sense)
Interesting. I guess our cameras are fairly similar to yours – or at least our high resolution cams are, Most of our cameras have more than one stream too. And they all stream over the LAN. Our legacy analogue cameras o/p goes to an Avigilon 4 port A2D converter, to enable them to stream over the LAN. In any event, we use the highest resolution streams and record them in 600 second chunks.
The configuration you propose is inappropriate for us. Most of our cameras are outdoors. So there is little point using using event triggering because there is detectable movement almost all the time. Instead we chop the continuous streams into 600s chunks and record everything. With six cameras and a 1TB SSD, this gives us a month’s retention. We then “archive” any clips that we want to keep, from within Zoneminder. I sometimes copy individual clips over SSH (or SSHFS) from the π, and process them on my laptop using Kdenlive or similar. Example:
The primary function of our ZM system is privacy. Chinese made IP cameras are notoriously leaky. Feeding their o/p into ZM, and then configuring our router’s NAT so only Zoneminder can be seen from outside, (and the direct feeds from the cameras themselves cannot), means that I (as Zoneminder system admin) choose which cameras can be seen from outside, and by whom. Of course it is handy that ZM also provides a convenient way of curating and storing the video clips. Also handy that it has a common PTZ interface that we can apply to all of our PTZ cameras.
I must make clear: we use the π rather than a PC not because the π has any special functionality. We use the π because it is a fraction of the size, and uses a fraction of the electrical power of a conventional PC.
Moreover, the configuration you propose is not really a Raspberry π issue either. It is a Zoneminder configuration issue, that would need to be addressed regardless of whether you were using a PC or a π. My gut feeling is that you could handle it by capturing both the high and the low resolution streams from each camera as separate camera objects within Zoneminder. At least, that is how I would tackle the problem. You might get a more definitive answer with regard to that type of configuration on the ZM fora. There are some very clever folks over there.
Whilst I doubt this is a configuration we will ever use, nevertheless, I would be very interested to learn how you resolve this.
HTH. G. 🙂