Install Debian 13
Windows 10 officially reaches end of life 2025-10-14. Unfortunately for Windows users, Windows 11 has some rather specific hardware requirements that a lot of perfectly serviceable PCs currently running Windows 10 do not satisfy. Consequently, lots of Windows 10 users are asking me about alternatives to Microsoft Windows. My stock answer these days is simply “Debian 13” – adding “with KDE Plasma 6 desktop of course“.
About our “Moving to Debian” series…
Dedicated to my family, friends and customers, and particularly my nephew Giles – a tech-savvy young fellow who is also considering joining the Penguinistas.
- Install Debian 13. Part 1 of our “Moving to Debian” series (you are here).
- A fully loaded Debian 13 system. Part 2 of our “Moving to Debian” series.
- Additional packages to enhance your Debian installation. Part 3 of our “Moving to Debian” series.
Debian offers a fast, free and very, very stable replacement for MS Windows, with industrial strength security and free, timely, hassle-free upgrades, forever. And the addition of the KDE Plasma 6 desktop offers a the user a pleasant, attractive yet highly-functional user experience rivalling that of any other modern operating system.
Regular readers will know that I rather like KDE Desktop. That’s not only because it is very pretty. It is also highly customisable by the user, offering shedloads of additional functionality behind its good looks. Most of which is just a “right-click” away. It also has a look-and-feel with which many MS Windows users will feel reasonably familiar. This includes “K” menu button that behaves in a very similar manner to the “Start” button in MS Windows.
Preparation
These are the things you need to do BEFORE you start your upgrade to Debian. In most cases you will do all this on your machine while it still runs MS Windows – especially if this is your only PC
Backup
Firstly, before you do anything else, be sure to make a full separate backup of anything that is important to you. The following installation technique is pretty safe and reliable. However accidents and technical failures can and do happen.
Download Debian .iso file
Then you need to get a copy of Debian. I normally use the “NetInst” version. This means you download a minimal version of debian, just enough to get the installer working. Then the installer downloads whatever else you require from your selected local Debian software repository – known as a Debian “mirror”. The “NetInst” version of latest Debian Stable (currently version 13) is available from:-
Debian offers several versions if its NetInst installer, intended for several different hardware platforms. If you are upgrading a normal PC or laptop, the chances are you will need the “amd64” version. Click amd64 and your browser should start the download process.
Create bootable USB stick (or CD ROM)
Open your file manager and find the file. It will probably be in your Downloads directory and its filename will likely be something similar to “debian-13.1.0-amd64-netinst.iso”. You will also need USB bootable stick creating software. If you do not have such software, then Rufus, available from rufus.ie, is a highly regarded boot disk creator for MS Windows. Rufus is a Windows application and I have not covered that here. However you can find free Rufus software and instructions at:-
You may also boot from CD ROM, but hardly anyone does that nowadays and I haven’t covered it here either.
Fresh hard drive
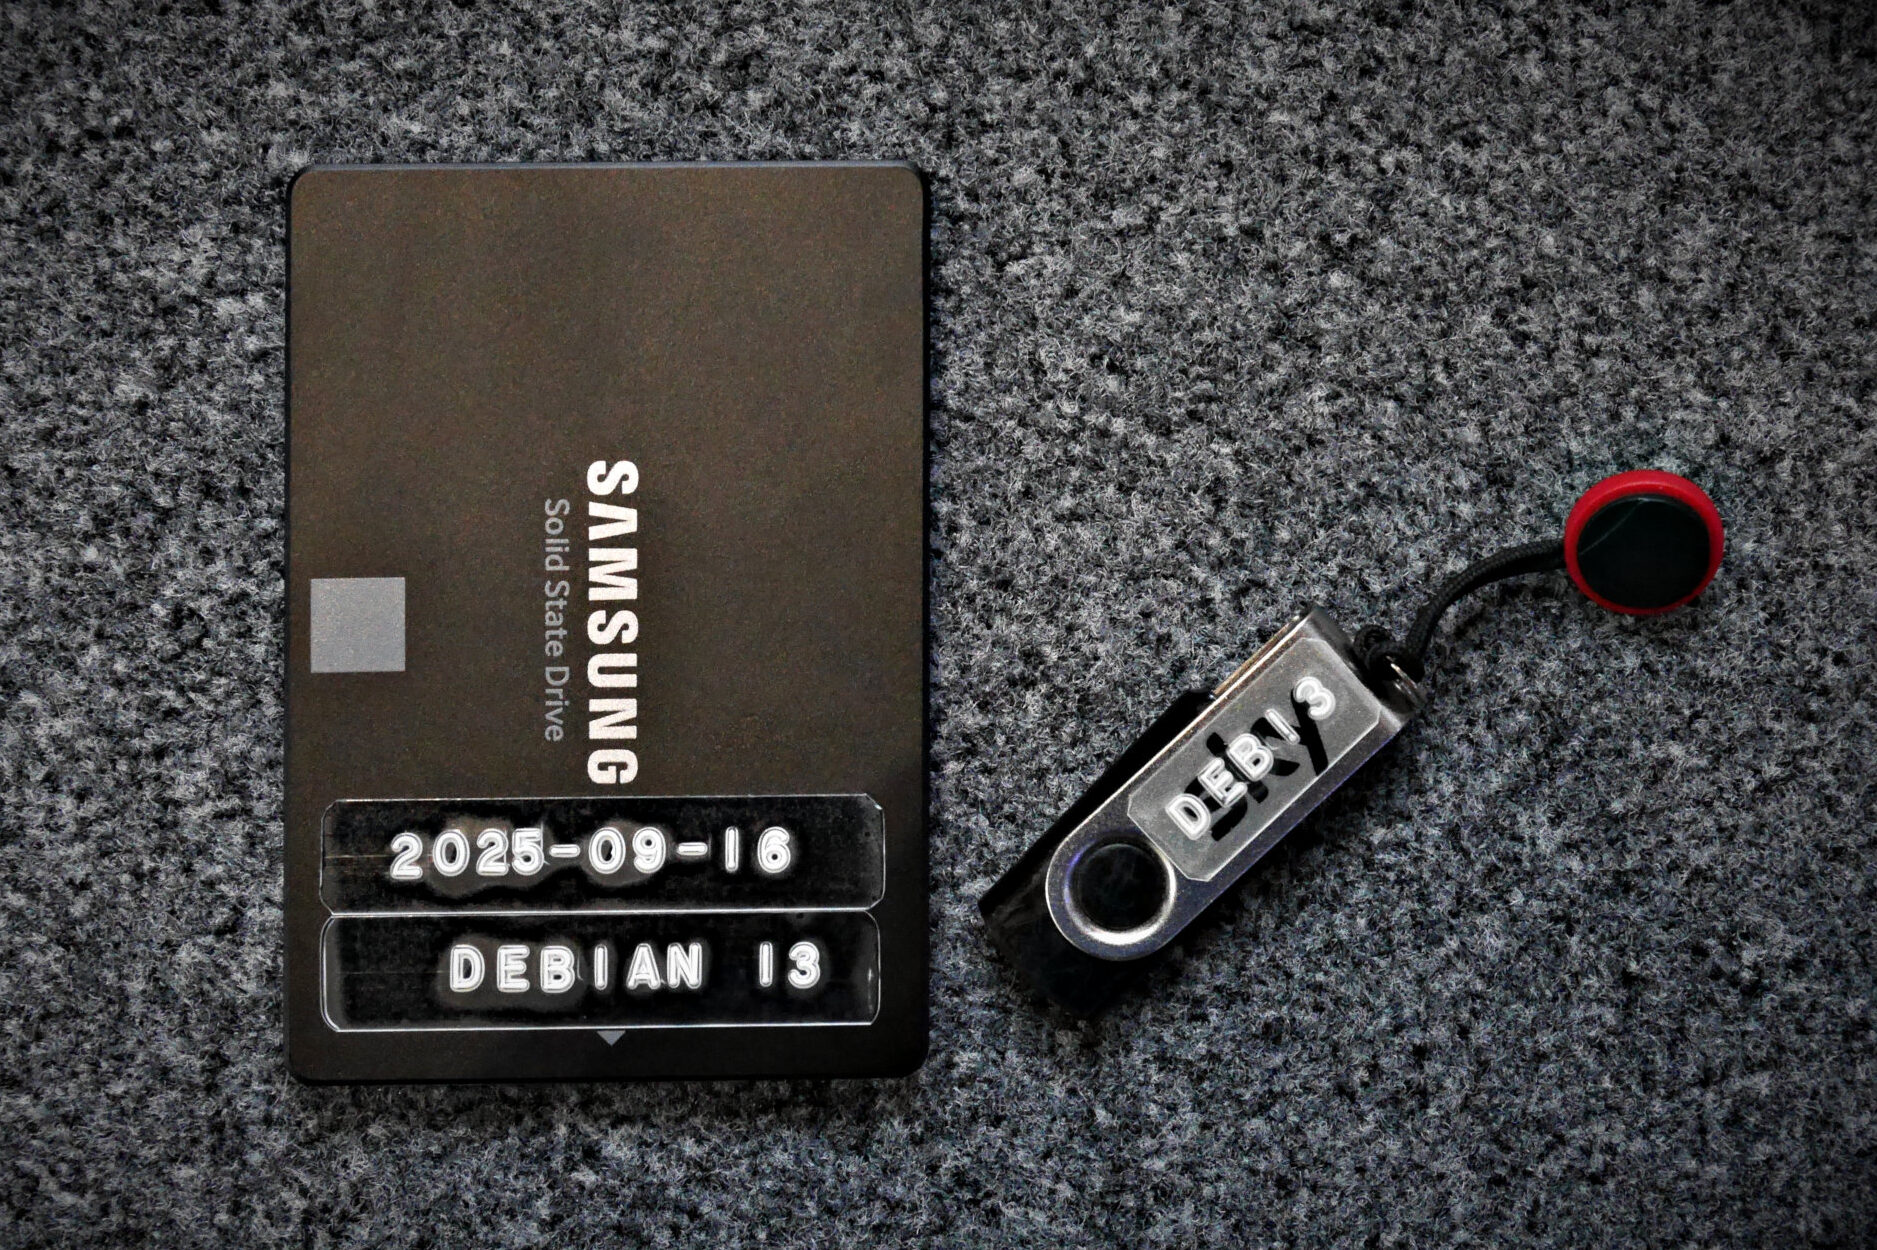
If you are upgrading from Windows 10, I strongly recommend you remove the old Windows drive and place it in a suitable USB enclosure and install a fresh SSD in your machine, of a suitable size. For most people 500GB is adequate. If you’ve been running Win10 for some time, chances are your old hard disk is knackered. Besides GNU/Linux loves SSD! The combination of SSD and Debian GNU Linux is actually quite breathtaking.
Personally I prefer Samsung SSD’s. Over time they have proven the most reliable. However, there are lots of other good brands too. I also like to label the new hard drive, with date and initial OS. This may prove to be useful information in years to come.
Importantly Do not attempt any kind of dual-boot lash-up. There’s a good chance that a Windows upgrade will break it at some point. Most users who dual boot never actually get to use GNU/Linux as a main operating system because they are swayed by the familiarity of the OS they already know. But arguably the worst thing about dual boots is you are still stuck with MS Windows and all the dangers that presents. Much safer to put M$ Windows in a virtual machine, protected by GNU/Linux, where it cannot hurt itself.
Upgrade to Debian
TL;DR
If you already know how to install a basic Debian operating system safely, then you may wish to skip to the next section.
Preflight checklist
Before you proceed, let’s quickly check you have done everything you need in order to make this a safe and successful upgrade…
- Backed up your data.
- Downloaded a debian .iso.
- Created a working bootable USB stick.
- Removed old Windows hard drive and put it safely in a USB enclosure.
- Physically installed new SSD.
Boot from USB stick
First we have to make the computer boot from the USB stick you created. Some machines it’s simply a matter of stuffing the USB stick in a USB socket and starting the PC. On others you may need to go into the BIOS and force it to boot from USB. The exact method to do this varies from one PC to another. But most often it means holding down the ‘F2’ or the ‘Delete’ key as the computer starts. The BIOS will have a “Boot” or similar menu, from which you need to select “USB” or “USB disk” or similar. There is no standardised way of doing this and every manufacturer uses slightly different terminology. But the guiding principle is that you need to find a way to make the computer start from the USB stick you created.
Assuming you can successfully boot from USB stick, the first screen that appears asks you how you wish to install. Select the first option “Graphical install” and do it fairly quickly! Then it will take you through a series of screens as it builds the operating system to your requirements. I have taken screen captures showing commonly used options, coupled with a brief explanation of each screen.
Select a language (English)
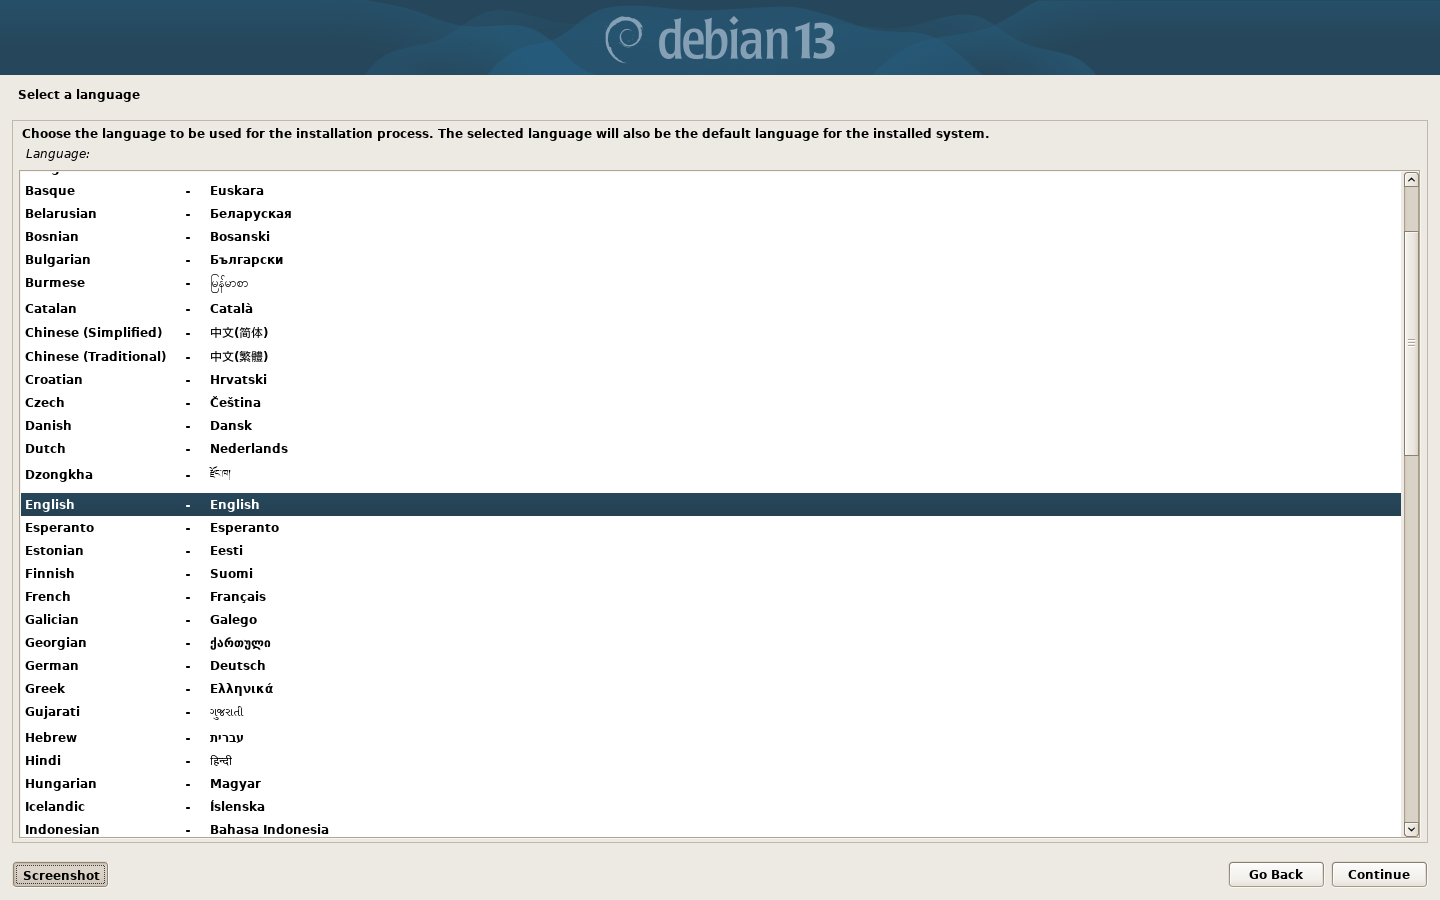
I selected English. You may wish to select some other language, but this article assumes you chose English. Then click the “continue” button.
Select your location (United Kingdom)
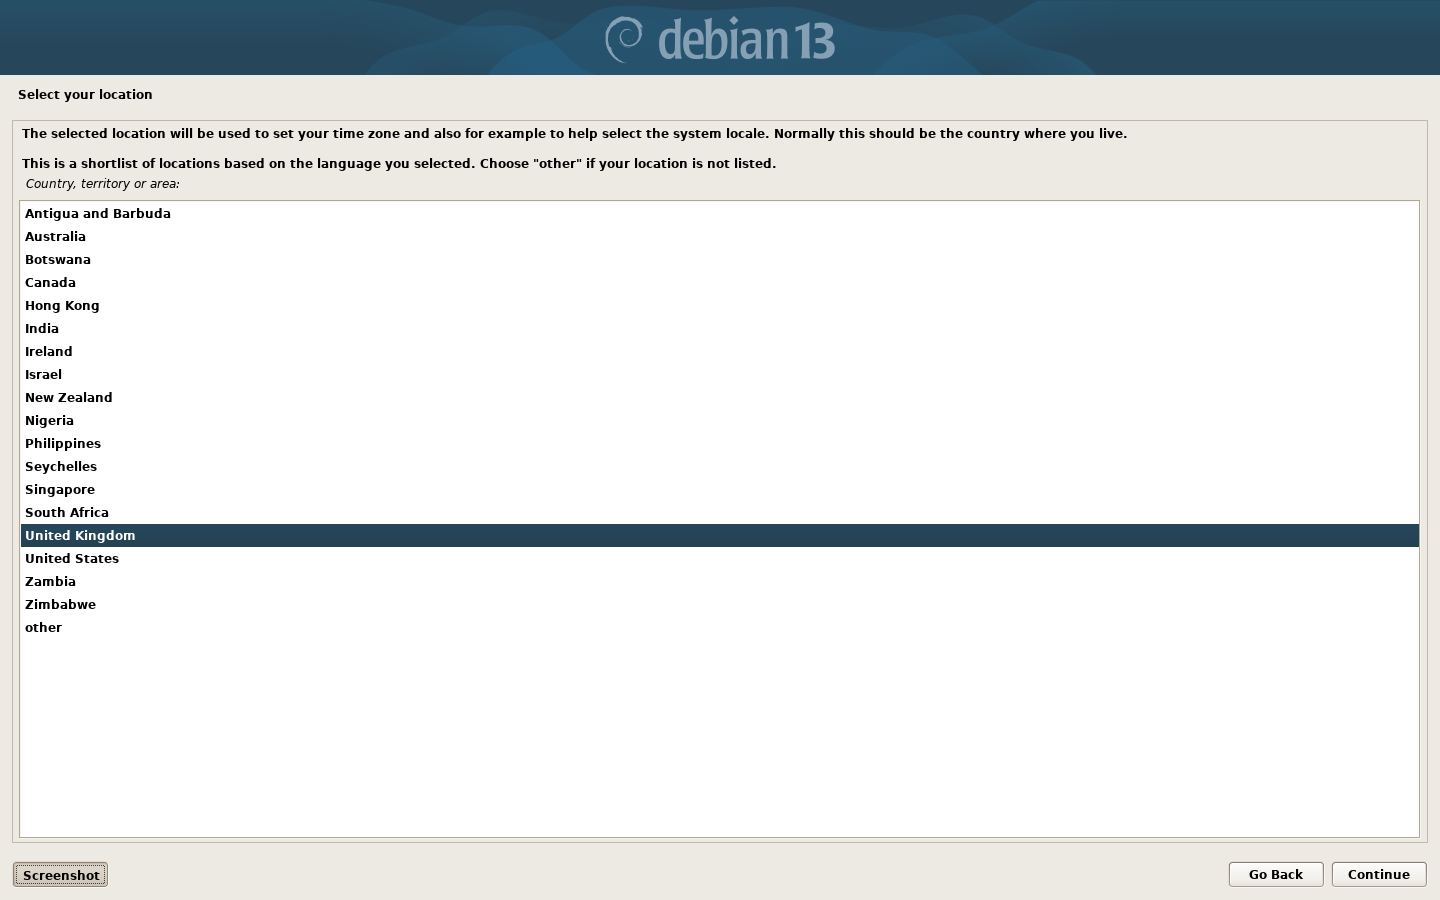
You may need to select some other location. but for simplicity’s sake, I will assume you selected United Kingdom. Then press “continue” button.
Configure the keyboard (British English)
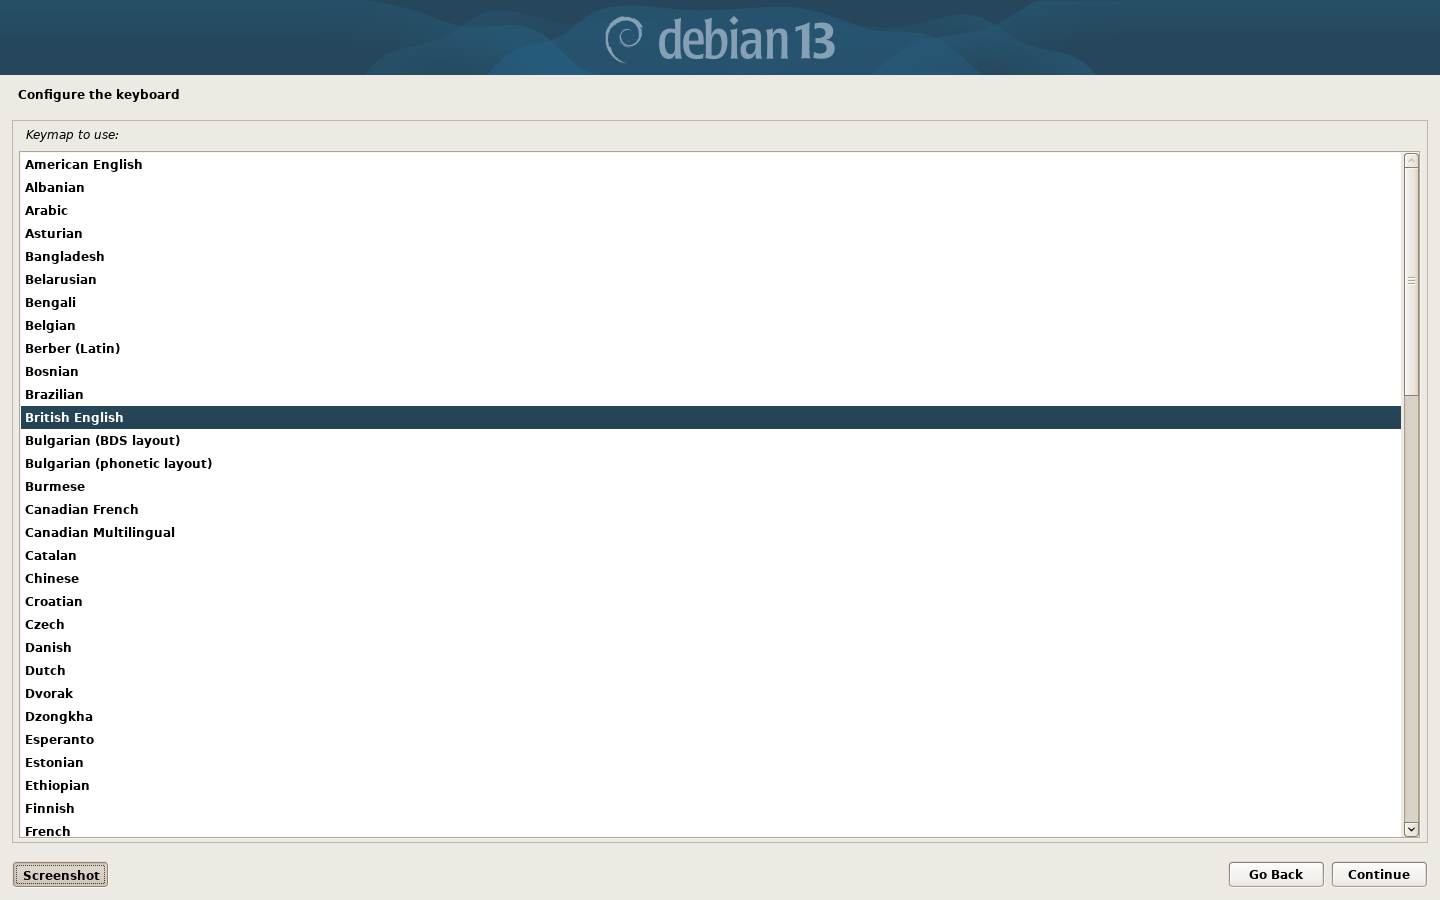
I selected “British English”, but you may wish to select some other keyboard layout. Then click the “continue” button.
It will now mount and detect media, and load some additional stuff. It will also detect your network. It needs this network connection in order to install the rest of the operating system from the Debian repositories.
Configure the network.
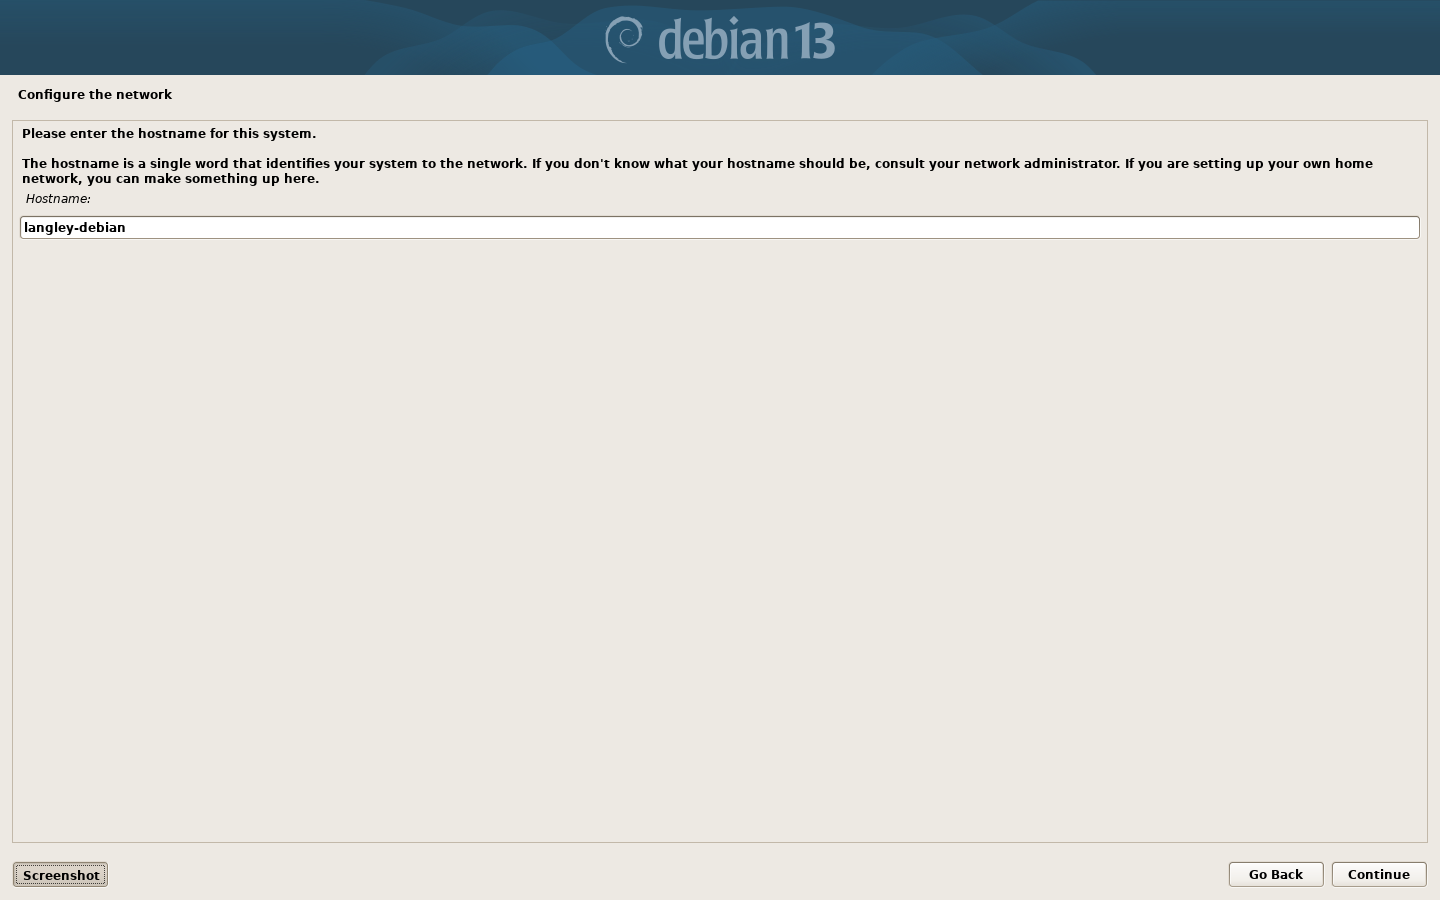
Now it asks you to give your computer a network name. I usually choose “something-identifiable-debian”. In this instance I chose “langley-debian” because “Langley” was the name of the house where it used to reside. Then click the “continue” button.
Configure the network.
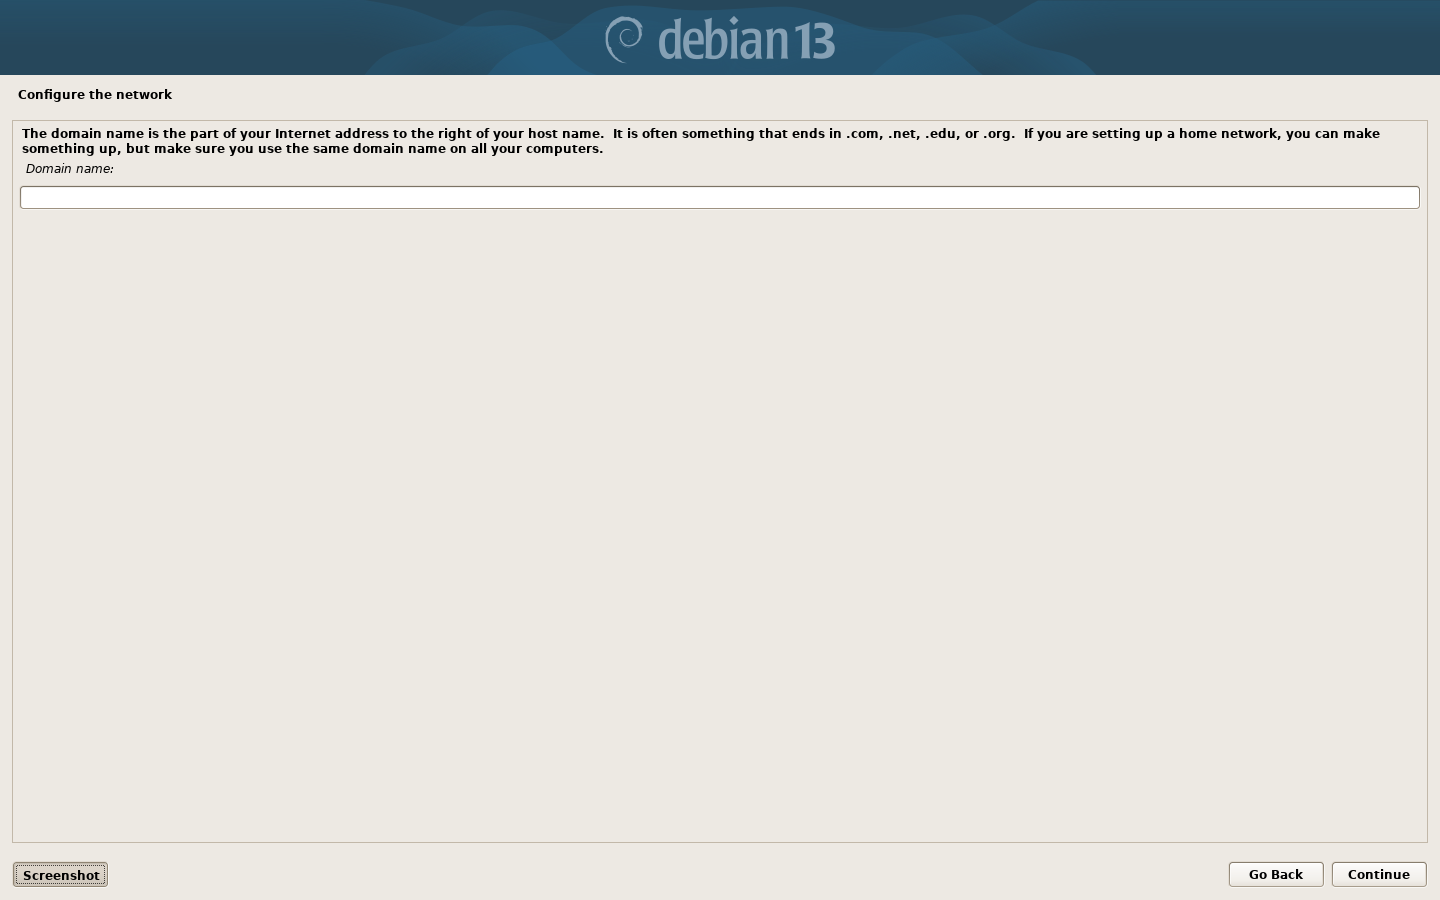
You will also be asked to enter a domain name. For most home users you can make something up. I normally just leave this blank because I access other computers on my network via their IP address. Then click “continue” button.
Set up users and passwords
Super-user aka “root” account
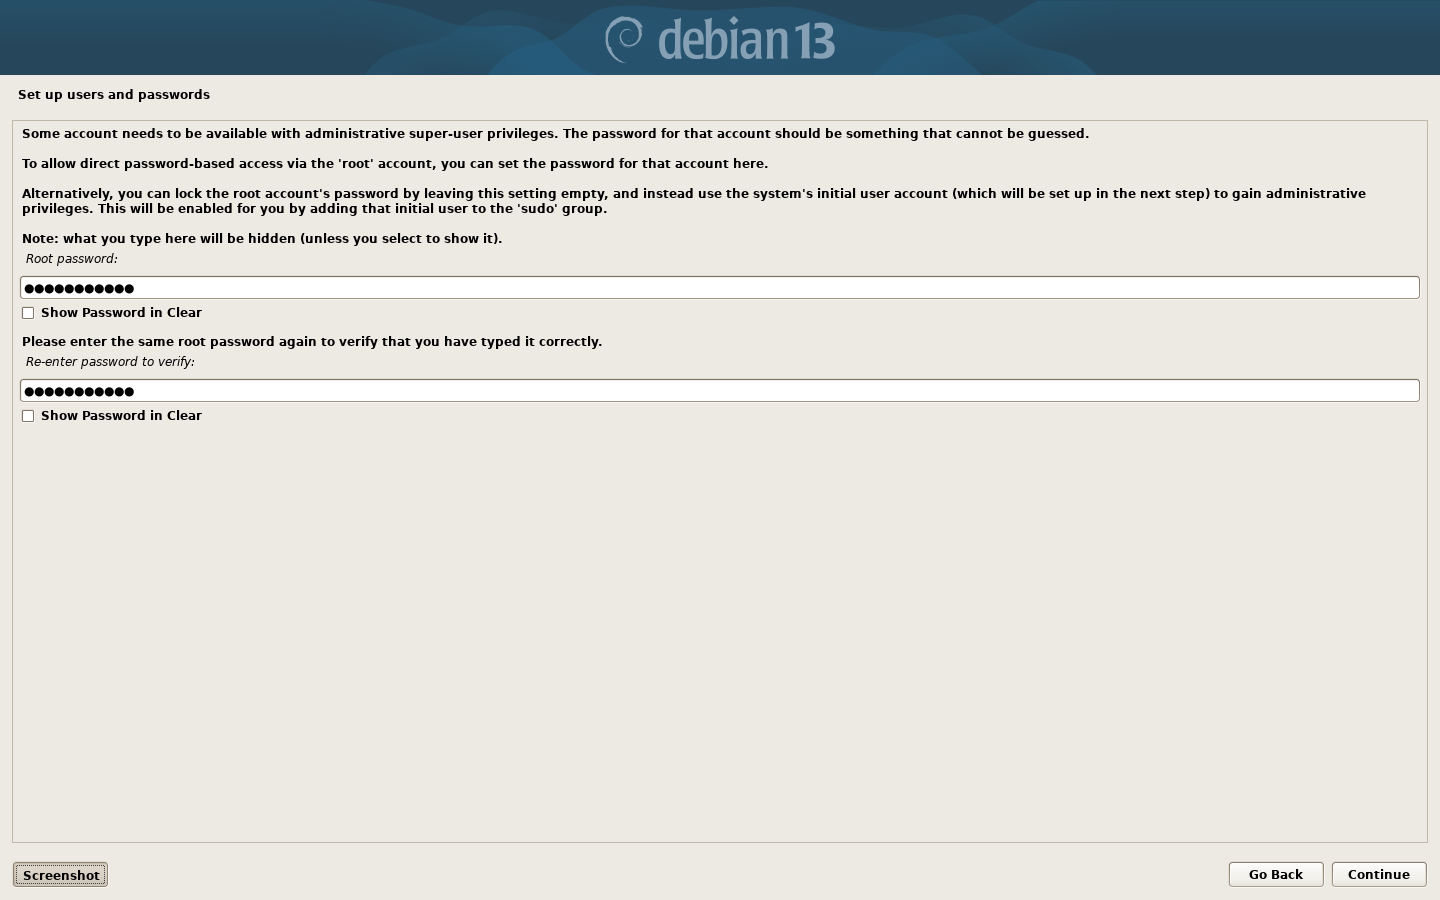
This screen asks you for a root password. This is critically important. There are many administrative tasks in GNU/Linux that can only be undertaken with root privileges. So your password needs to be strong. You may wish to make a note of this password somewhere. Fortunately the Debian installer does give you the option of showing your password in plain text by clicking the ‘Show password in clear’ checkbox. Once you are happy with your chosen password, click the “continue” button.
Set up users and passwords
Create an ordinary user account
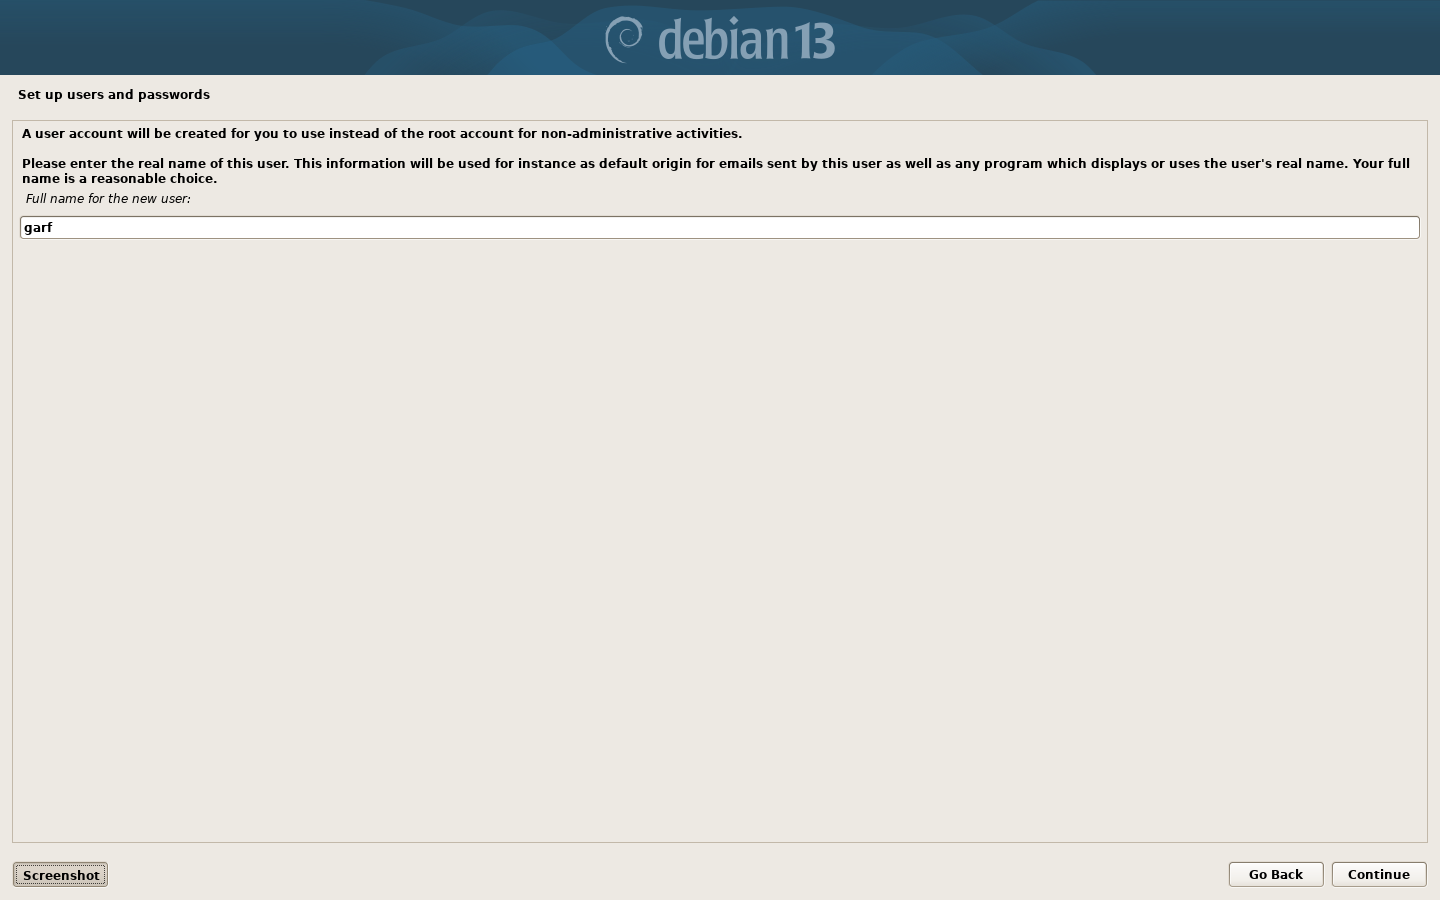
Now we need to set up an ordinary user account. Firstly it will ask you for your full name. It does not actually need the full name. It can be the same as your username on the next screen. I’m a very lazy person so I just typed the first four letters of my name. Then click the “continue” button.
Set up users and passwords
Select a username for the new account
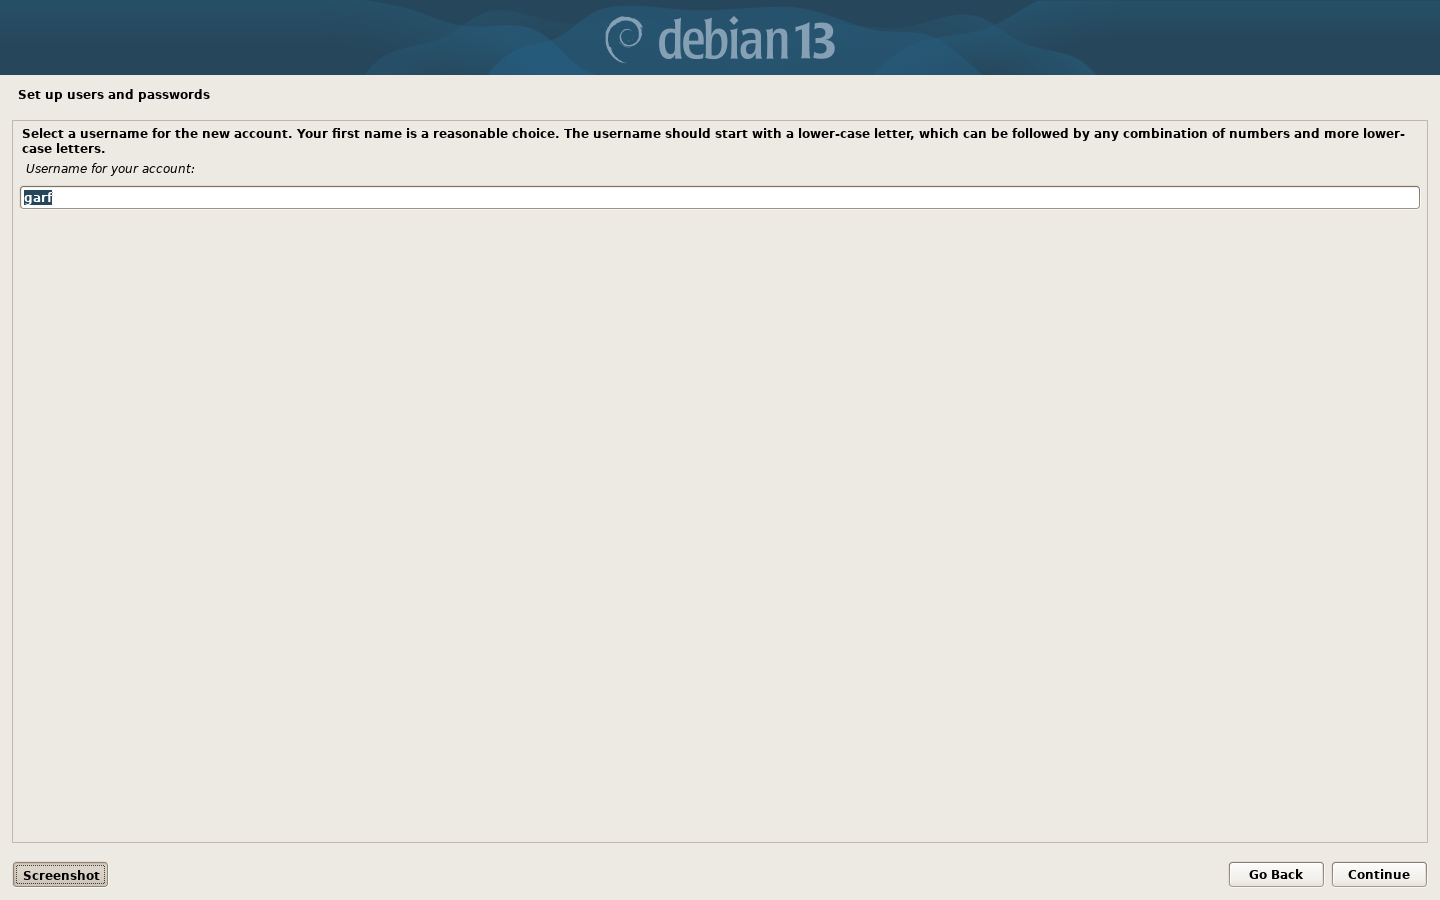
Now it asks for your user name. This can simply be your forename. But it must be all lower case. Then click the “continue” button.
Set up users and passwords
Choose a password for the new user
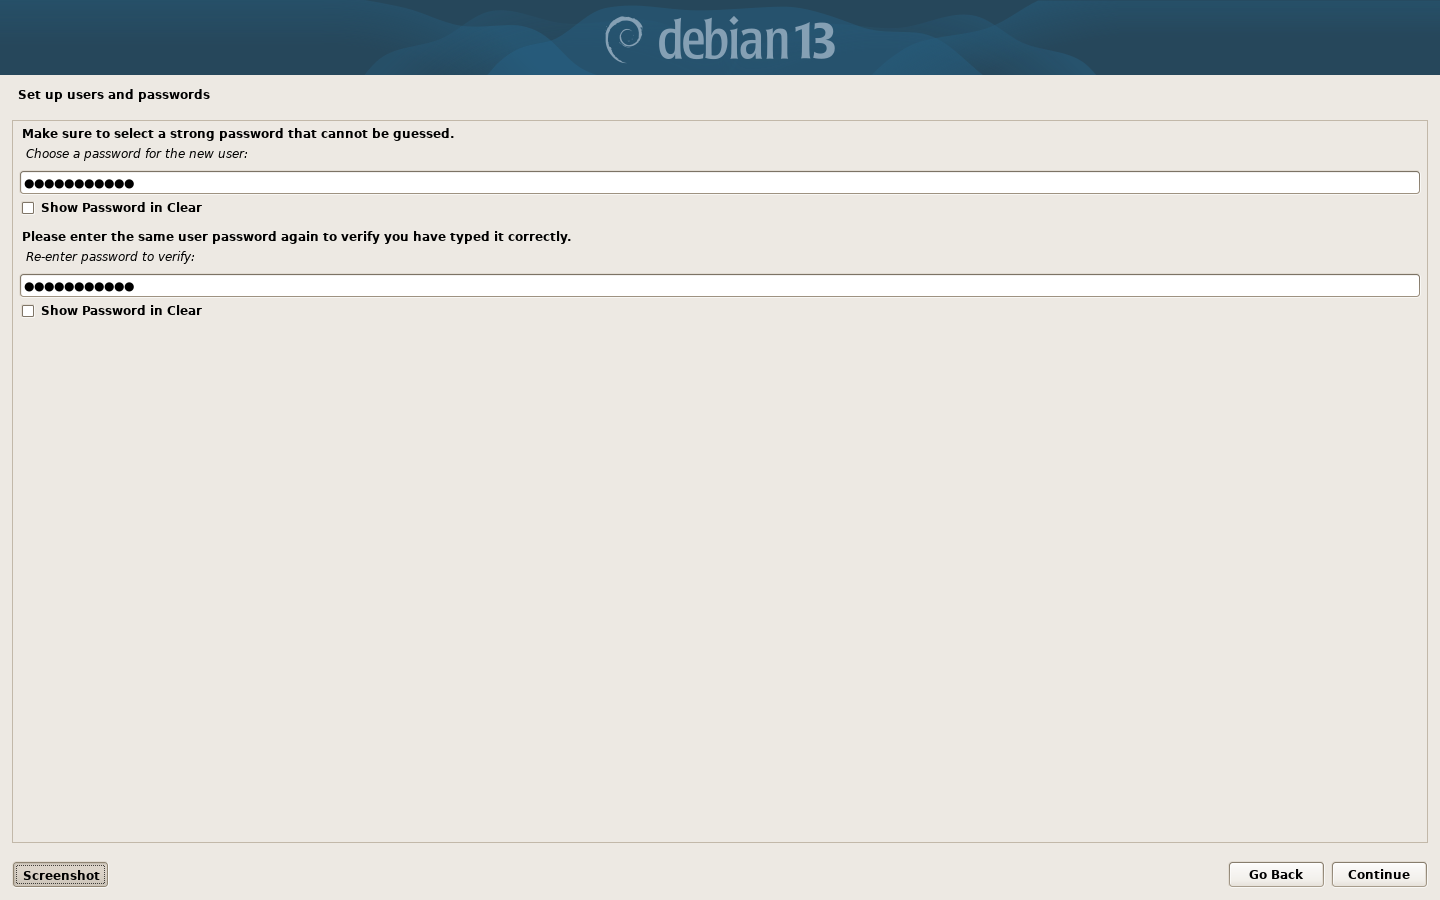
And a password. Again make it nice and strong and make a note of it somewhere. Again it gives you the option of showing your password by clicking the ‘Show password in clear‘ checkbox. Then click the “continue” button.
Partition Disks
Partitioning method
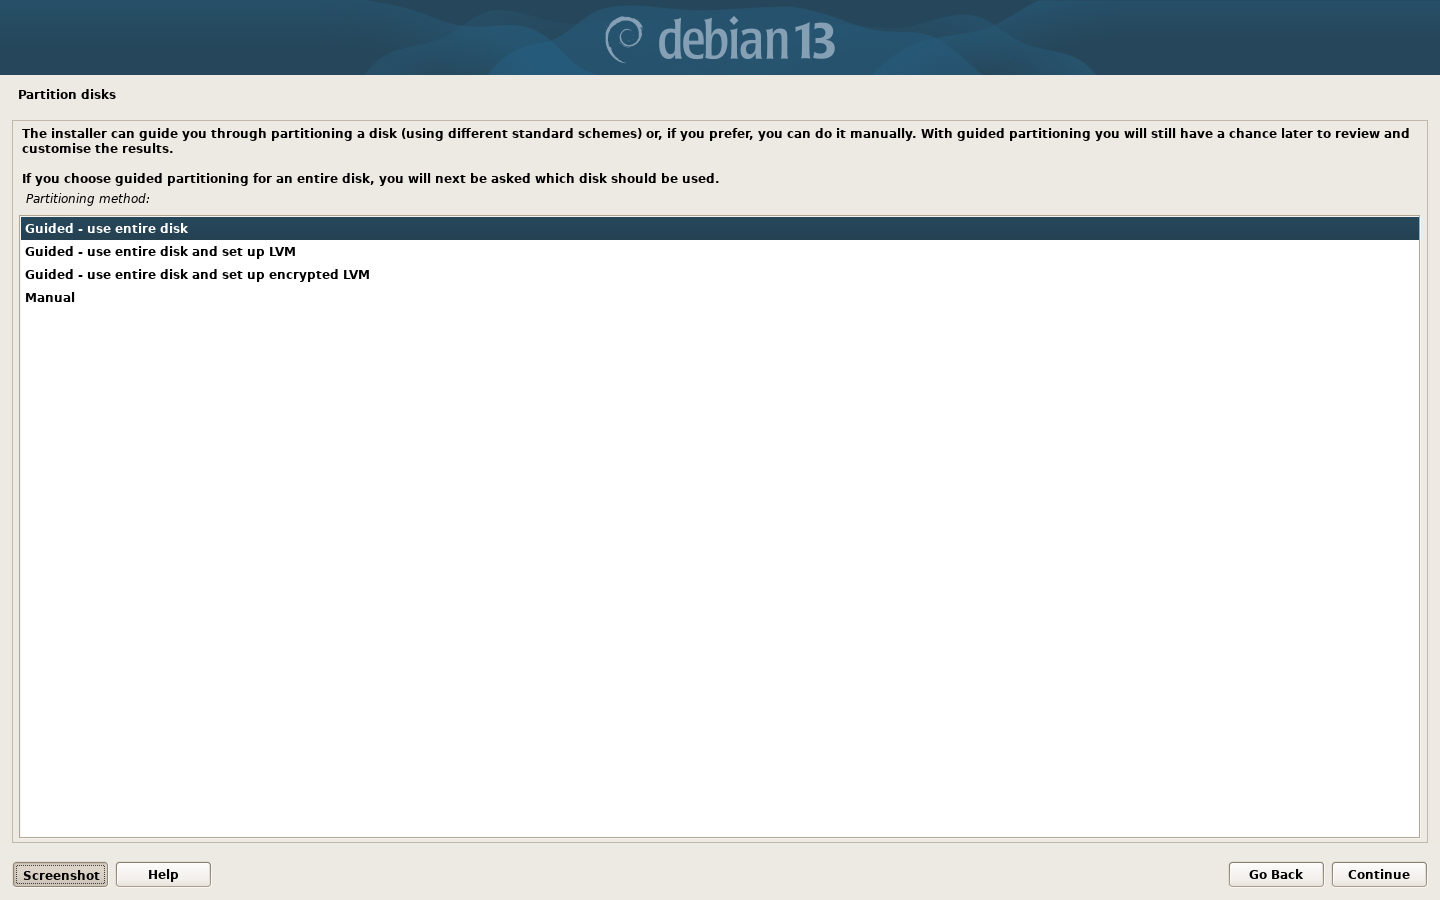
Now it will configure the clock and load the disk partitioner. Unless you have a good reason not to, my advice to new users is to use the defaults here.”Guided – use full disk”. Then click the “continue” button.
Partition Disks
Select disk to partition
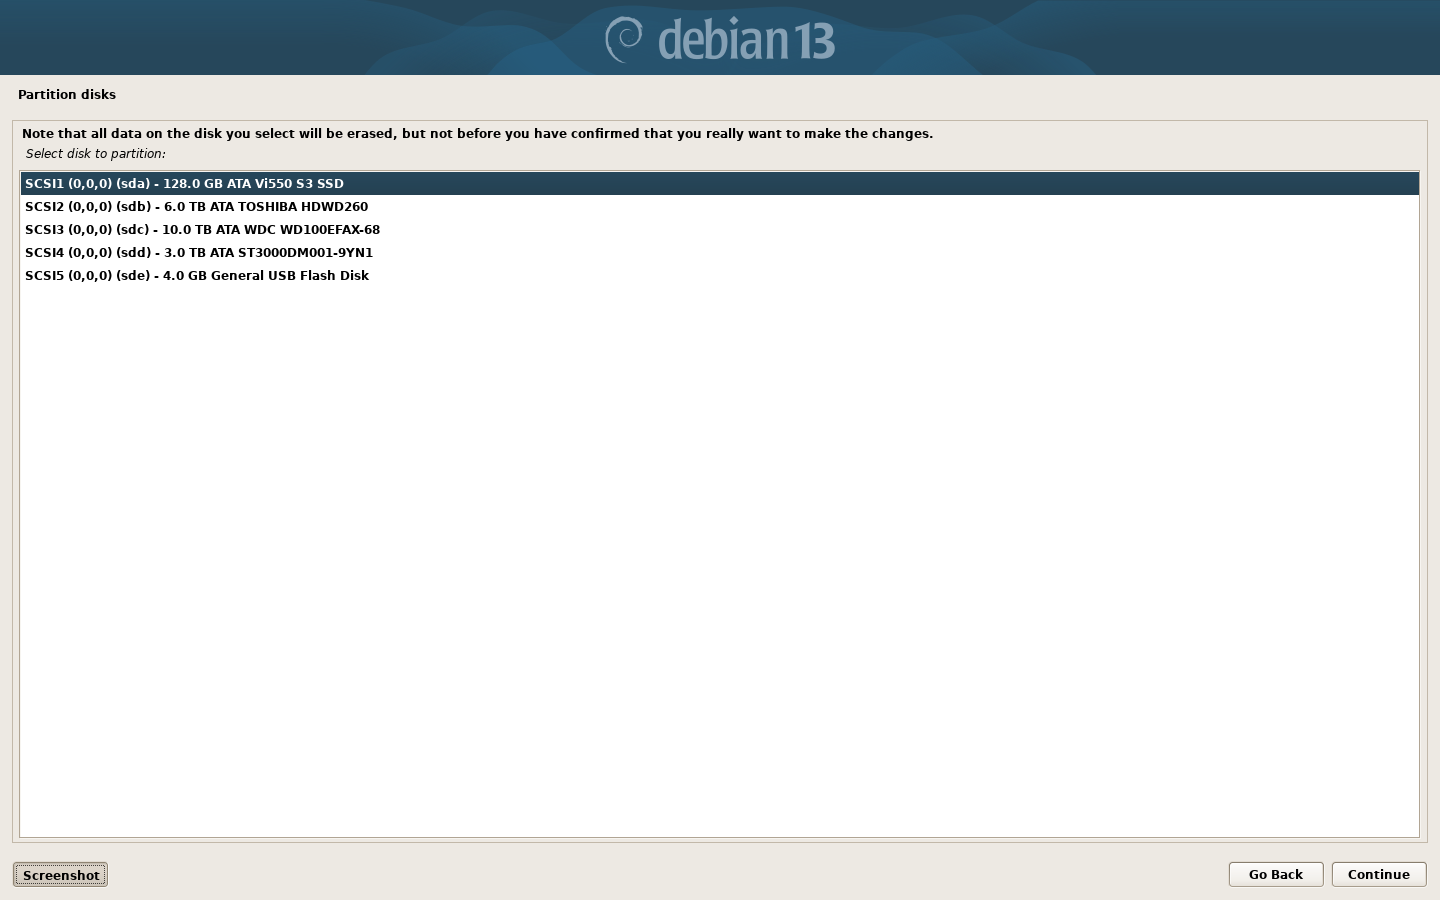
This screen you need to be a bit careful, if you have multiple hard drives in your machine. Make sure you select the correct one. In this case I wanted to use the 120GB SSD. so that’s the one I selected. Then click the “continue” button.
Partition Disks
Selected for partitioning
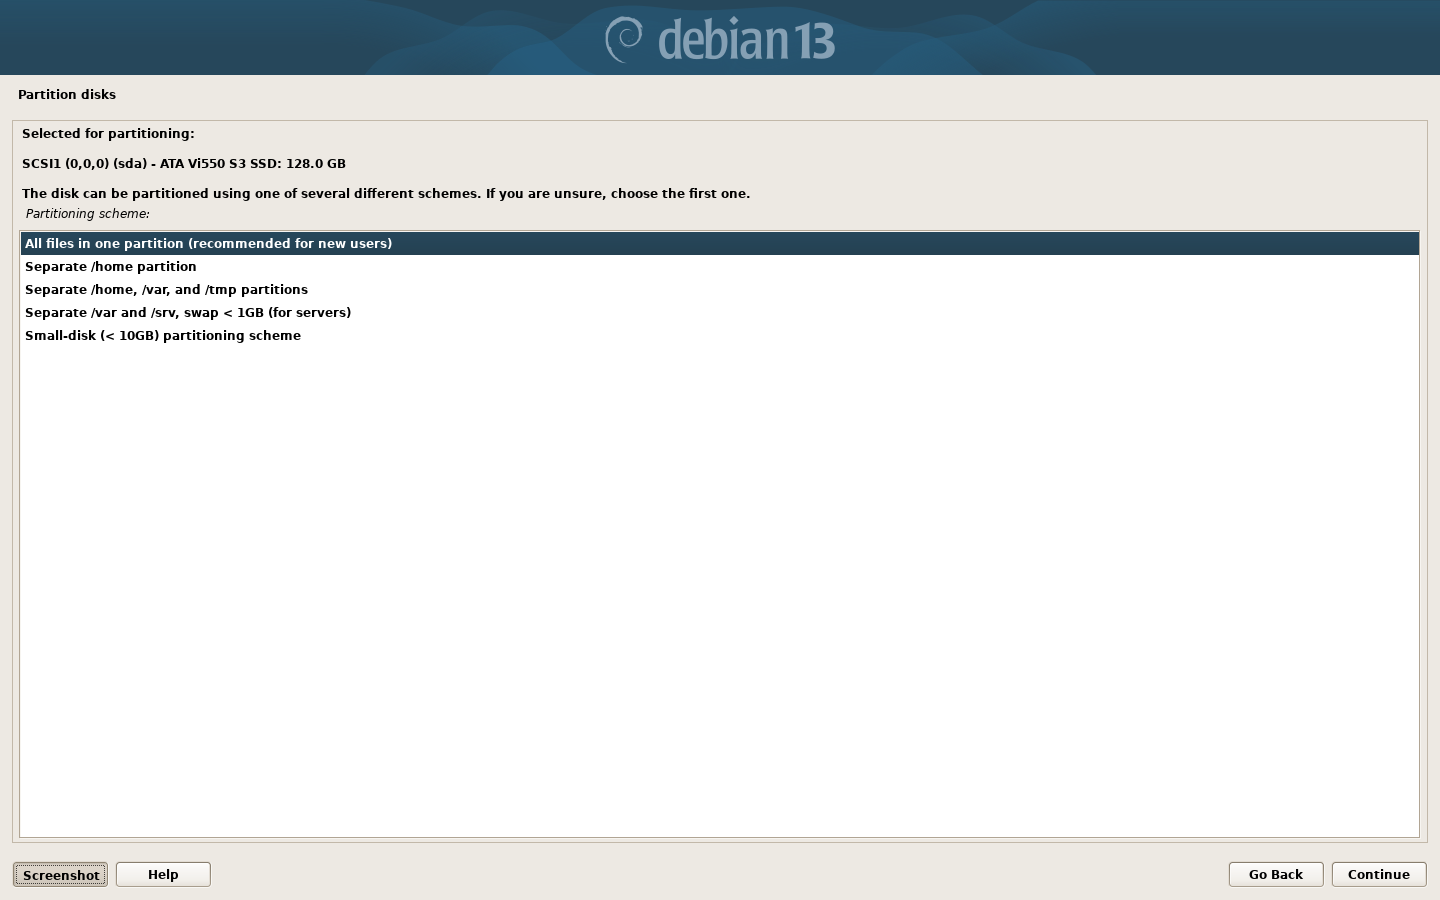
This screen, I recommend you select the default “All files in one partition (recommended for new users)” option , unless you have a compelling reason to select something different. Then click the “continue” button.
Partition Disks
Overview of your selection
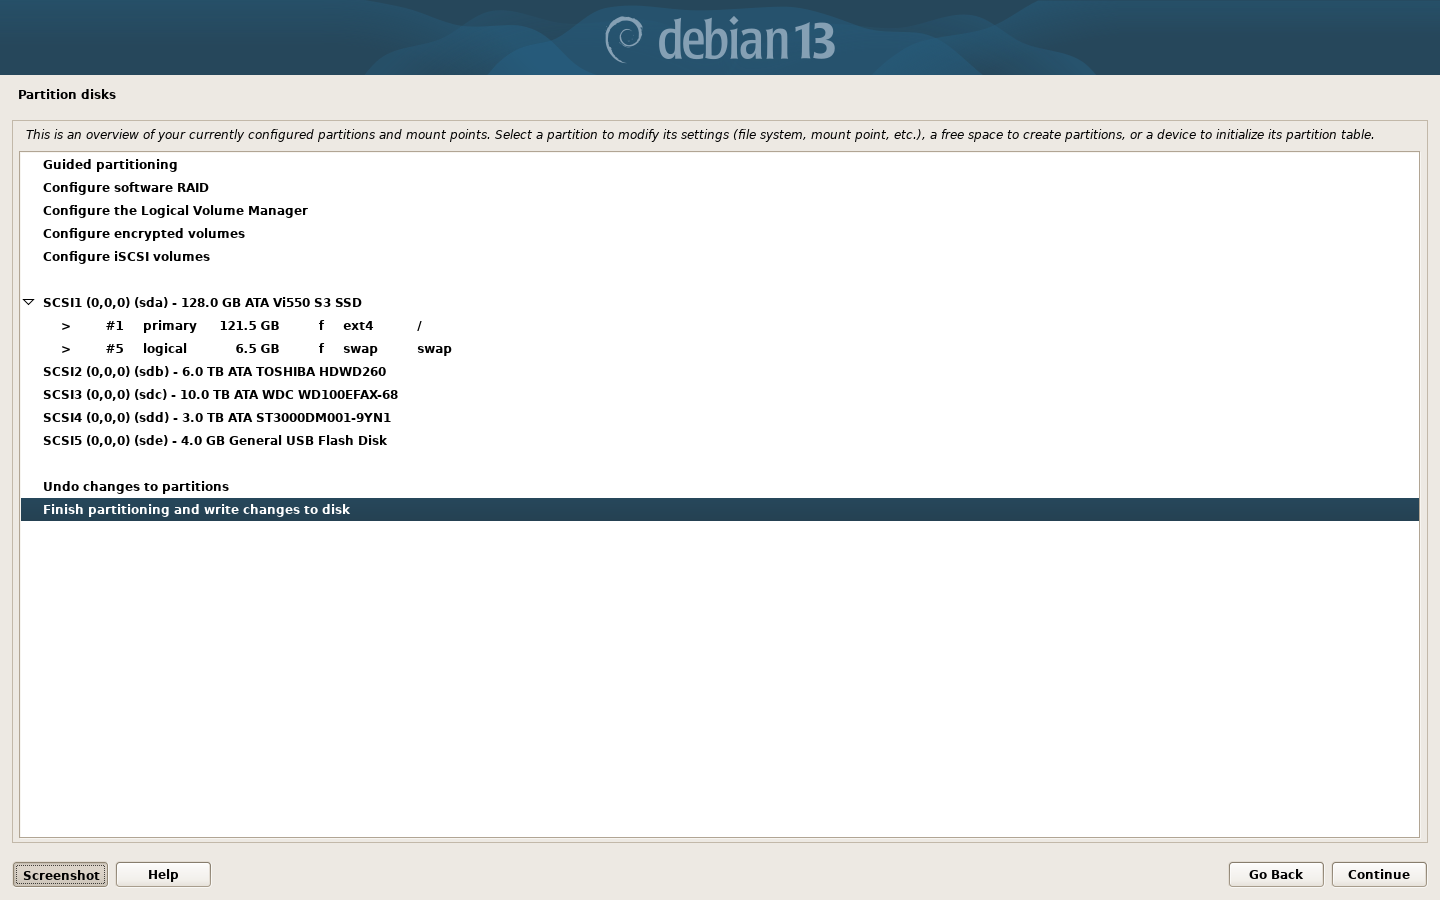
This screen shows what has been selected. Don’t mess with this unless you know what you are doing. Simply click the “continue” button.
Partition Disks
Make partitioning decisions final
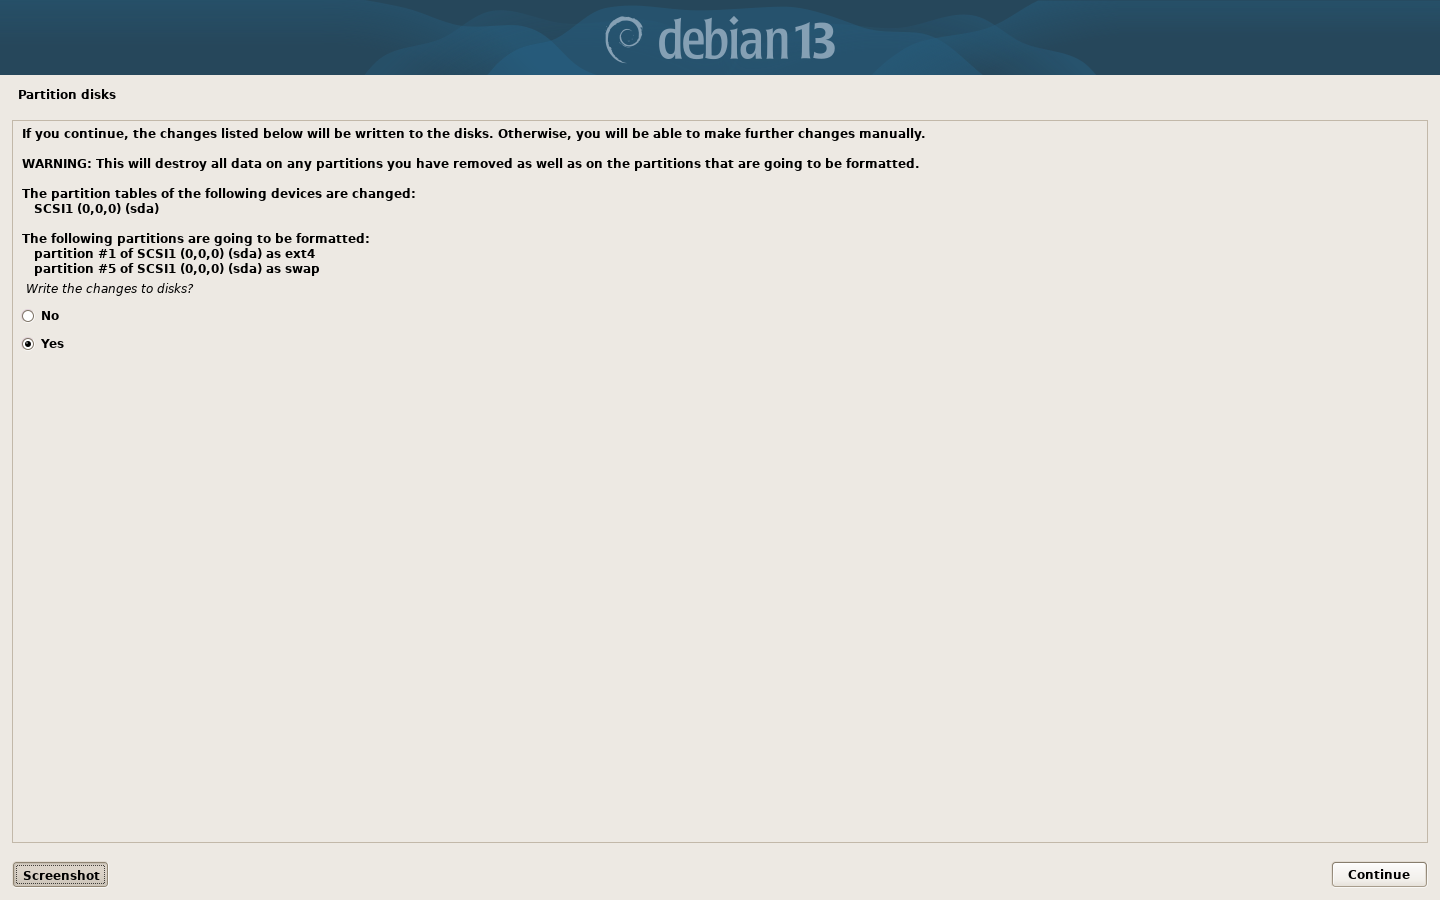
This screen is a confirmation screen. Select “yes” and click “continue” button.
It will now actually partition the disk you chose and install a basic operating system of it. Be patient, this may take a few minutes.
Configure the package manager
Select Debian archive “mirror” country
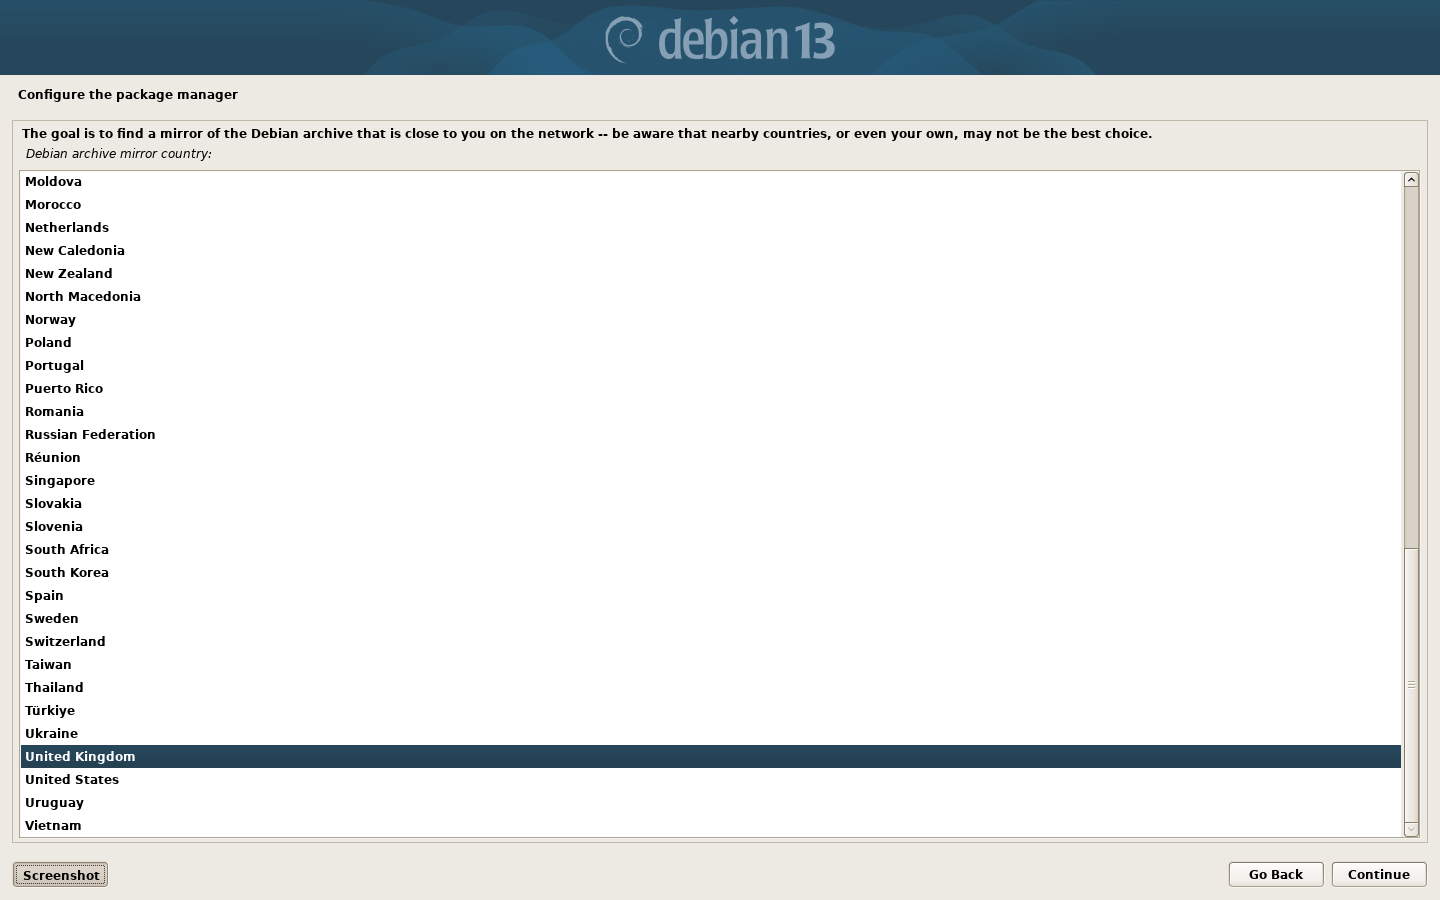
It asks you to select what country’s Debian repositories you wish to use. Because I am in the UK, I selected “United Kingdom“. So choose your country, then click the “continue” button.
Configure the Package Manager
Select a Debian archive “mirror” server
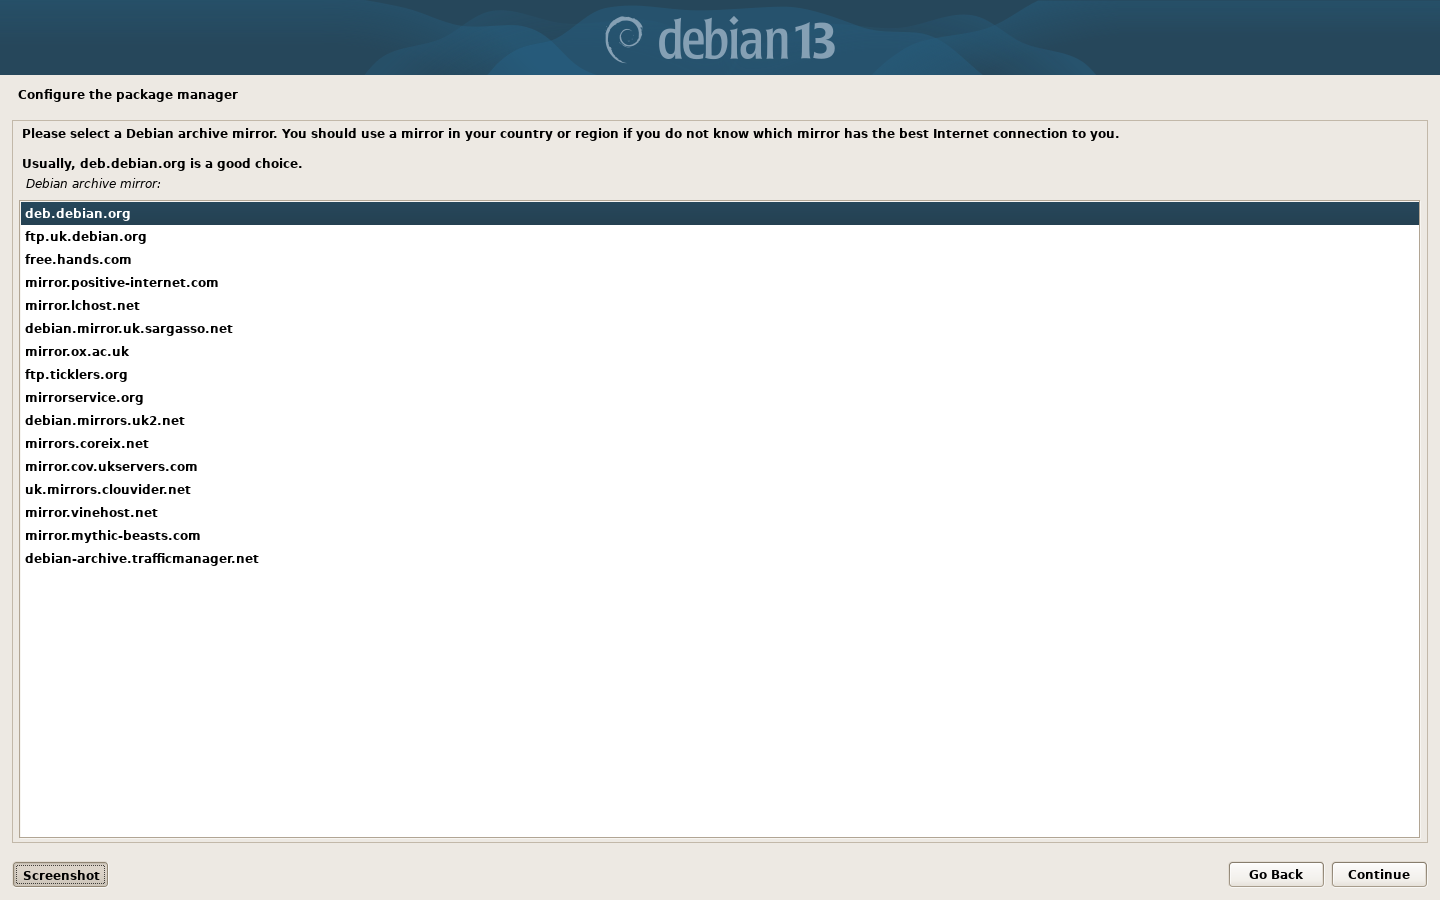
Then it asks you to select a mirror server. This a remote server that keeps a copy of the Debian software repositories that you will use to build and maintain your new system. I find the default Debian servers perfectly adequate and generally fairly fast. So I chose “deb.debian.org“. This can be changed after the installation is complete. So choose your server then click the “continue” button.
Configure the package manager
Proxy server
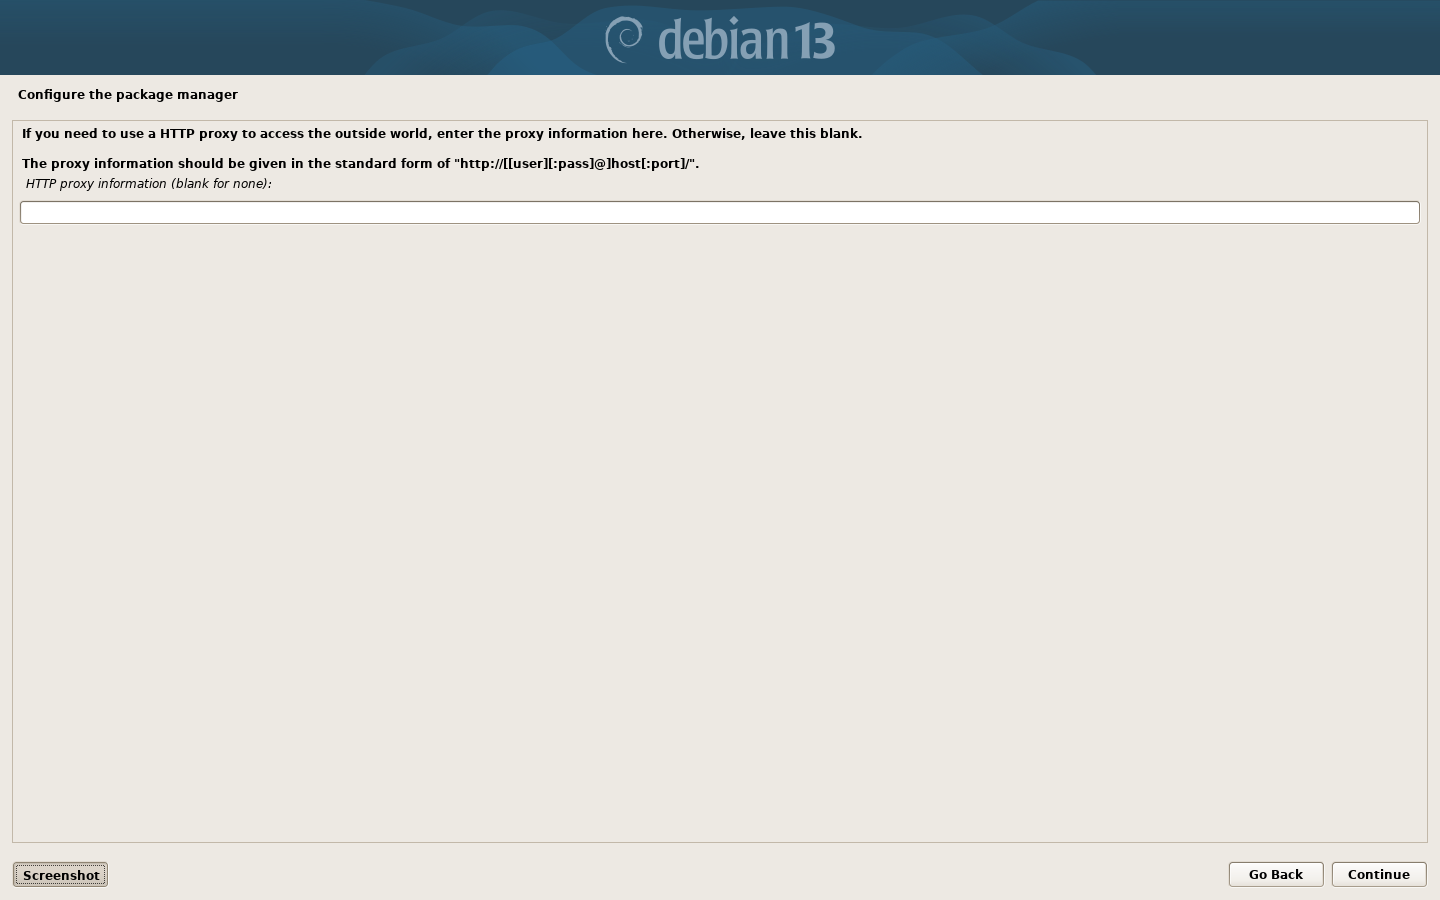
This screen only needs to be completed if you use a proxy server to connect to the internet. Most people can simply leave this blank and click “Continue“.
It will now download a load more stuff. Again, this may take some time.
Popularity Contest
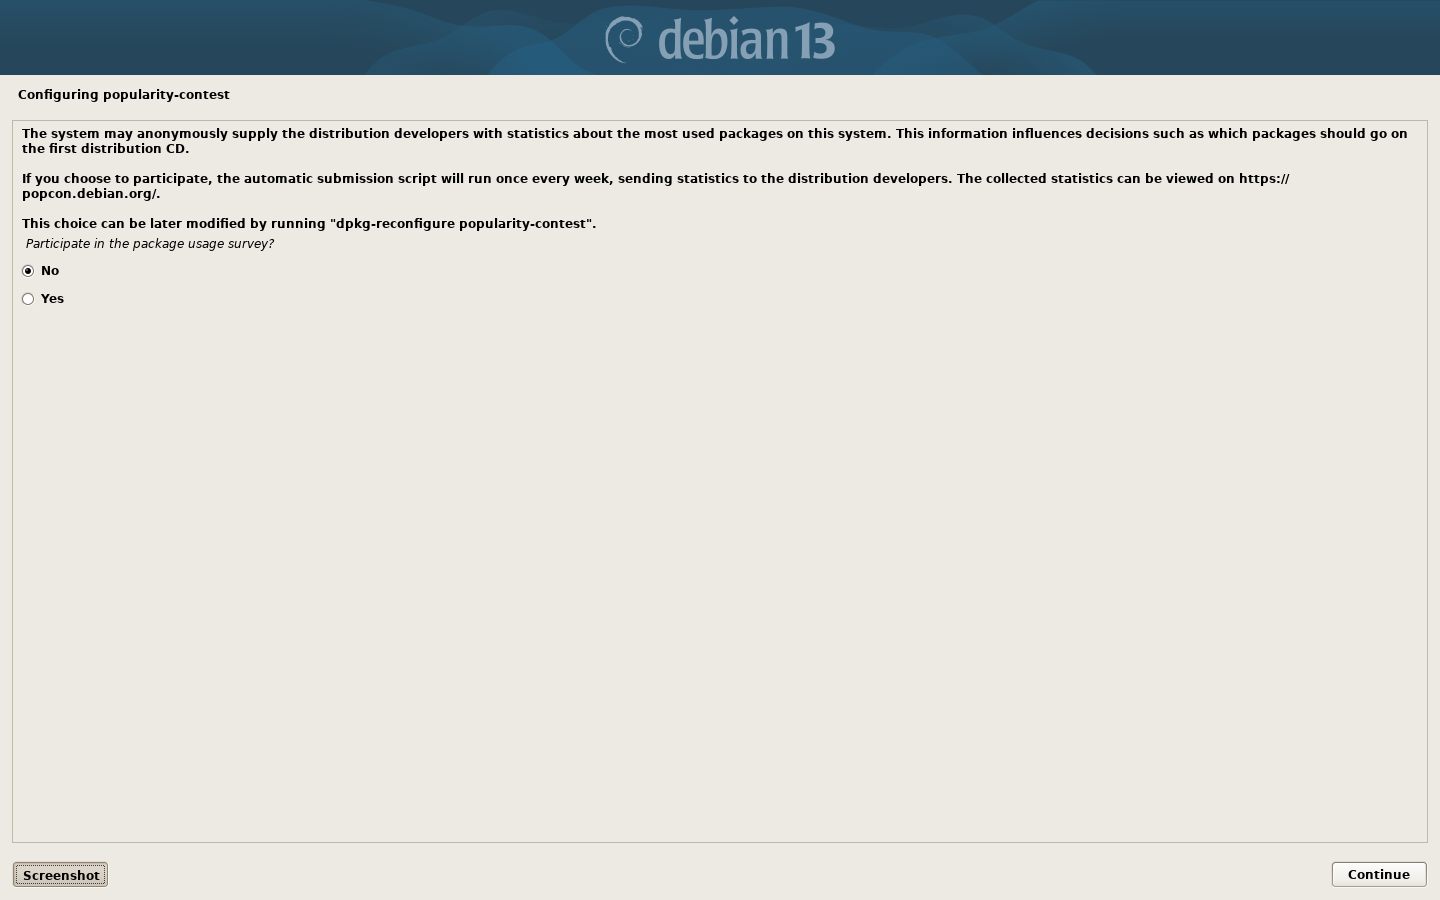
Just click “no” and “Continue”.
Software selection
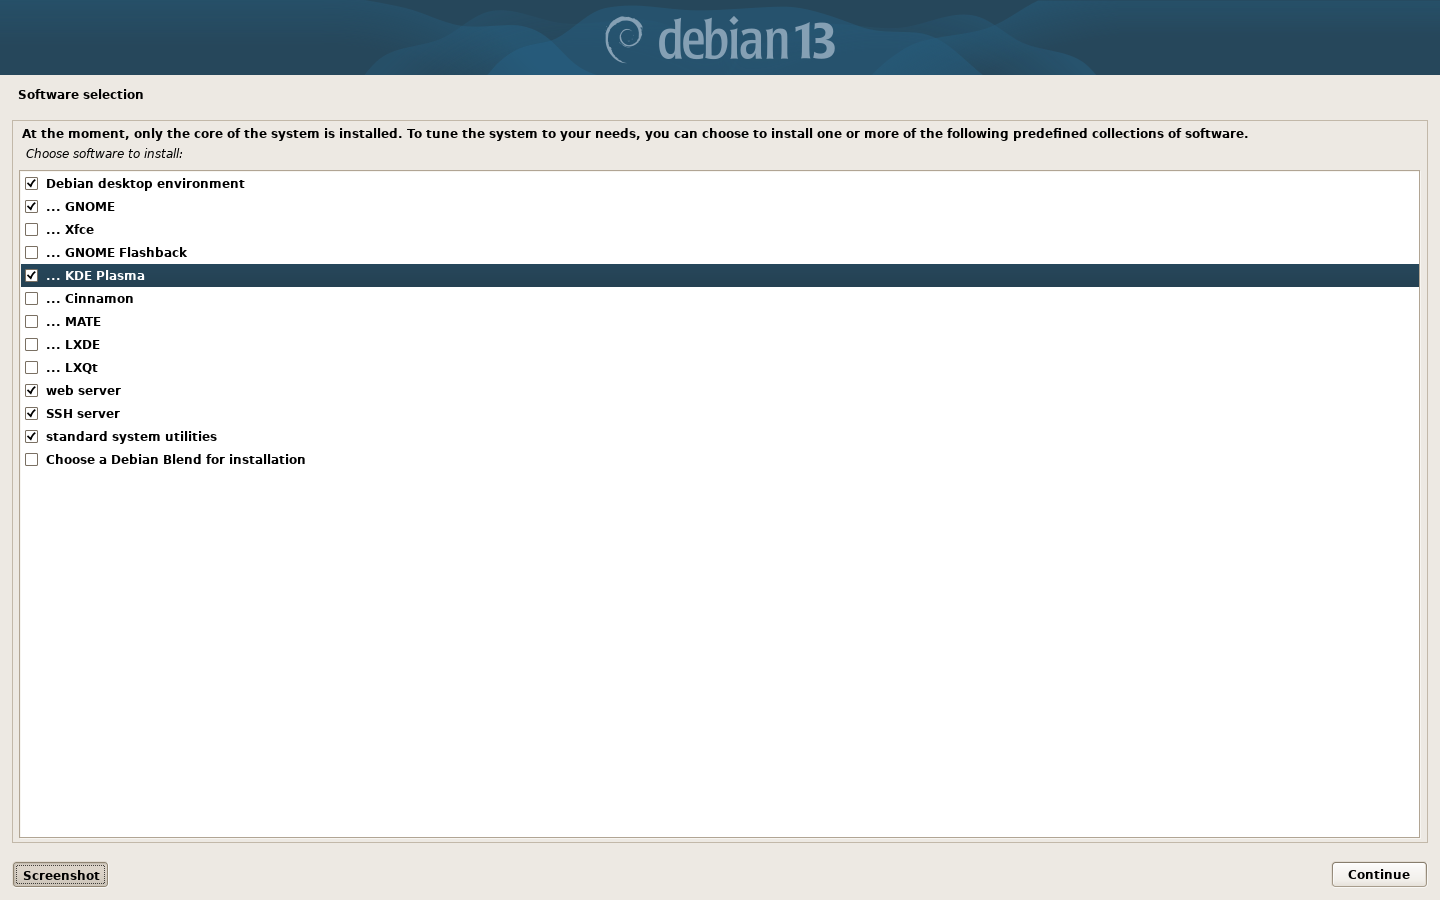
From here you can select predefined selections of software for particular tasks. I recommend
- Debian desktop environment
- GNOME
- KDE Plasma
- SSH Server
- Standard system utilities
You may also wish to select webserver. This will allow you to serve web pages to other computers on your LAN. However installing the webserver does have security implications however because it means that if you use your laptop on a public network, other can see these webpages. Web server can be installed later if you prefer. Or simply not at all if you feel you will never need it. However I would very strongly recommend installing the KDE Plasma desktop. It will make you transition to Debian GNU/Linux a much more pleasant experience. Then click the “continue” button.
Select and Install Software
The installer will now download and install all the software you just selected. Again, this may take some time.
Configuring GDM3
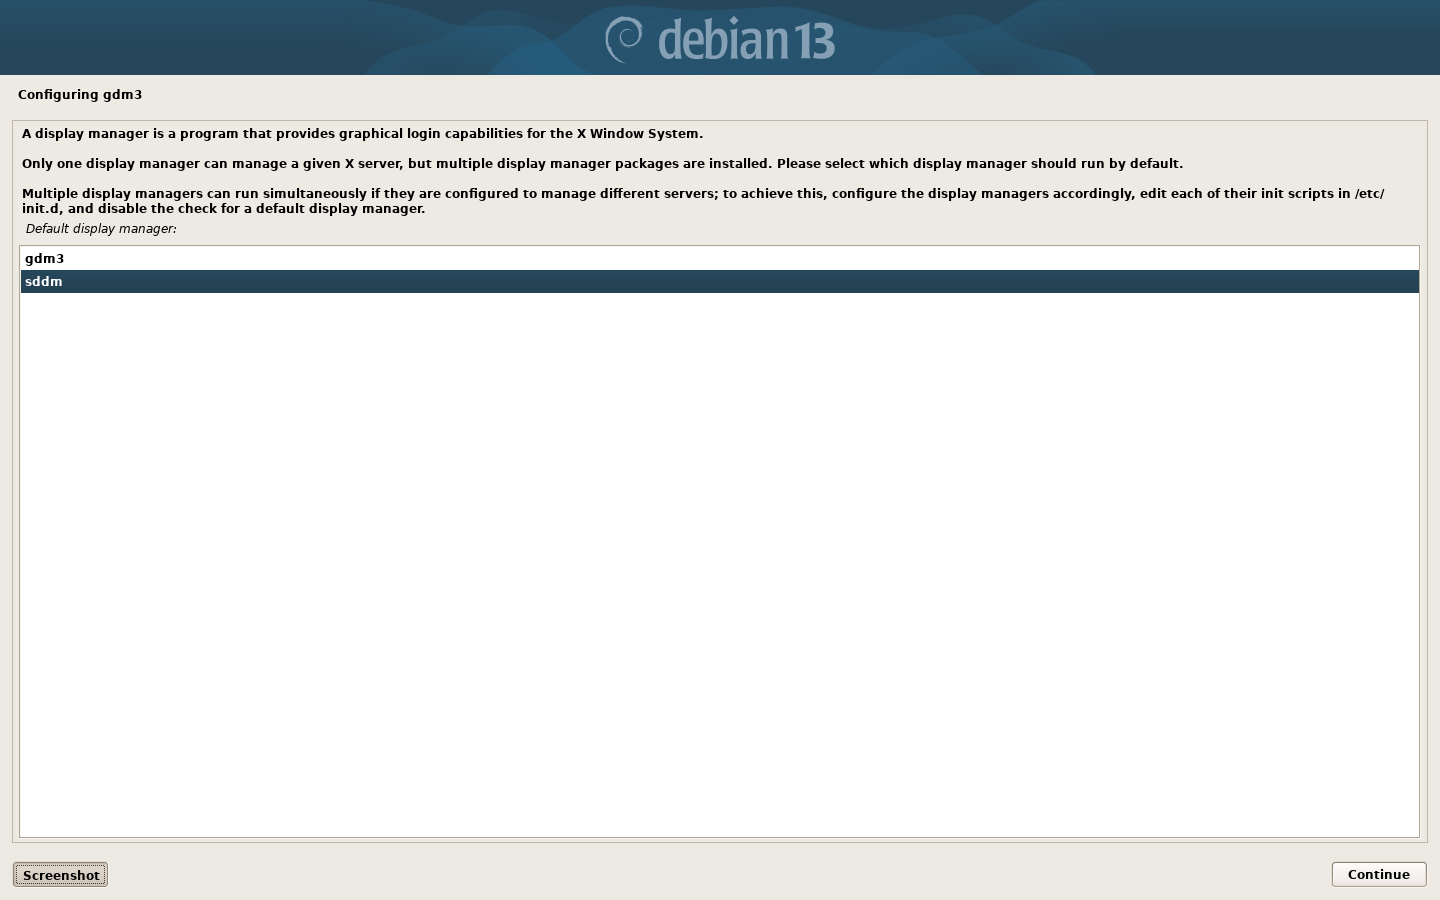
It now asks you to “configure GDM”. GDM is the Gnome Desktop Manager. It is designed for use with the Gnome Desktop. However SDDM (Simple Desktop Display Manager) is a better selection if you are planning to use the KDE Plasma desktop. Select “SDDM” and click “Continue”.
Select and Install Software continues…
The installation process will continue. Patience is required, especially if you have a slow internet connection.
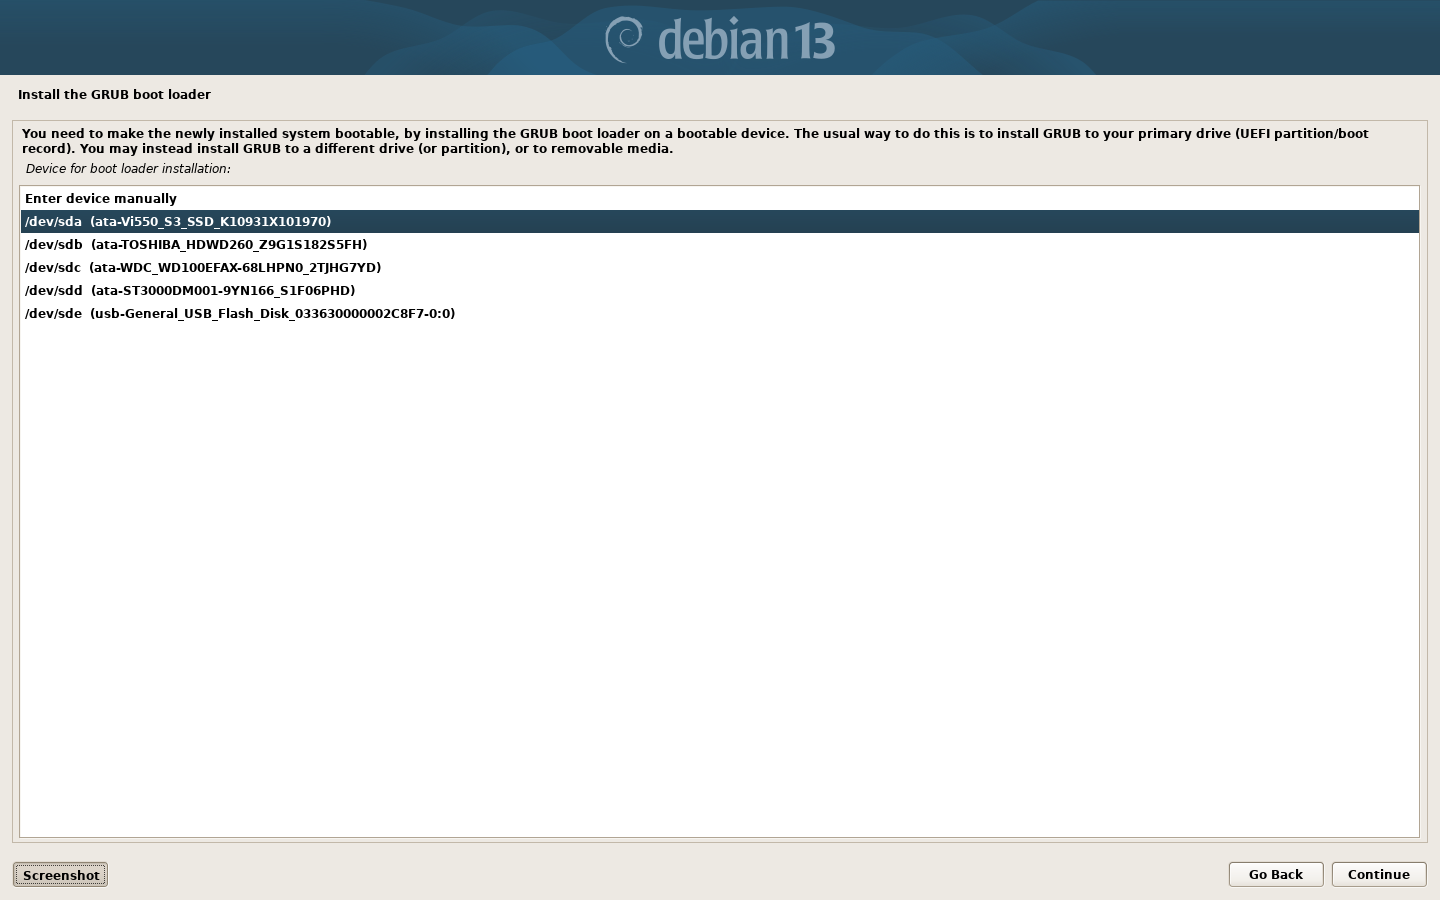
Install the GRUB bootloader
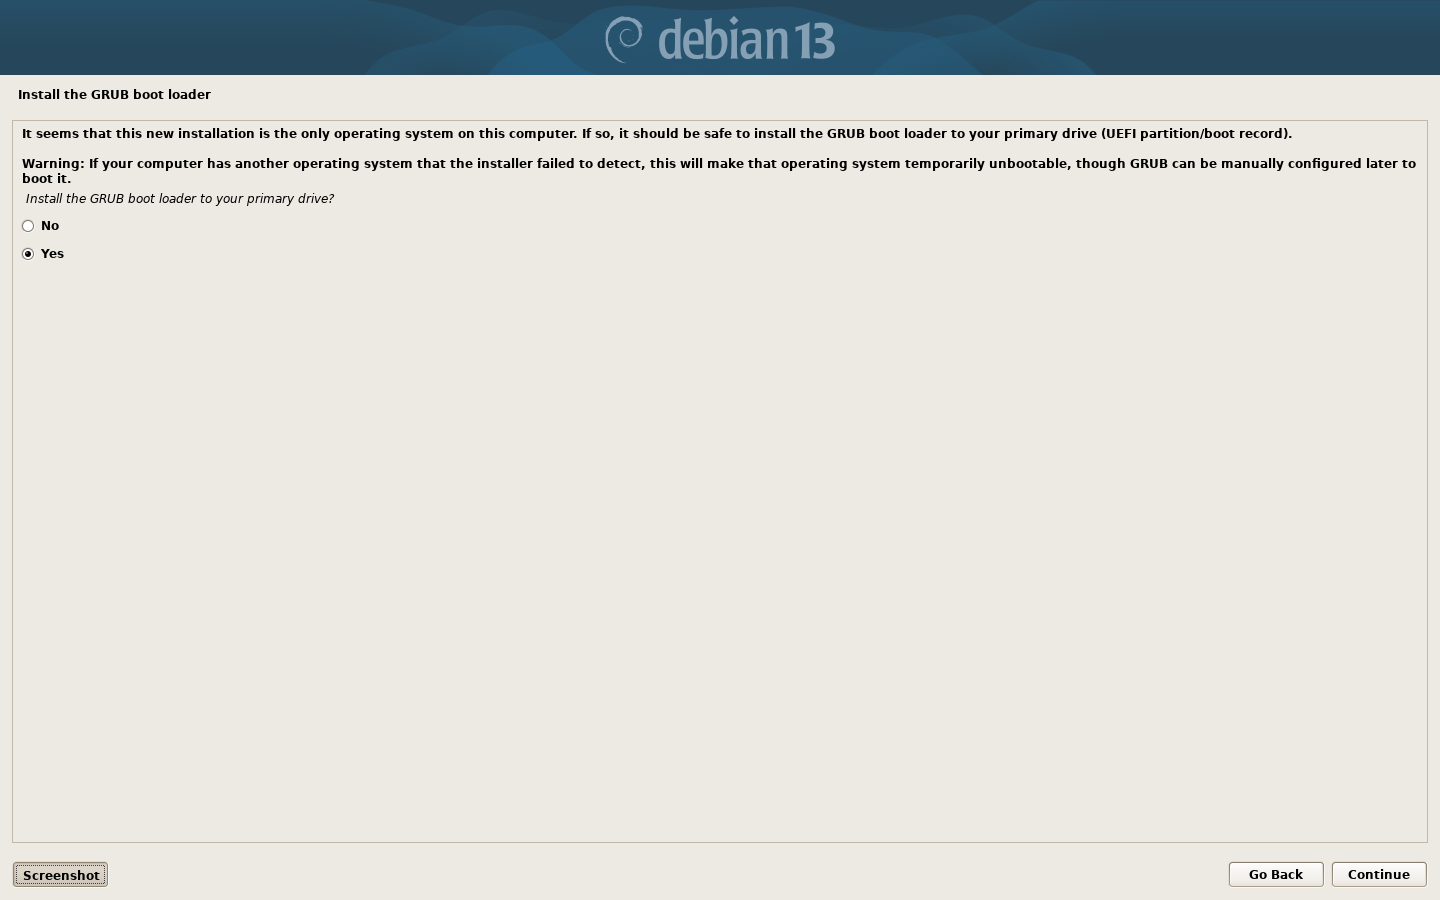
As you near the end of the installation process, it will ask you to install the “Grub Bootloader”. This is the component that allows your new operating system to boot. Normally it will live on the same disk as the system, in this case the 120GB SSD. Select the appropriate disk and “Continue”
It asks you to confirm the GRUB installation. Select yes and click “Continue“.
Finish the installation
Reboot.
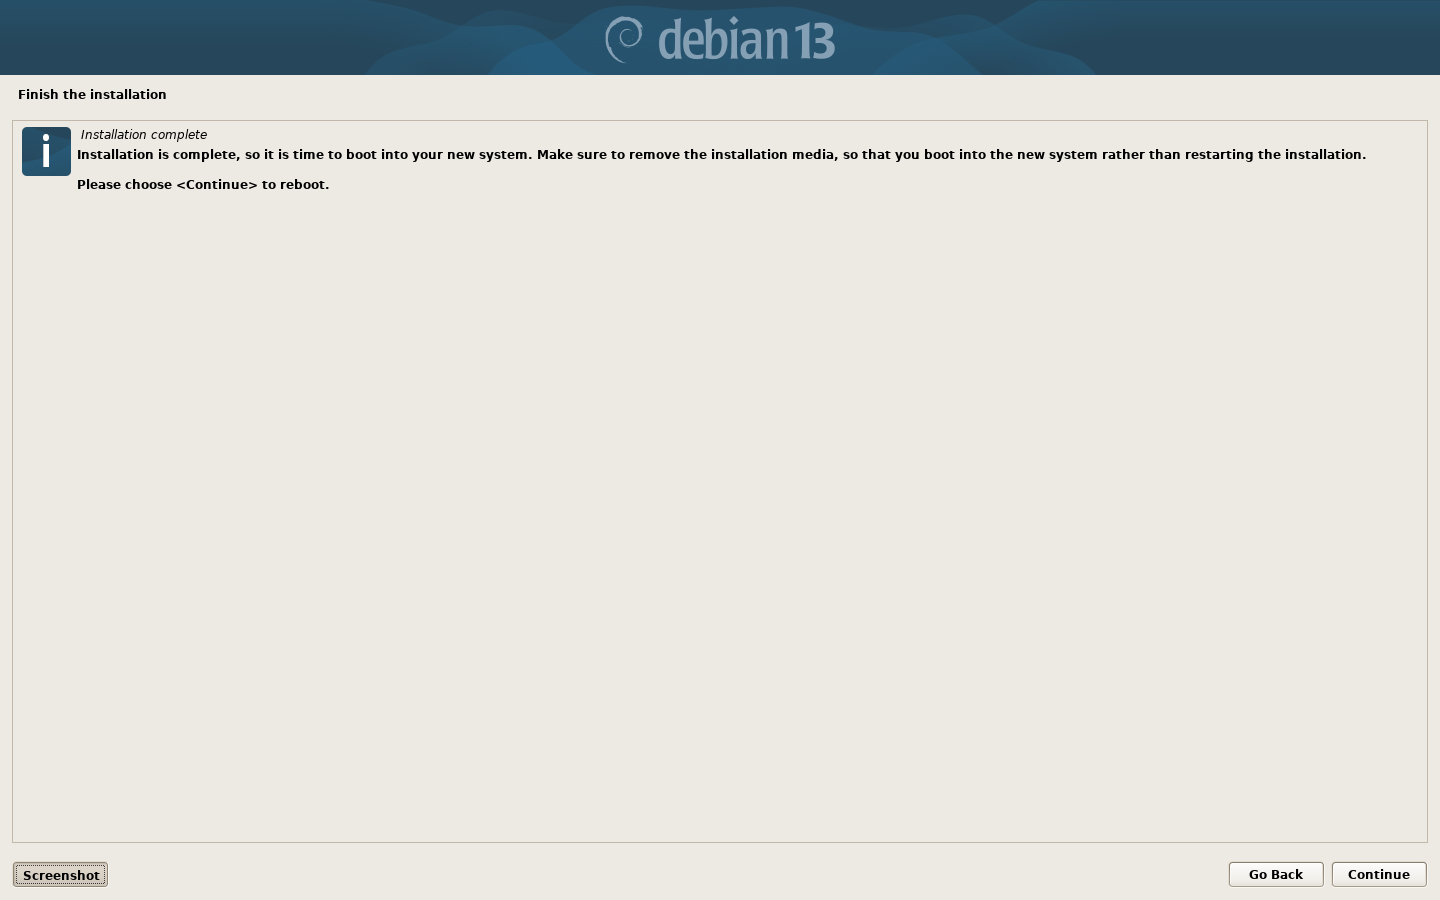
Once the installation is complete you will need to click “Continue” to reboot. Remember to remove the USB stick!!!
Configuring your new Debian System
Assuming your machine reboots successfully, I’d firstly like to say: “Congratulations you have now successfully installed Debian GNU/Linux” 🙂
However there still a few things you need to do before you actually start using your system. Debian has a couple of small but rather annoying gotchas I would like to discuss. We need to address the first one before you log in.
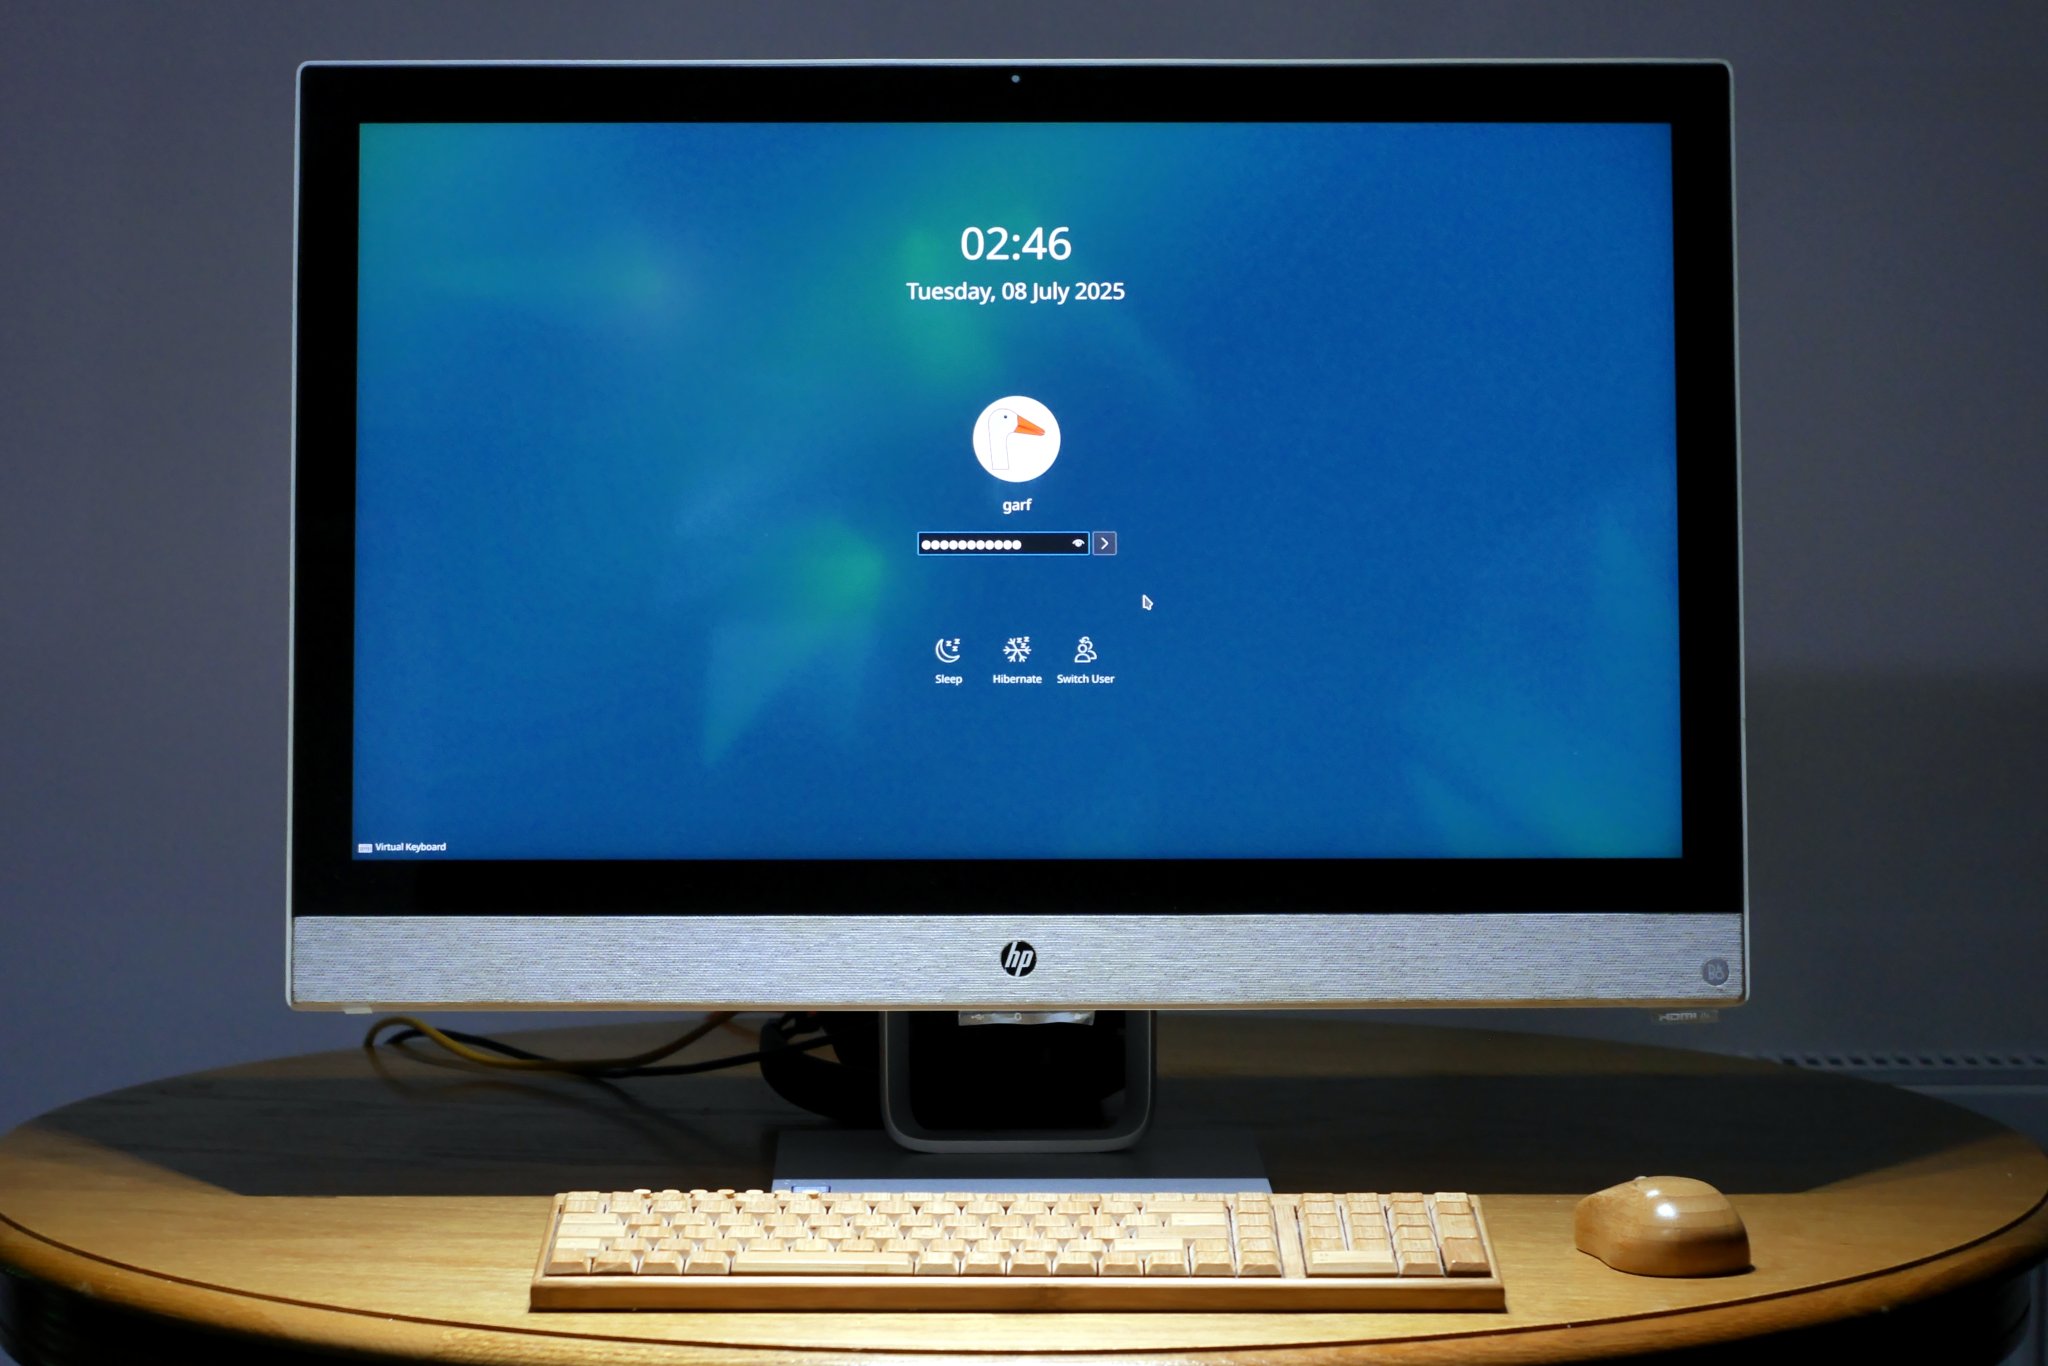
Gotcha #1 Plasma on Wayland not selected by default
Despite installing KDE Plasma Desktop and despite selecting KDE’s SDDM desktop manager, by default Debian will try to load the Gnome desktop. So please be sure to select “Plasma (Wayland)” desktop before you log in.
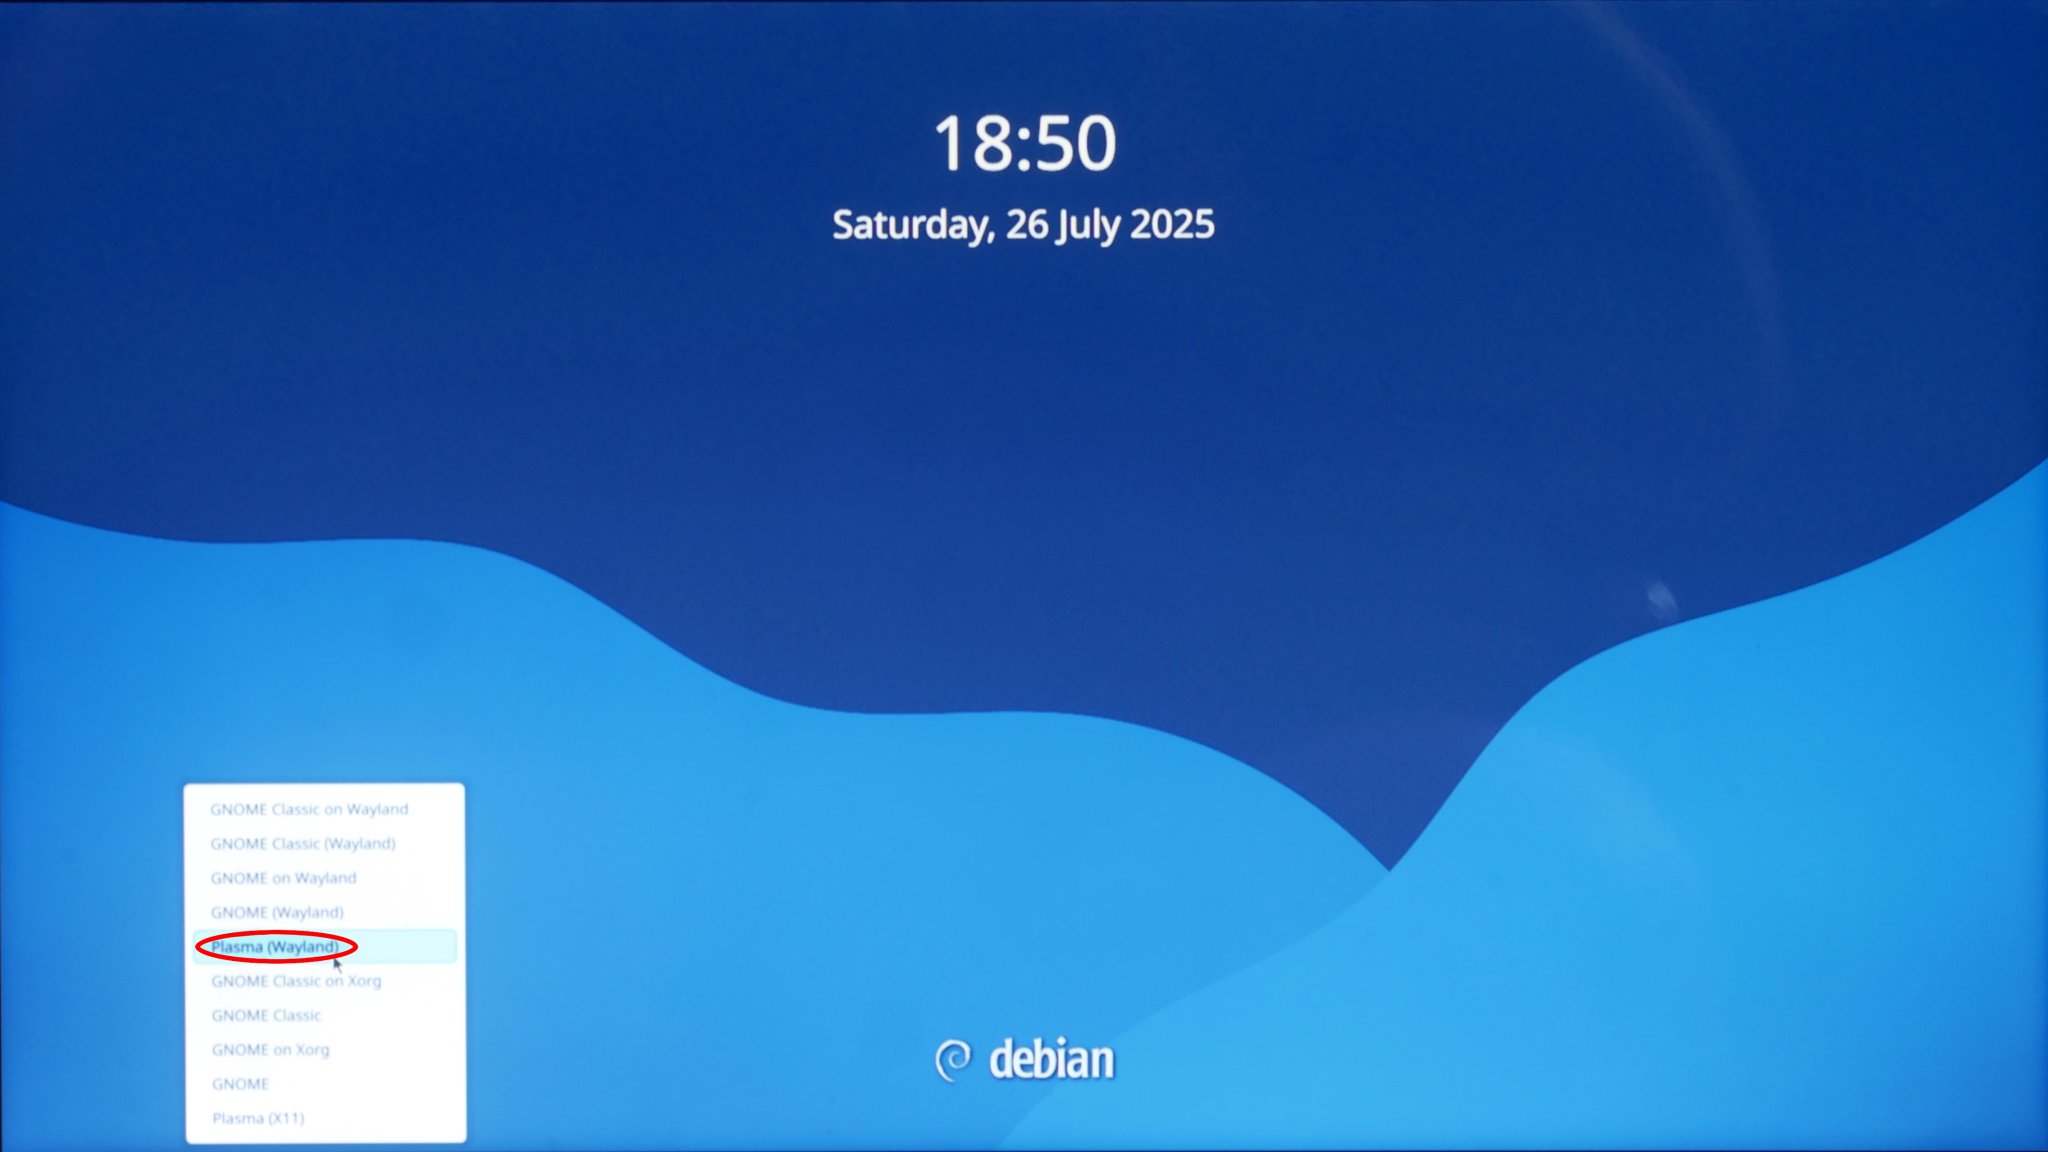
This is a little pop up menu tucked away near the bottom left of the screen. Simply select “Plasma on Wayland” desktop before you log in.
Gotcha #2 Main user has no administrative aka “sudo” rights
Once you have logged in you need to put yourself on the sudoers list so you can pretend to be root and have root privileges. The “root” paradigm is a very important feature of Unix-like operating systems. It is similar conceptually to “administrator” in MS Windows. However in Unix, access permissions are much more rigidly applied. As an ordinary user, you need a way to make yourself “root” pro tem, in order to install new software and perform routine upgrades. For reasons I have never fully understood Debian does not automatically assign the first user these rights. You actually have to add yourself to the “sudoers” group. But first you actually have to get root.
Open a terminal (Konsole or similar) and type the following and hit return key. It will ask you for the root password – that’s the first password you entered during the installation process. Also note the “-” character is important!
su -
Then as root, type or paste the following and press return key.
usermod -aG sudo garf
Substitute your username for where I typed “garf“. Then log out of KDE Plasma and log back in again. This is important! It forces your user account to have sudoers rights. When the time comes, you can now issue system commands with root permissions simply by preceding them with “sudo”, and typing your user password when asked.
As an aside, you can normally log out of the terminal either by pressing Ctrl+D keys, or typing the following in the terminal and hitting return key.
exit
However, in this particular instance, where you are giving yourself sudoer’s rights, you may still need to log out of the KDE Plasma GUI completely, and log back in again in order for sudo to function correctly.
KDE issues
You may also encounter some minor KDE annoyments. I have already addressed the KDE issues you are most likely to incur in an earlier article:-
Copy across your old data
Now your Debian machine is up and running, you can connect the USB enclosure containing your old Windows disk, via a USB socket. Debian should automatically recognise the old disk and give you the option to open it in Dolphin file manager. From there, it is a simple “copy-and-paste” filing exercise to copy your data from the old drive to the new Debian drive. You may wish to take advantage of KDE’s clean and easily understood filing system to place your various types of data in the correct location.
/etc/hosts hostile server blocking
Optional but recommended – if you have no other immediate way to do it – block your machine from communicating with hostile servers, such as trackers, ad-servers etc. It’s free, only takes a couple of minutes and it makes the internet a much nicer place…
Hostile server blocking – eliminate ads and other nasties, free
What’s next?
By now you should have an adequate functional computer system with all the basic features the average home user needs. This includes an office suite, a web browser, a terminal window, a text editor, system settings dialogue and a few games – all the other features one has come to expect in a modern computer system. And of course, you should by now have copied across at least some of your data from your old Windows drive.
But Debian has much, much more to offer. So in part 2, entitled “A fully loaded Debian 13 system” we look at installing a bumper free software bundle, the easy way, from the Debian repositories. Meantime, enjoy your new Debian computer… 🙂
Useful links
- Debian installation manual
https://www.debian.org/releases/stable/installmanual - About the Debian operating system
https://www.debian.org/intro/about - About the KDE Plasma desktop
https://kde.org/plasma-desktop/