Repairing a dead YN565EX II speedlight
Photographer pal changed the batteries in his dead YN565EX II speedlight flash gun. Unfortunately when he tried to witch it on, it didn’t work. He tried several sets of batteries. No luck. For those not familiar with the device, the Yongnuo YN565EX II is a relatively affordable battery-powered Chinese flash speedlight for both professional and advanced amateur photographers. When he described the problem to me I asked if there was any smell of burning? He said no, had a good sniff around and said no again. So I asked him to bring it over and so I could take a look. After testing the batteries and trying the device myself, it was still dead. And importantly no burning smell.
So the next thing to try was to connect a known power source and test to see if it was drawing current. Well it was hard to reach to the base of the battery cage reliably. I really needed to get the casing off. This is done by removing six self tapping screws including the two underneath the swivelling flash head and gently prising the two case halves apart the help of a mobile phone repair plectrum. When I connected it to a laboratory power supply set to 5.9 volts, it worked as expected. But the brand new fully tested alkaline batteries did not. When connected to the lab supply I noted it was consuming around 2.5 amps while charging. Then once charged, it returned to a quiescent current of a few milliamps as one would expect. And there was still no smell of burning.
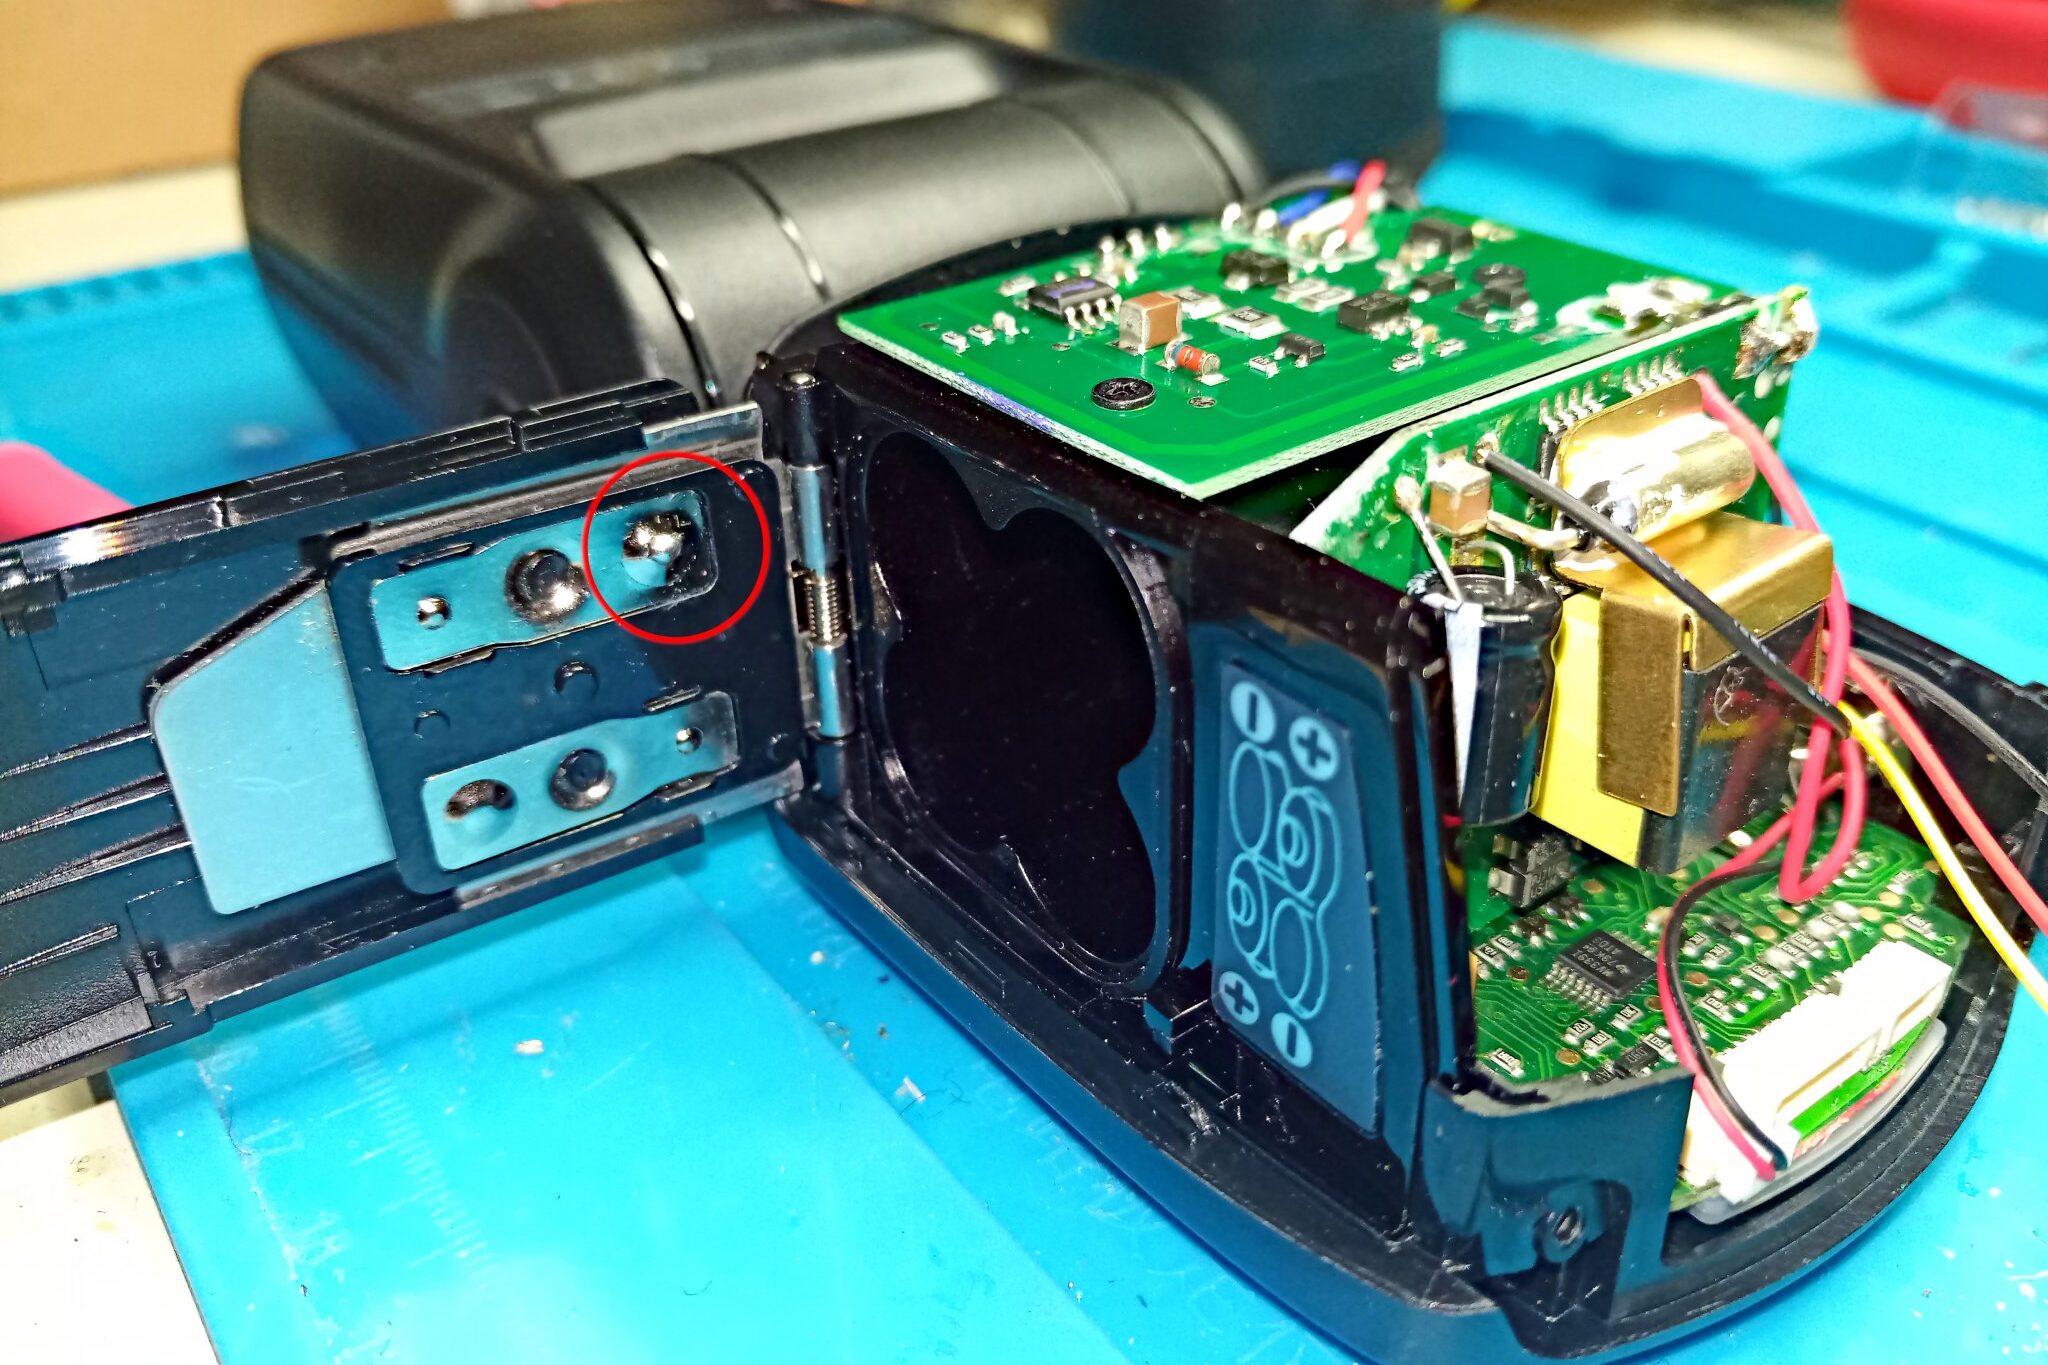
Problem was that the folding door on the battery cage was pushing one of the batteries down and away from its metal contact. The fix was a small blob of solder on the contact plate in the battery cage. To do this one had to clean the metal thoroughly, flux with a decent quality flux and be very careful not to melt the surrounding plastic whilst soldering. Soldering iron was set to 335°C. The fix is shown in the following image, circled in red. It is literally just a 1mm deep x 3mm wide blob of solder…
[Please click image to enlarge]
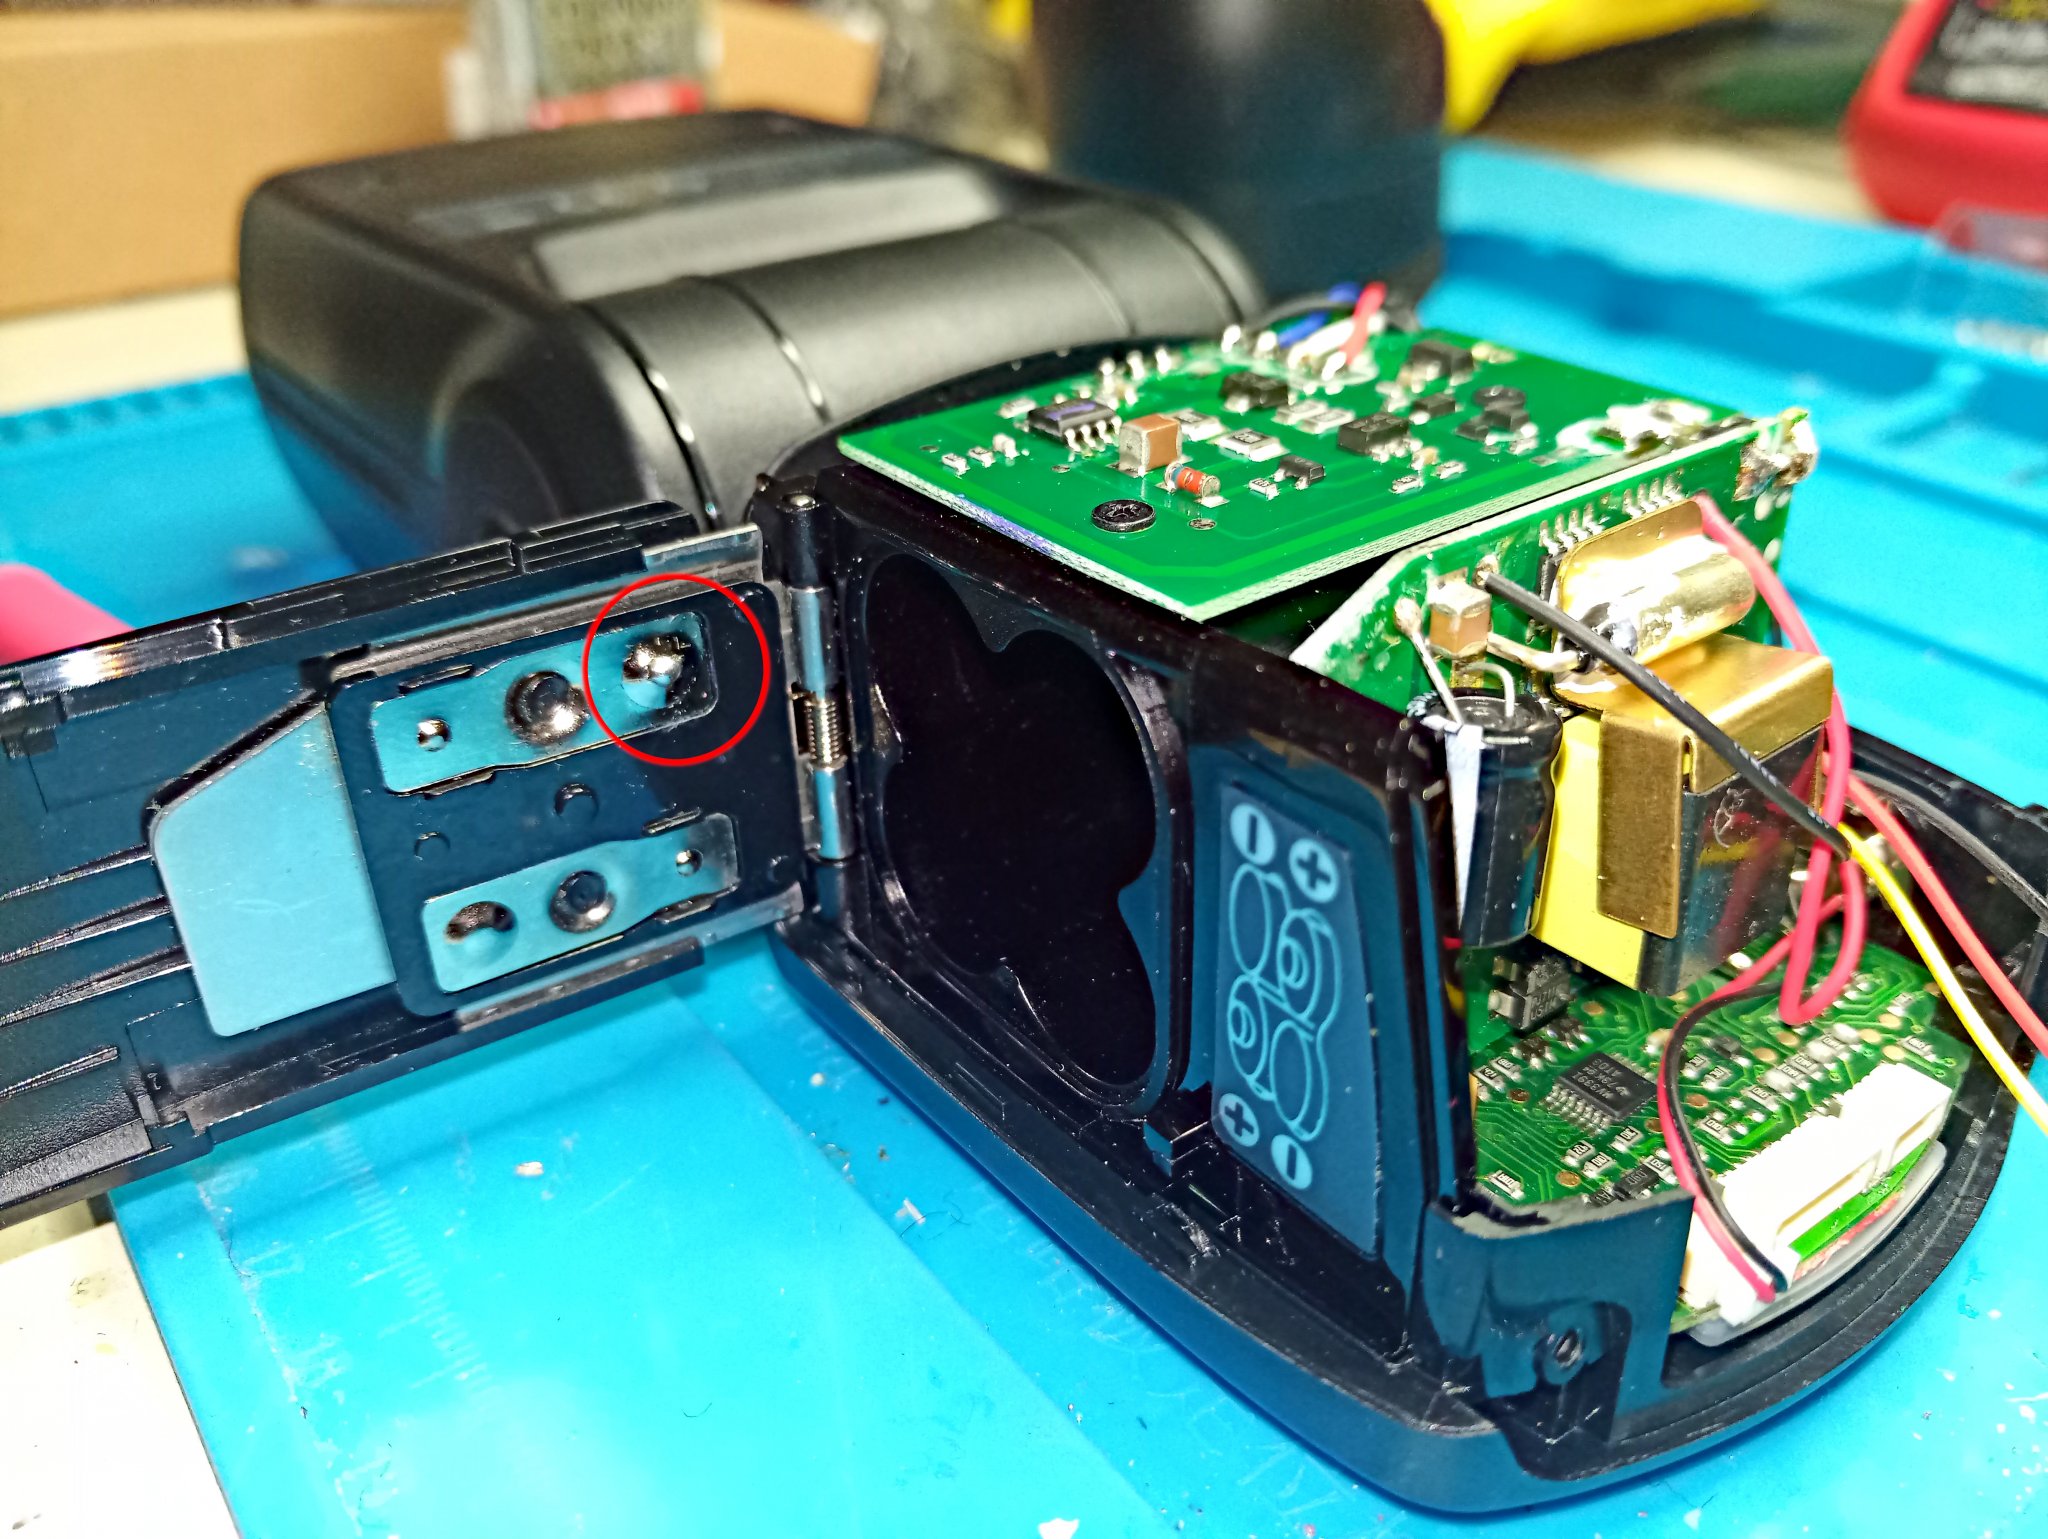
Blob of solder in place, I reassembled the device, inserted the batteries and it worked, as good as new.