
More infrared photography
Well today is Boxing day, and the sun just managed to struggle its way out of the clouds around 14:00. As luck would have it, my variable infrared filter actually arrived from Shenzen late Christmas eve. So, following on from my early IR adventures on Christmas Eve, I thought I’d pop out to our backyard this afternoon, and try a few more infrared snaps.
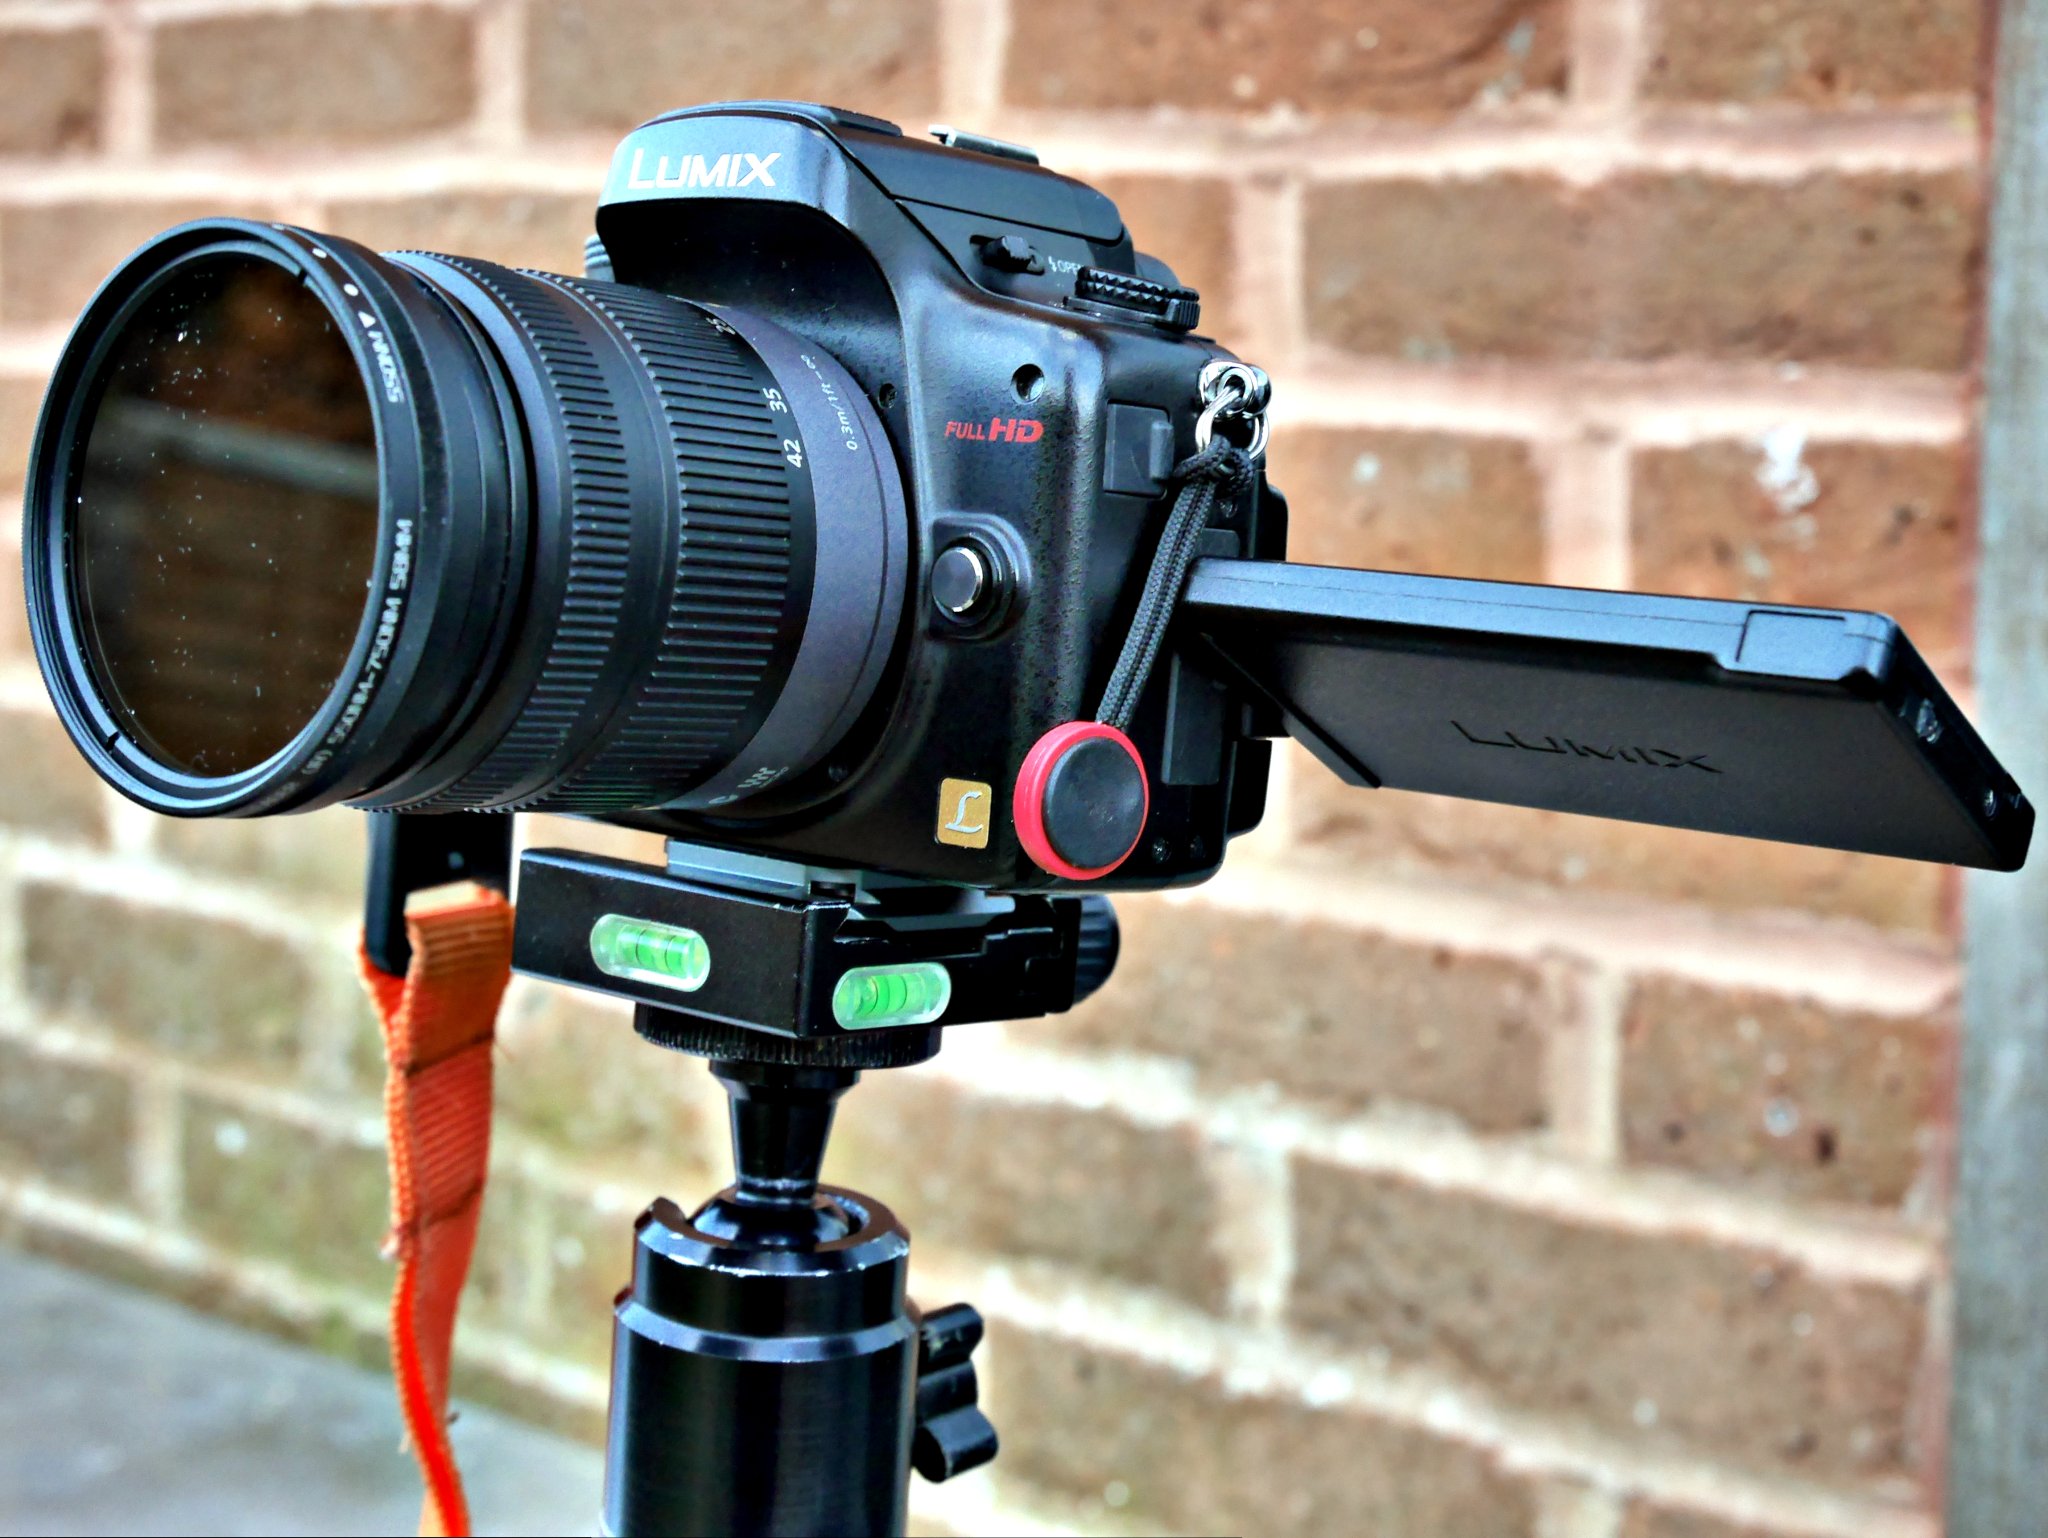
The camera is an elderly Lumix GH2, that I had converted to ‘full spectrum’ for IR photography, by Protech Photographic in Crowborough. The camera was sitting in a drawer doing nothing. I’m surprised at how good the results are. As it happens I had rather forgotten just what a nice little camera the old Lumix DMC-GH2 really is. For those considering doing this for the first time, the are quite a lot of GH2’s on eBay in the £150-£200 range if you don”t want to risk something more expensive. And Kelvin @ Protech seems to rate this sort of camera fairly highly for its ease of conversion.
Fourth Eye variable IR Filter in action
The first thing one needs after a “full spectrum” camera conversion is proper Infrared filter. But which wavelength should I opt for? Or should I splash-out fifty quid or so and buy a set? Well much against the advice of certain Youtubers, I went for a variable filter. Specifically, a Fourth Eye 550 nanometre to 750 nanometre. It cost me a bit over thirteen quid on AliExpress.
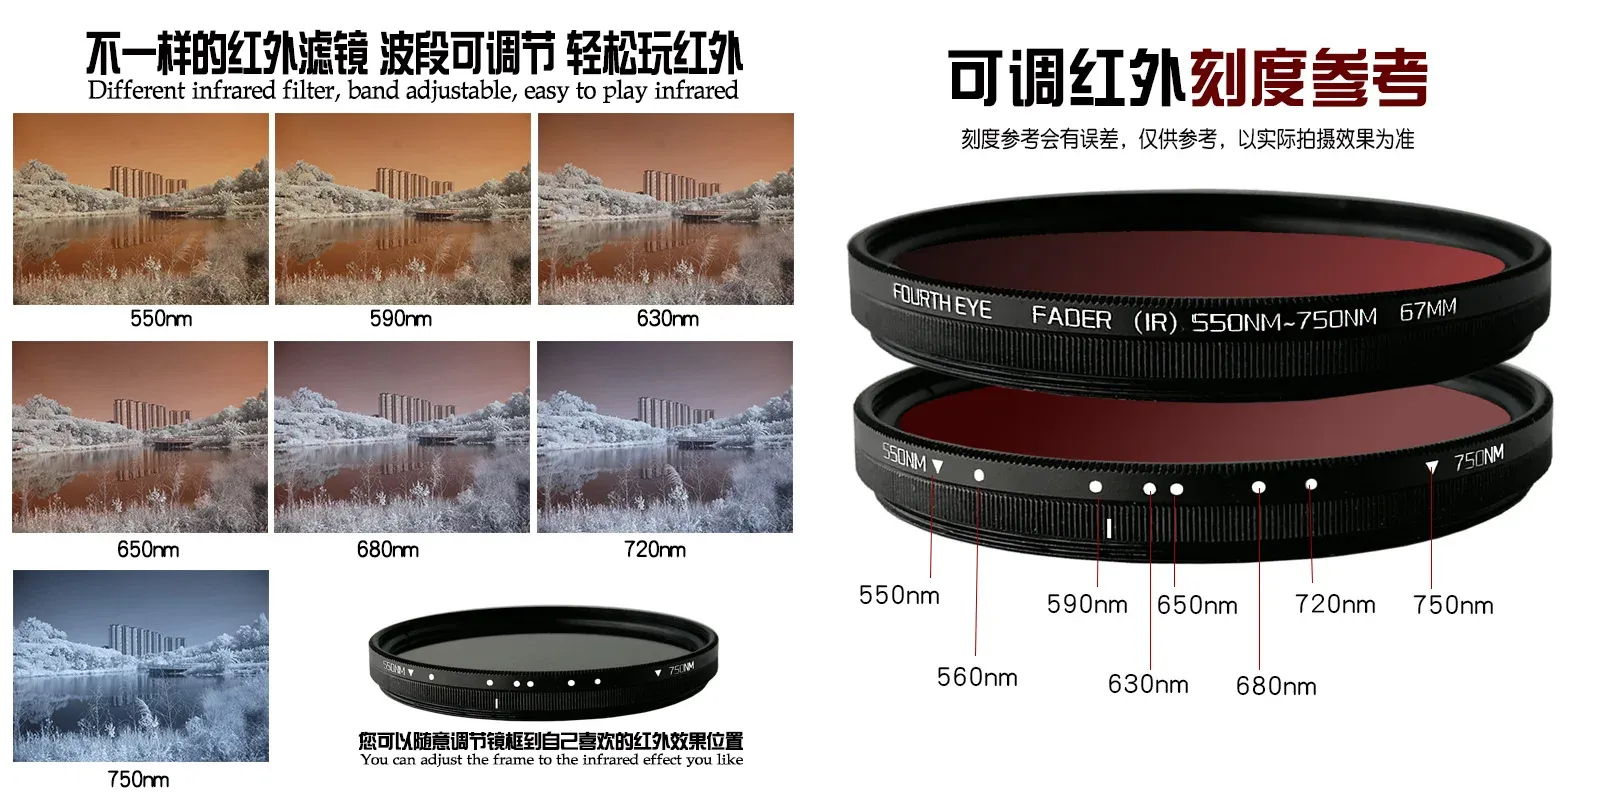
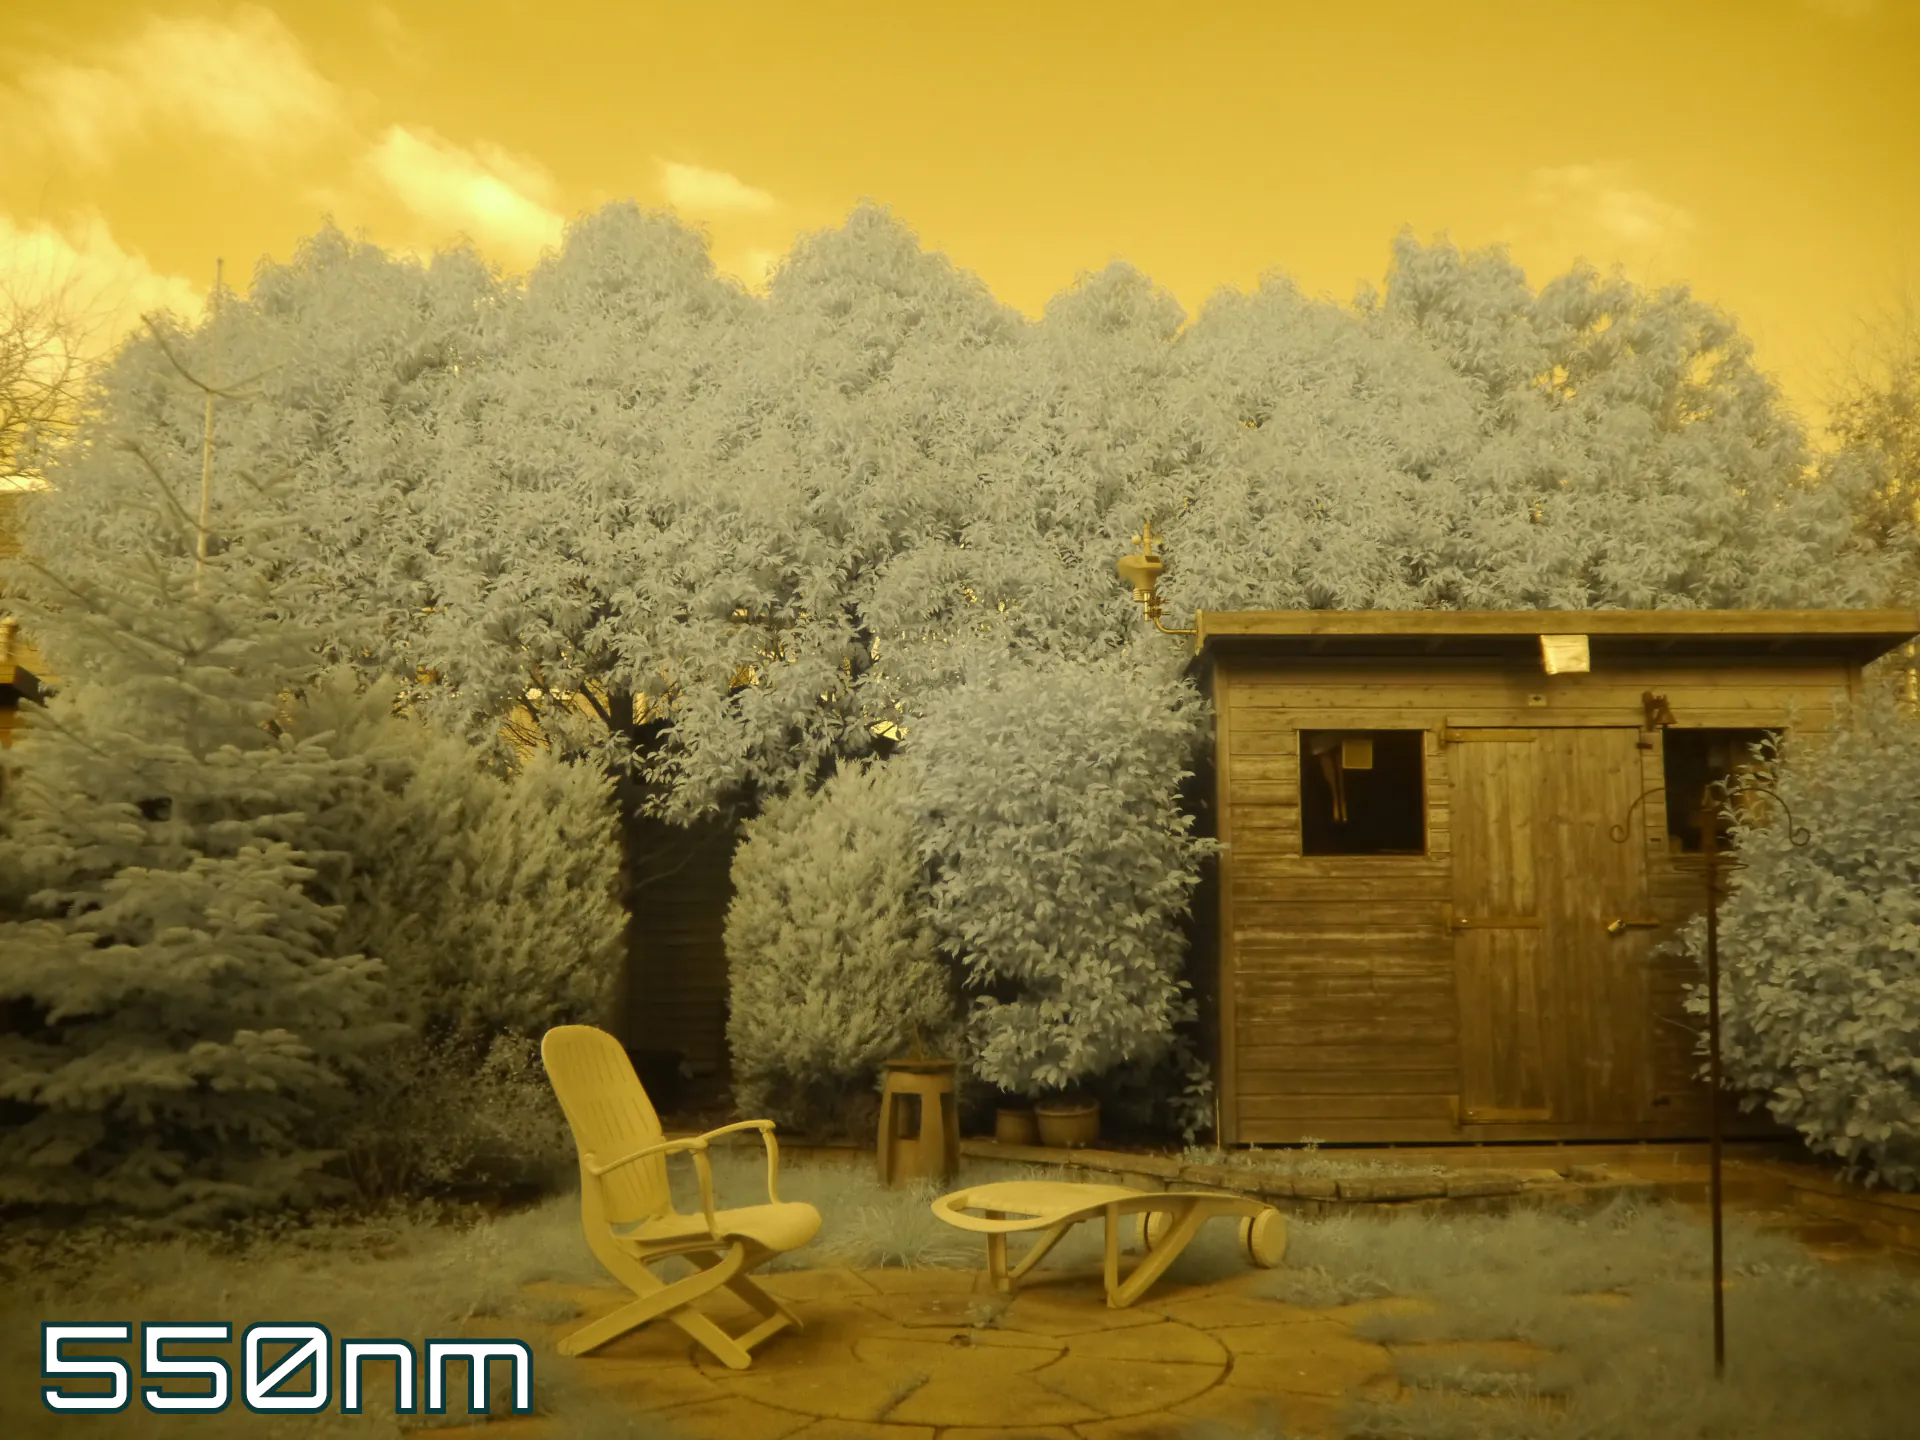
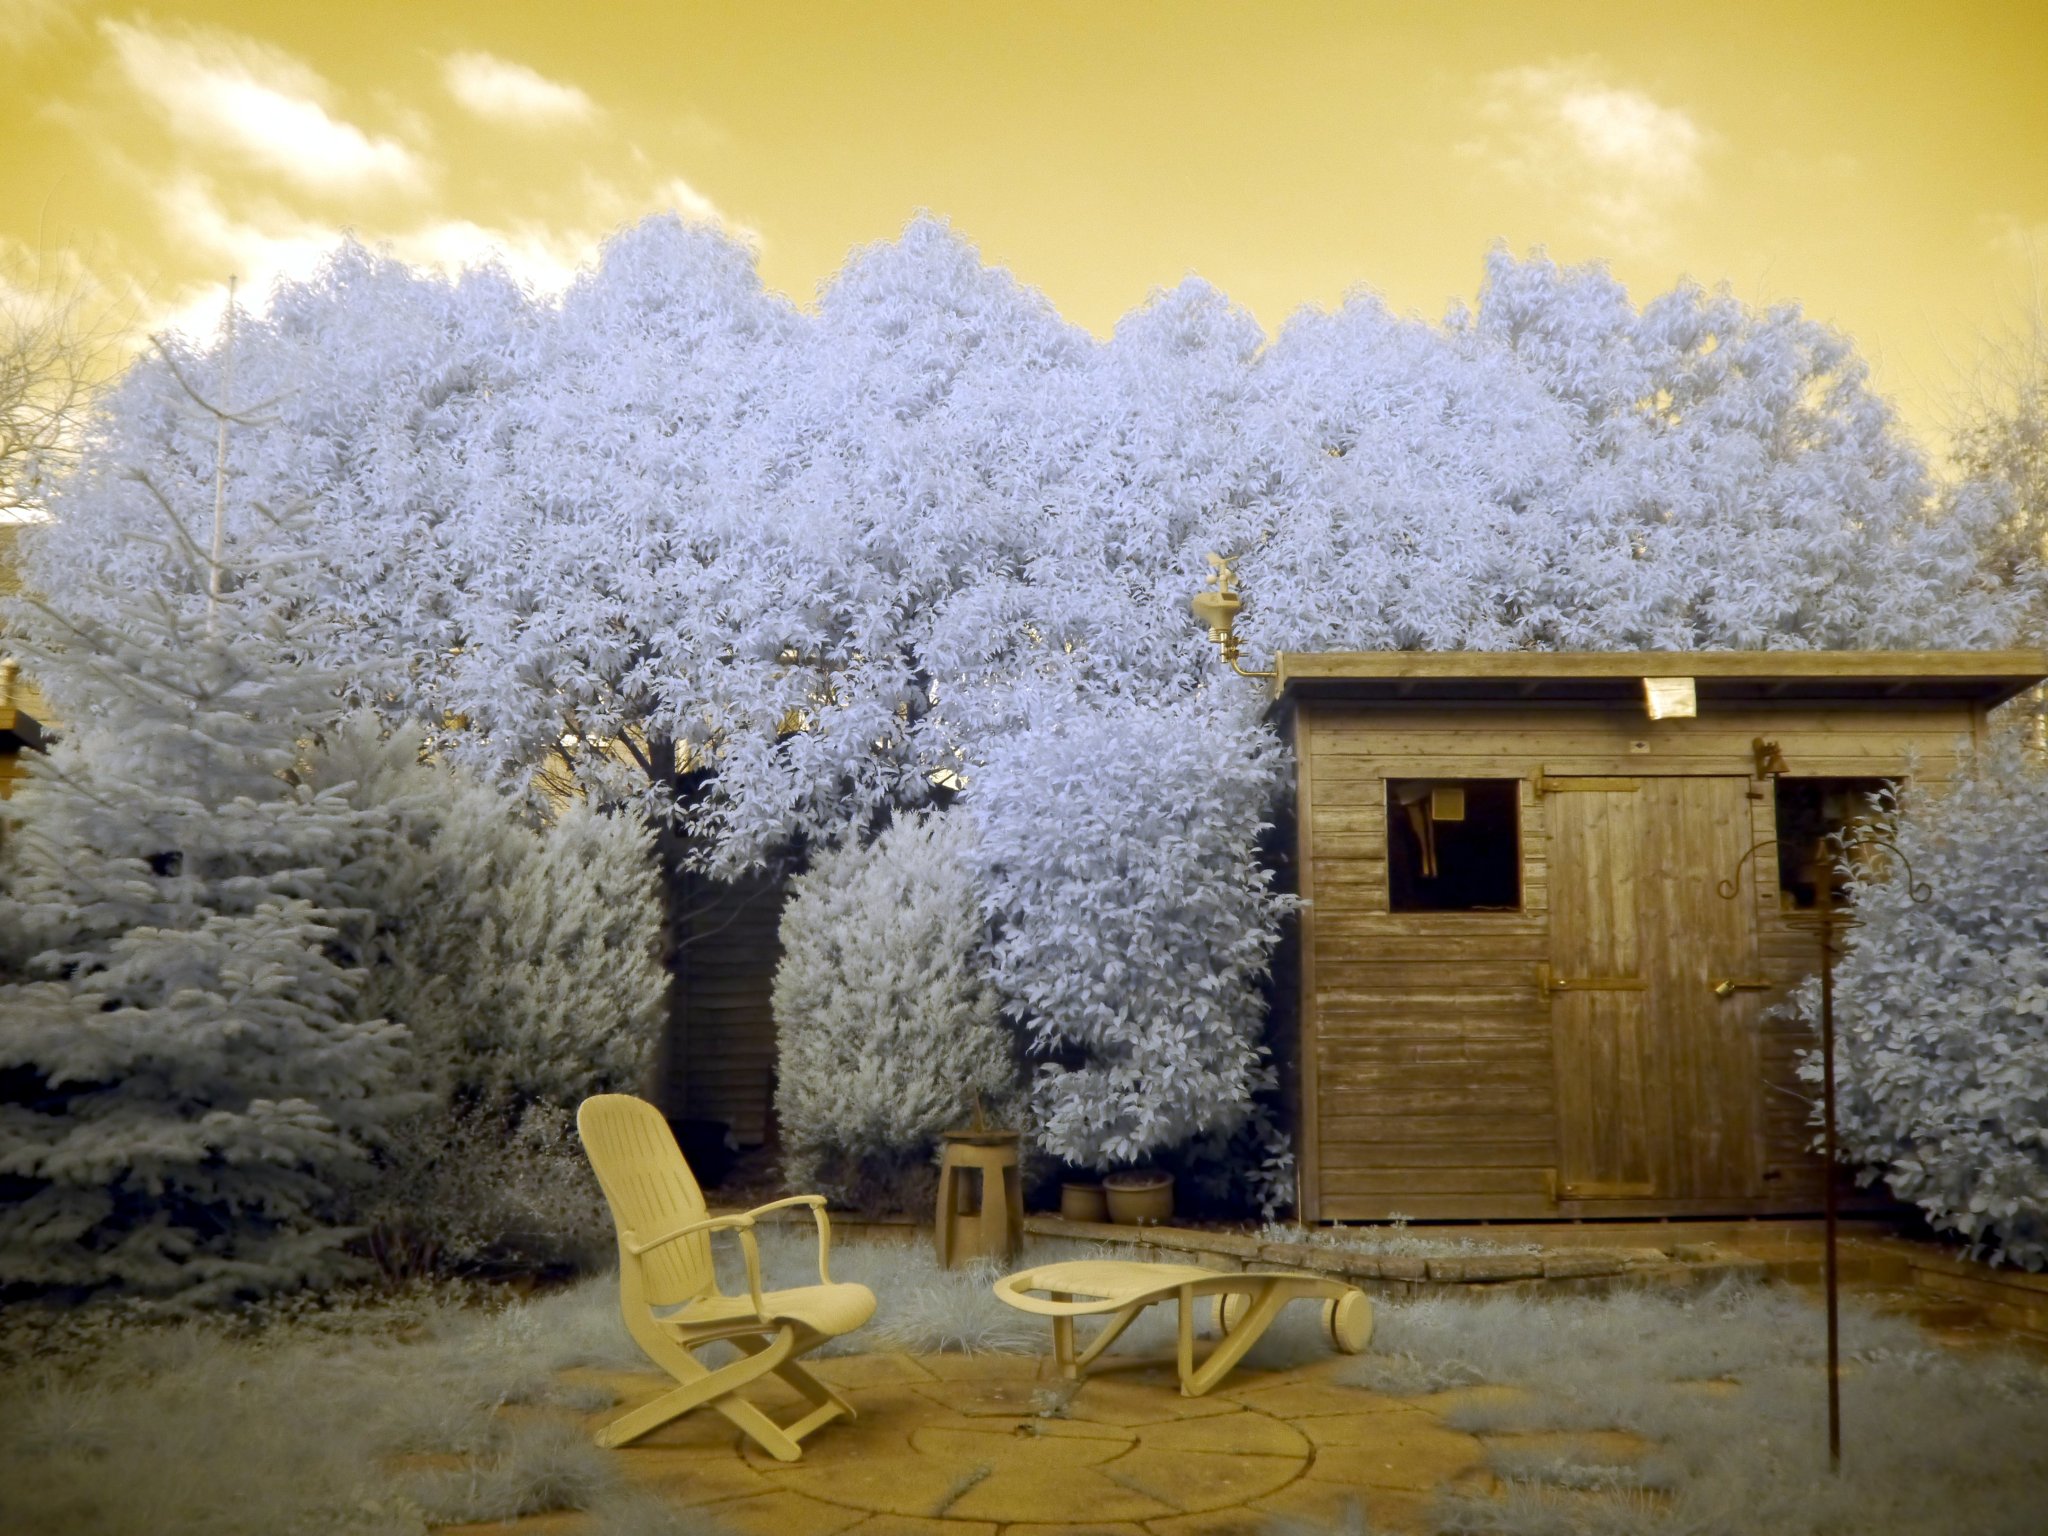
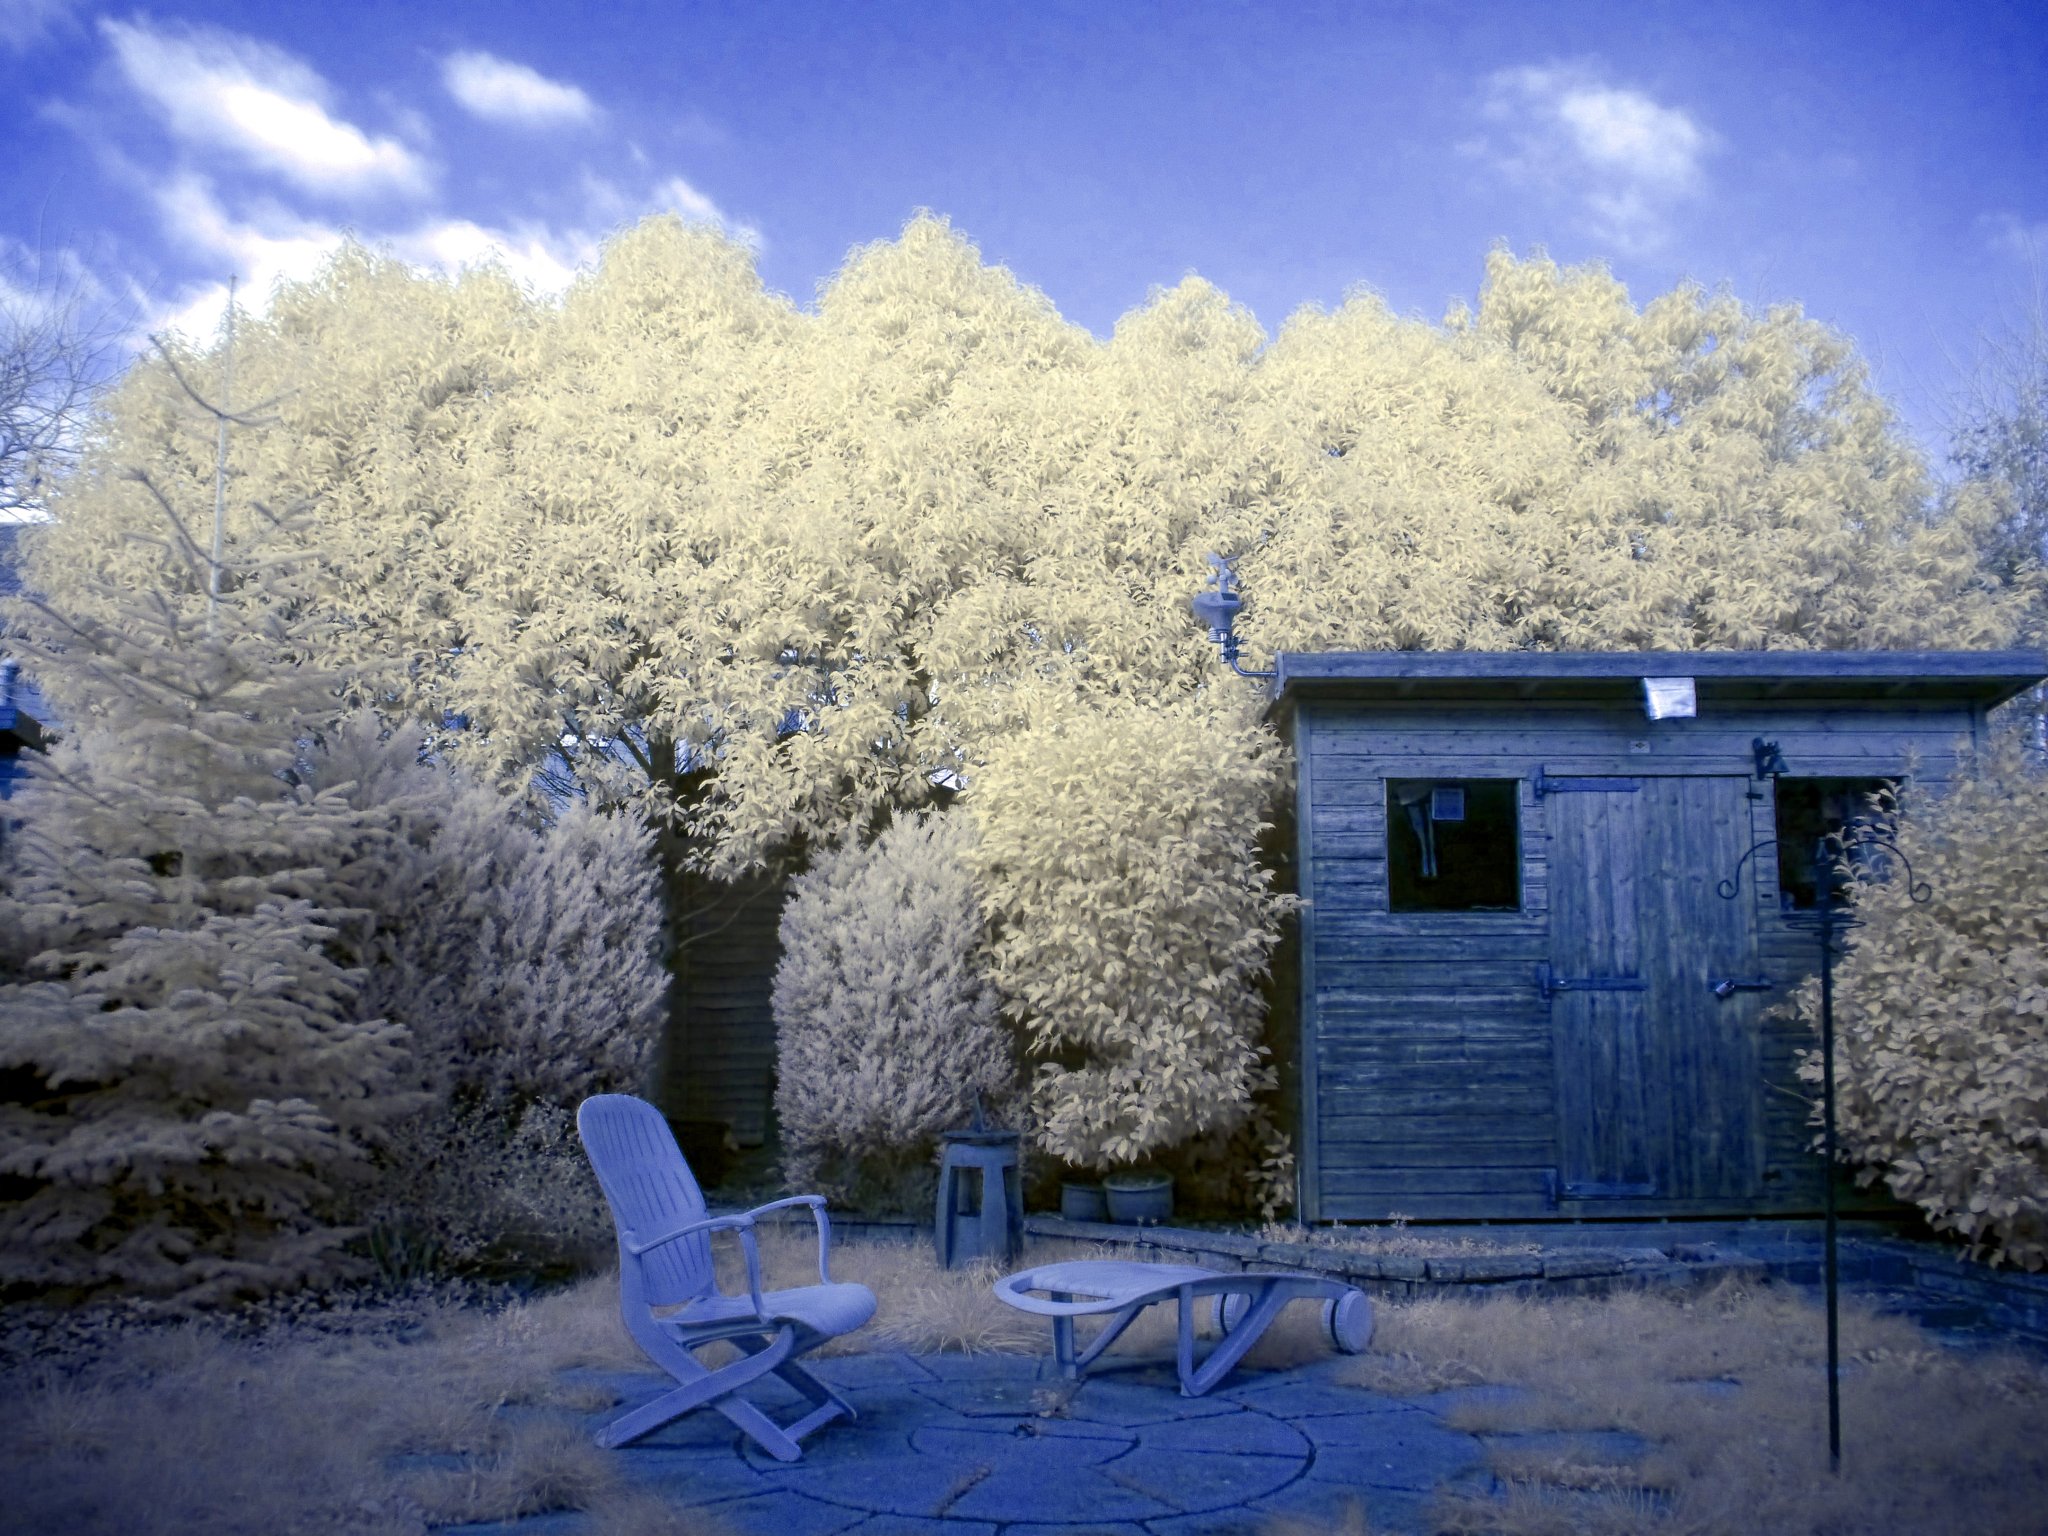
Well having bought the thing, I figured I really should test it properly. So I mounted the camera on a tripod, then took a snap at each of the variable IR filter’s eight settings. It goes from filtering-out only the shorter wavelength light, below 550 nanometres. Thus filtering-out greens blues and violets. Then it goes in in stages, through 560nm, 590nm, 630nm, 650nm, 680nm, 720nm to 750 nanometres. At which point it is filtering-out the entire visible spectrum, leaving just the near-infrared. This shows as a spooky sort of black and white image.
All the images that comprise this animation are virtually SooC (straight out of camera). I.e. no colour editing or sharpening. Full details of the test rig can be found near the end of this article, here.
How did it perform?
The short answer is much better than expected. Camera sensitivity was set to ISO 800/30°. The camera custom white balance was configured to give pure greys at 750nm. This makes it immediately obvious what ‘visible light’ colours are being allowed through the filter at any given filter setting. It also seems the filter’s advertising literature used a similar white balance technique, Thus making it reasonably easy to see how closely this filter actually performed compared to its supplier’s advertising claims.
All-in-all, I would say that its results are pretty close to the claims. My images images are little more yellow, though I think that is a camera/white-balance issue. In any event, that is too trivial to contemplate here, and mostly irrelevant for producing final images because these will almost always require some palette rotation in post-production anyway. Certainly my experience of this filter differs greatly from that of certain Youtubers. I cannot reasonably comment on other photographer’s technical difficulties. All I can say is that on my on converted µ4/3 mirrorless camera, this particular variable IR filter seems to work flawlessly. It is also worth noting that this sort of filter is only effective on “full spectrum” cameras.
Some examples
I then made a copy of the test image I had taken with the filter set to 590nm, and opened it in GIMP. I first used GIMP’s simple White Balance tool…
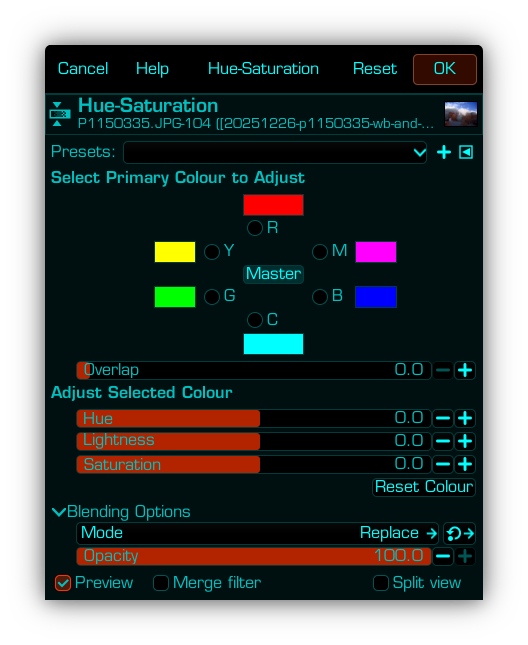
Then I rotated the colour palette using its excellent Hue and Saturation tool…
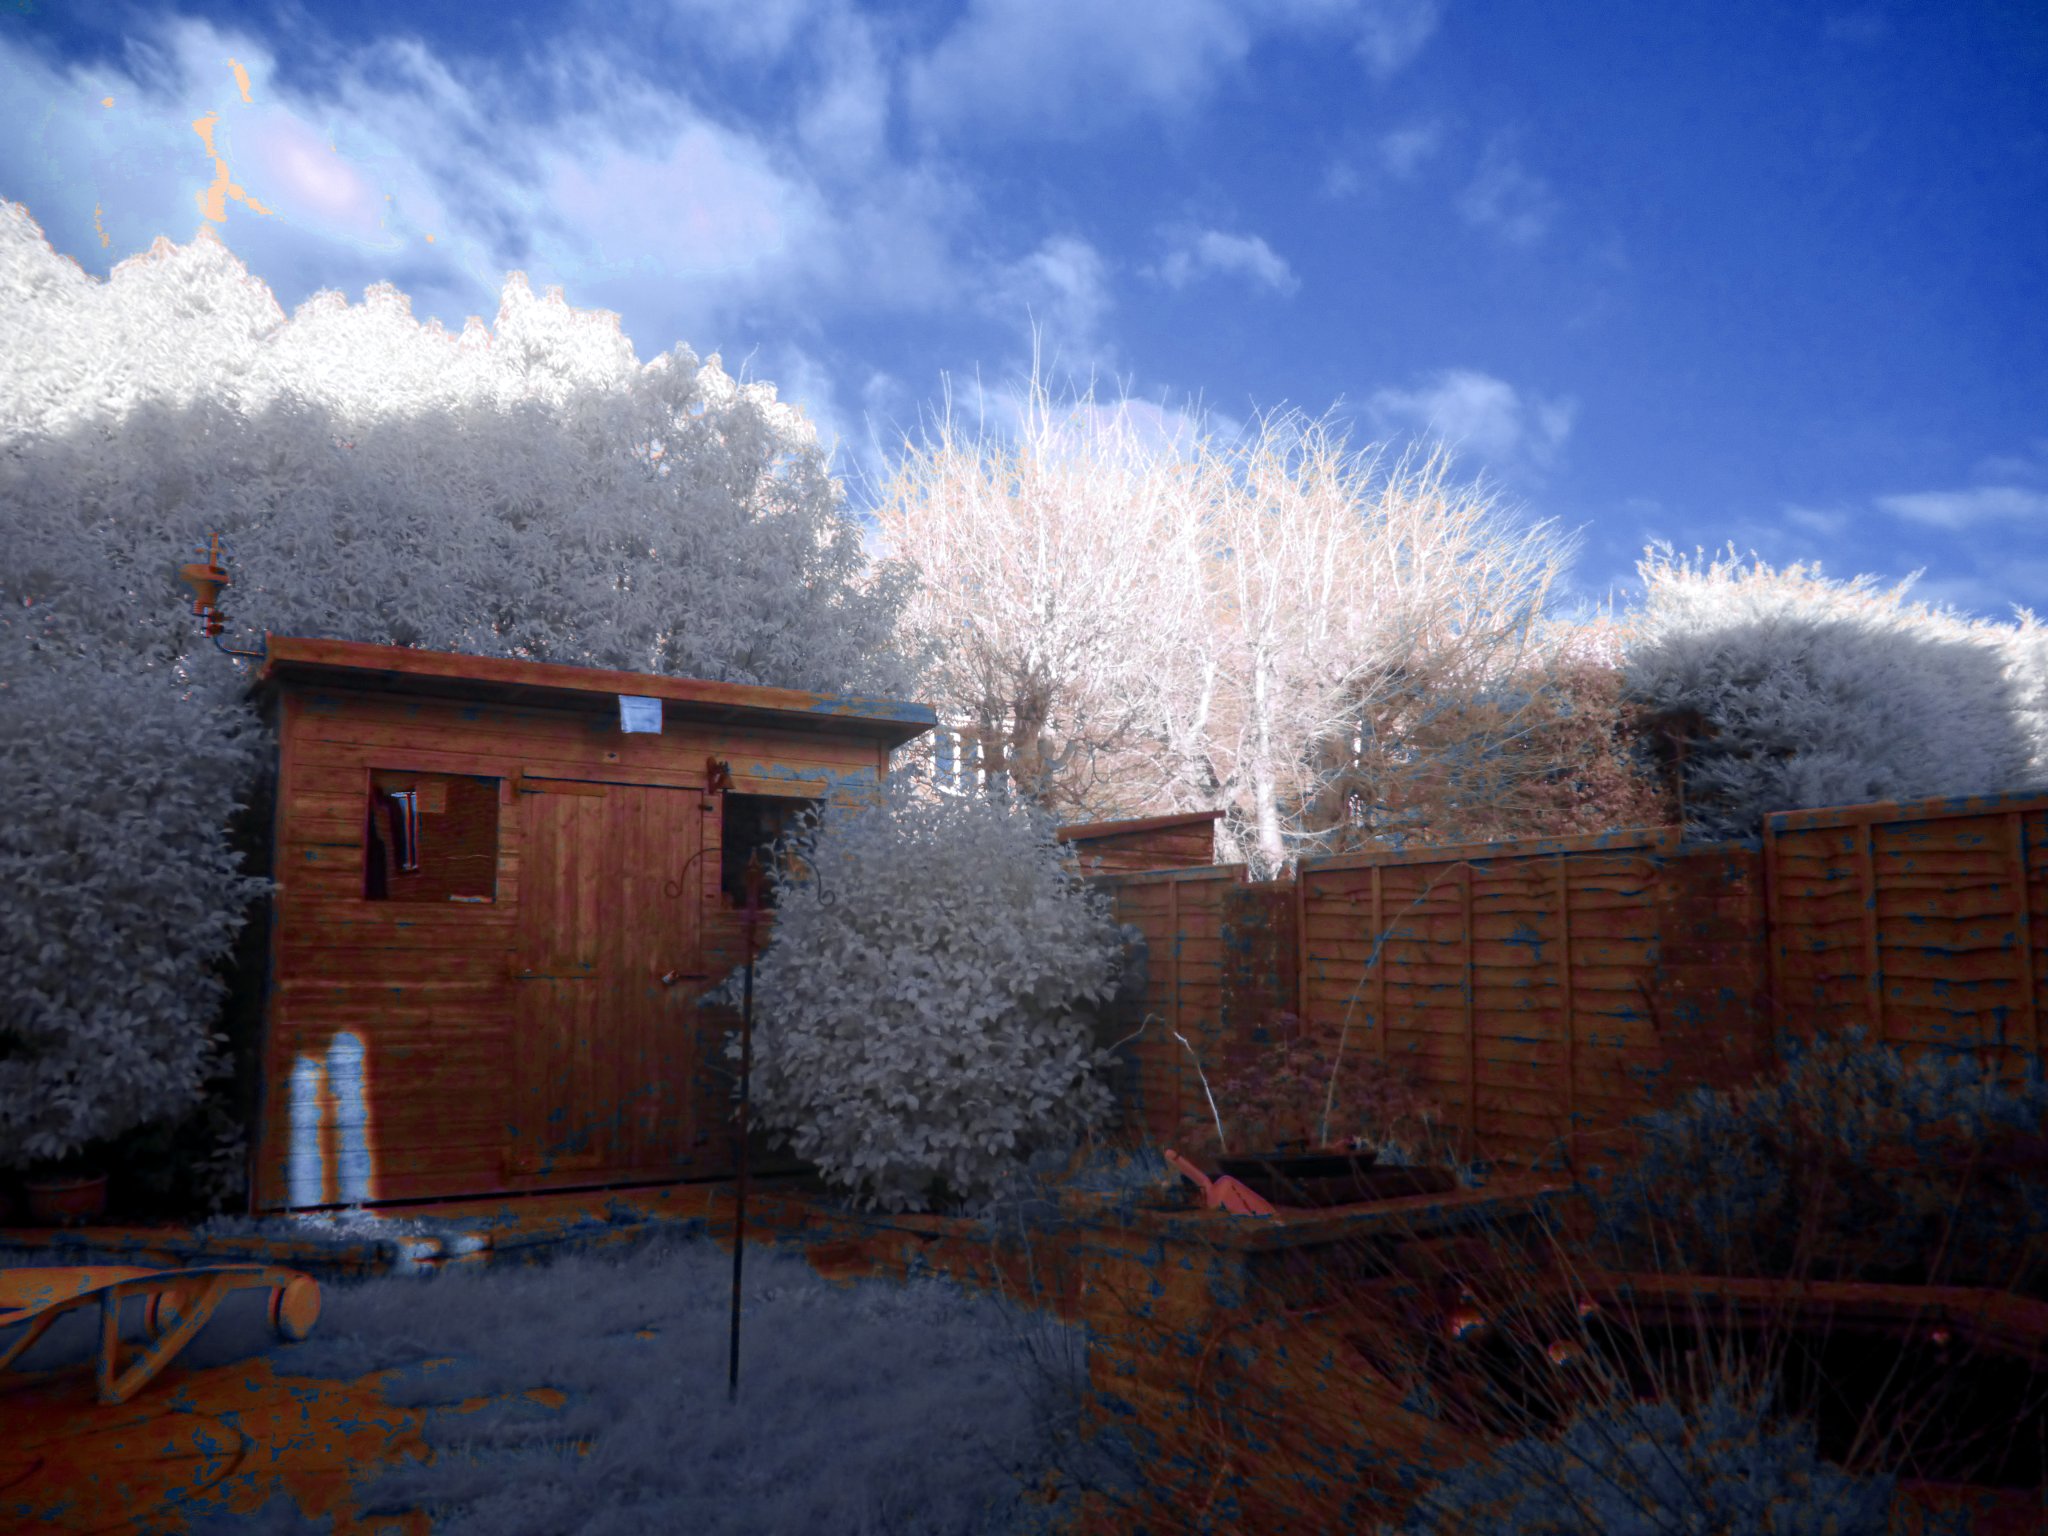
More sophisticated examples
Well, as sophisticated as one can be snapping away in a tiny backyard. These were taken at 590nm. I then used GIMP’s Hue and Saturation tool several times to rotate only selected parts of the colour palette. Note, these were taken in the middle of winter. So the camera was angled in such a way as to avoid seeing through windows of adjacent properties, that might be visible through the naked trees…

Without the IR flter
I also bought a cheapie UV+IR blocking filter, that purports to restoring a “full spectrum” converted camera back to normal. It’s not perfect (well, what do you expect for a tenner?). But it does a surprisingly reasonable job. Firstly with no filter at all, camera white balance set to ‘Auto’…

Then I fitted my cheapie Fotga UV+IR blocking filter, camera white balance still set to ‘Auto’…
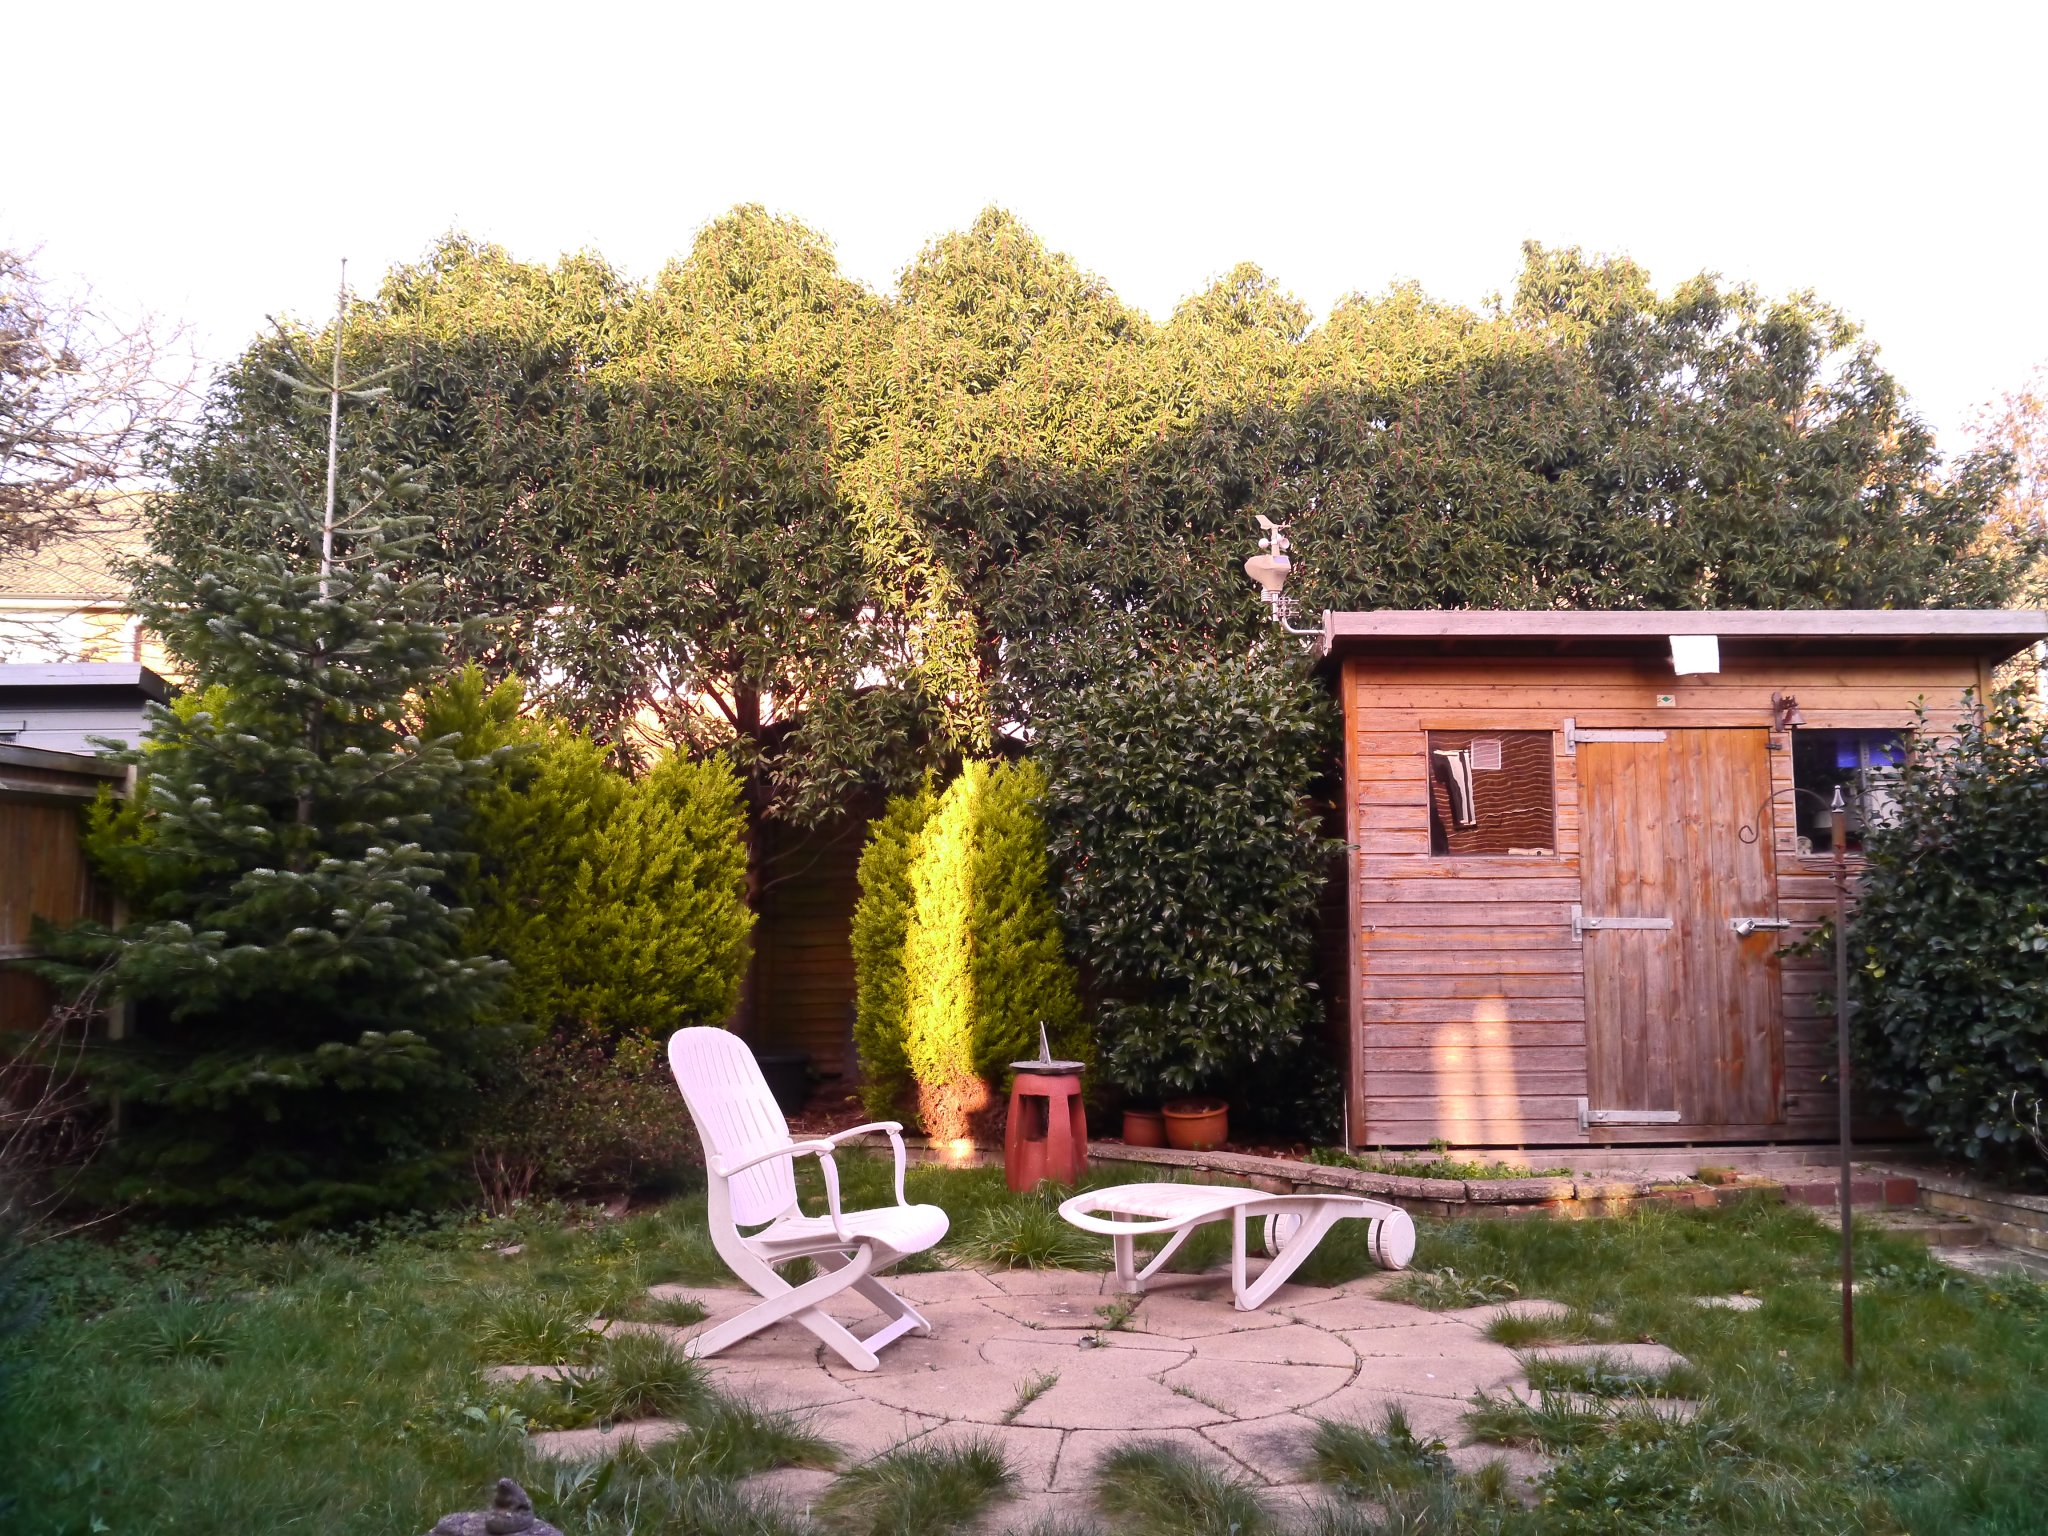
I think the Fotga UV+IR filter does a pretty good job of restoring the colours to a full-spectrum converted camera, certainly in this instance.
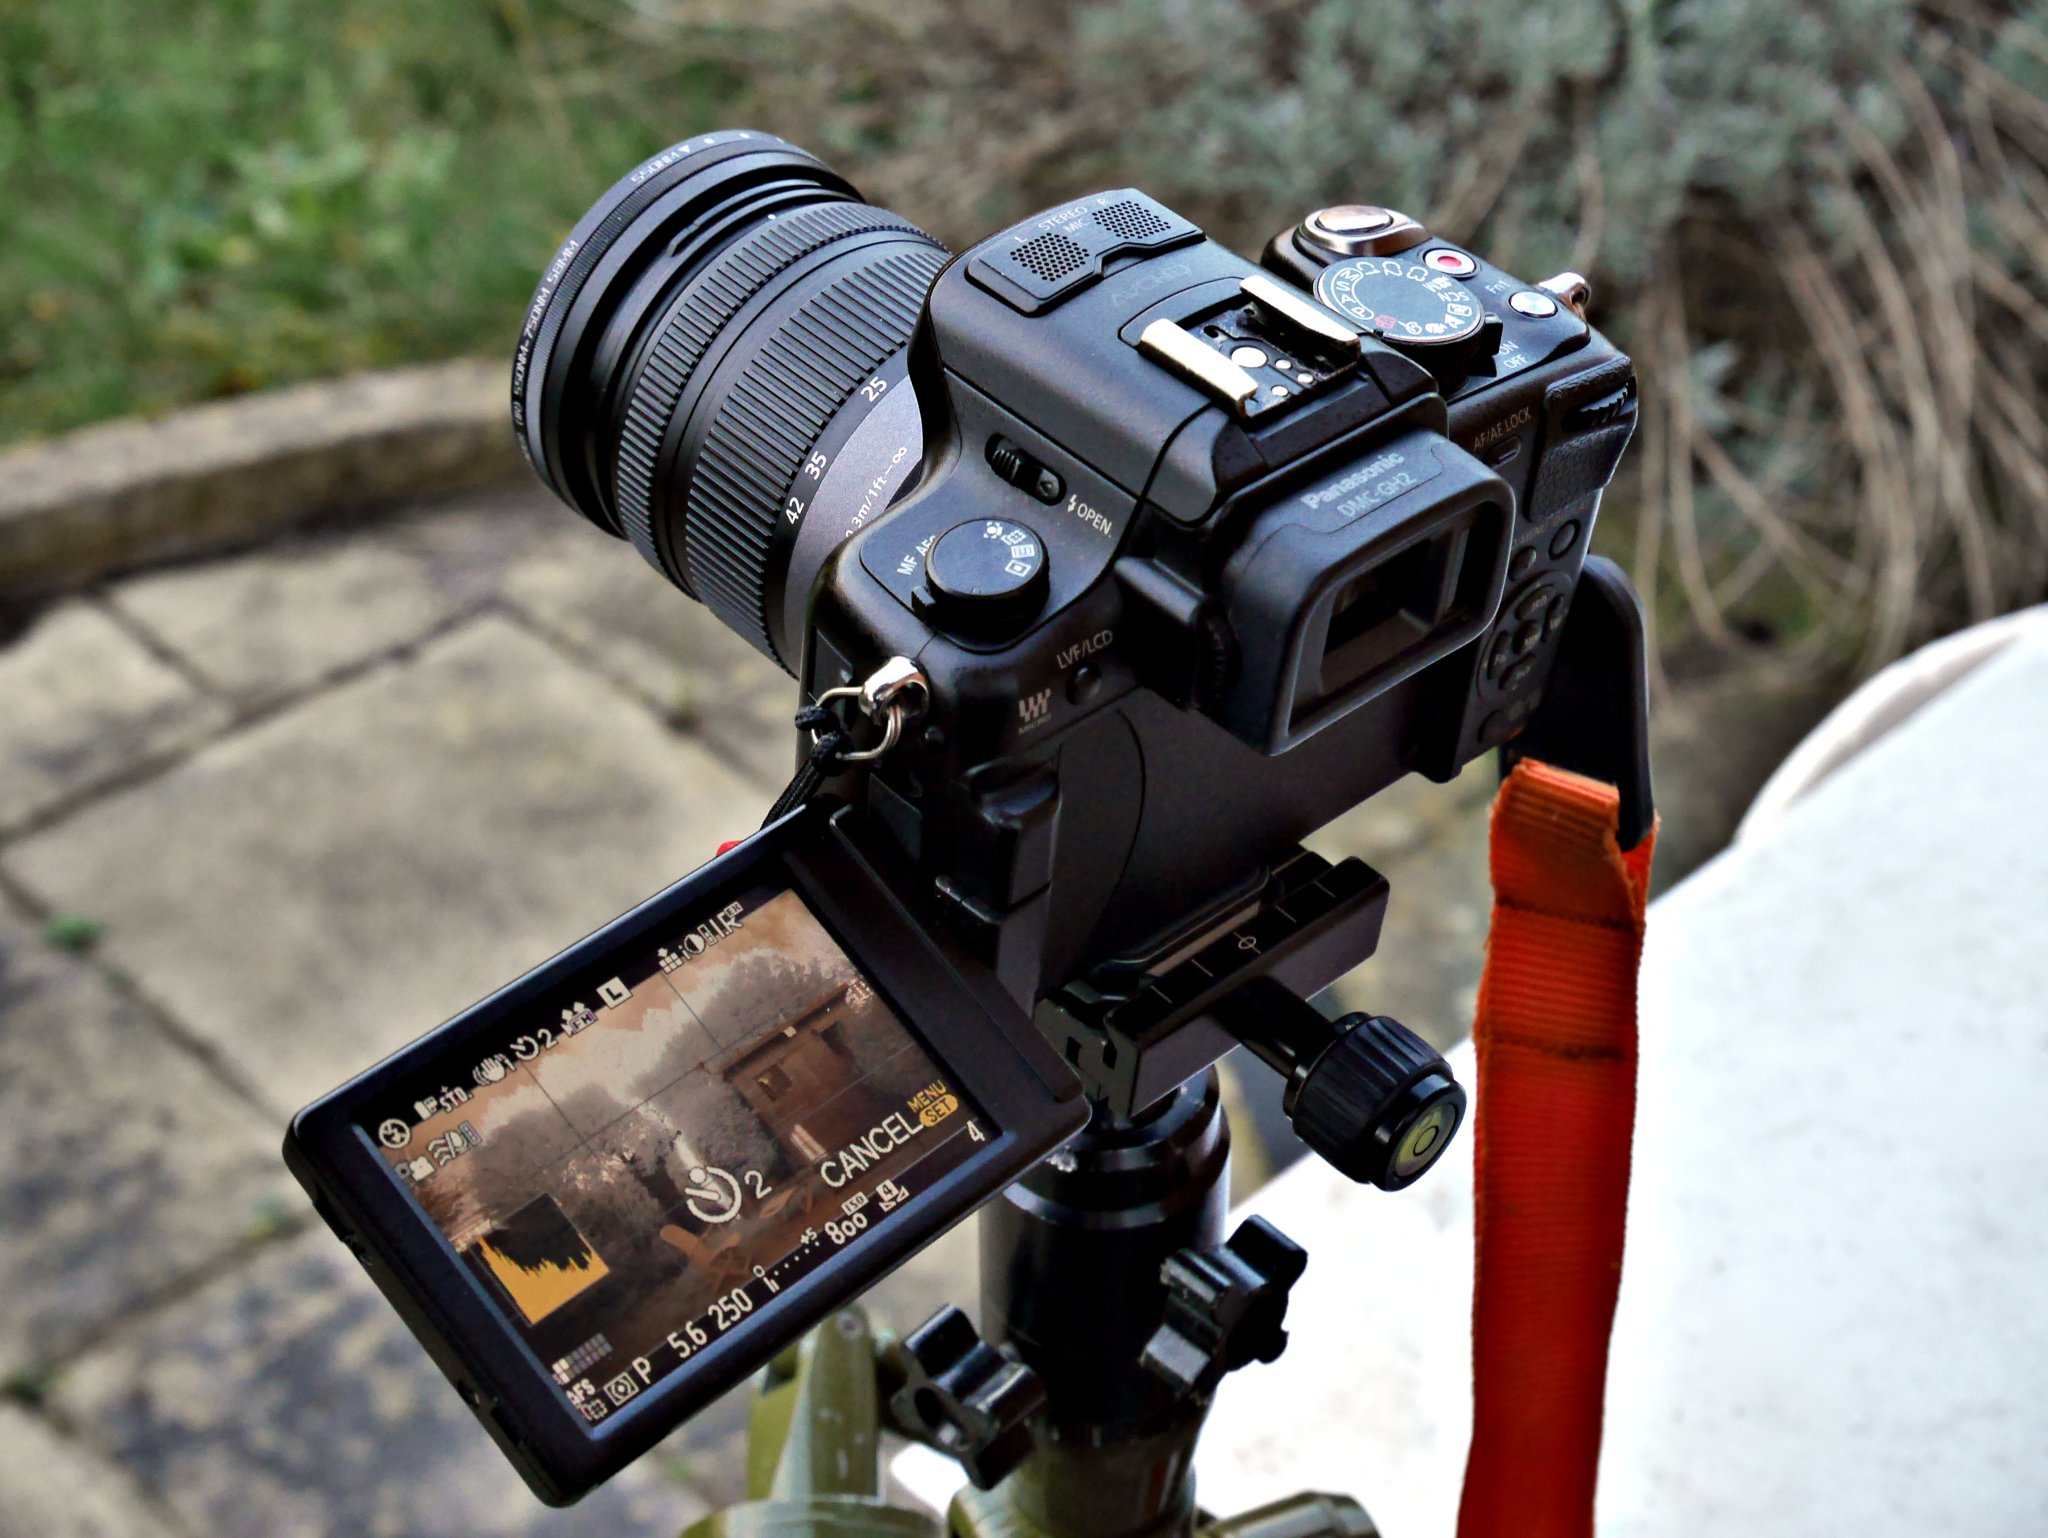
My current IR kit
My camera is an elderly full-spectrum-converted Lumix DMC GH2, c/w a bog-standard Lumix 14-42mm “kit lens” c/w step-up ring and aforementioned 58mm Fourth Eye variable IR filter. The entire kit and caboodle is mounted on a 30 year-old British Benbo Trekker tripod, with an “Arca Chinese” quick release. I figured that out of all my dedicated µ4/3 AF glassware, this basic “kit lens” lens would be the least clever. I also read somewhere this thing is pretty friendly to “out of band” photography. Although it’s an ugly plasticky brute, it’s actually quite a good lens, as kit lenses go. For all the images in the the animation, the lens had a focal length of 14mm (28mm 135 equivalent).
This article wouldn’t be complete without a screenshot of another essential bit of kit, GIMP’s Hue and Saturation tool…
GIMP is an acronym meaning GNU Image Manipulation Program. Users of Debian (and its various derivatives) can install GIMP by opening a terminal, typing the following and hitting the return key:-
sudo apt install gimp
Users of other operating systems can download it from the official GIMP website.
Gallery
All the images used for this article, plus a few extras


Conclusion
Overall I’m pretty happy with how the project is going. The DMC-GH2 “full spectrum” conversion seems very successful. The Fourth Eye 550 nm to 750 nm variable infrared filter seems rather better than expected. And the Fotga UV+IR blocking filter, though not perfect, seems to make a reasonable job of restoring the camera back to how it was before the conversion. So the next job is to get out and try to take some more interesting photographs than my backyard and my garden shed. 🙂
Links
- ‘Full spectrum’ conversion of Lumix DMC-GH2 for IR photography, by Protech Photographic in Crowborough:-
https://www.protechrepairs.co.uk/ - Fourth Eye adjustable Infrared Filter IR Lens Pass Infra-Red 550nm to 750nm (choose how much of the visible spectrum you wish to include):-
https://www.aliexpress.com/item/1005002873283210.html - FOTGA UV-IR CUT Filter for DSLR (visible light bandpass filter that effectively reverses full spectrum conversion):-
https://www.aliexpress.com/item/4000918067712.html - Protective Metal Case Cap Protector. (When not in use, screw your filters together, then and screw these on the ends to protect them – sold as a pair):-
https://www.aliexpress.com/item/32849486098.html - GIMP website:-
https://gimp.org - All GarfNet infrared articles. I’m still relatively new to this infrared malarkey. So it’s handy to have the articles all clustered together so I can remind myself of all the stuff I’ve forgotten already! 🙂 :-
https://garfnet.org.uk/cms/category/photography/ir/