
Converting inexpensive LED flood lights for use in the studio.
This is how I converted three left-over cheapie (£60 for a box of ten, delivered) 20 watt daylight LED flood lights for use in the studio.
The basic tools you need:-
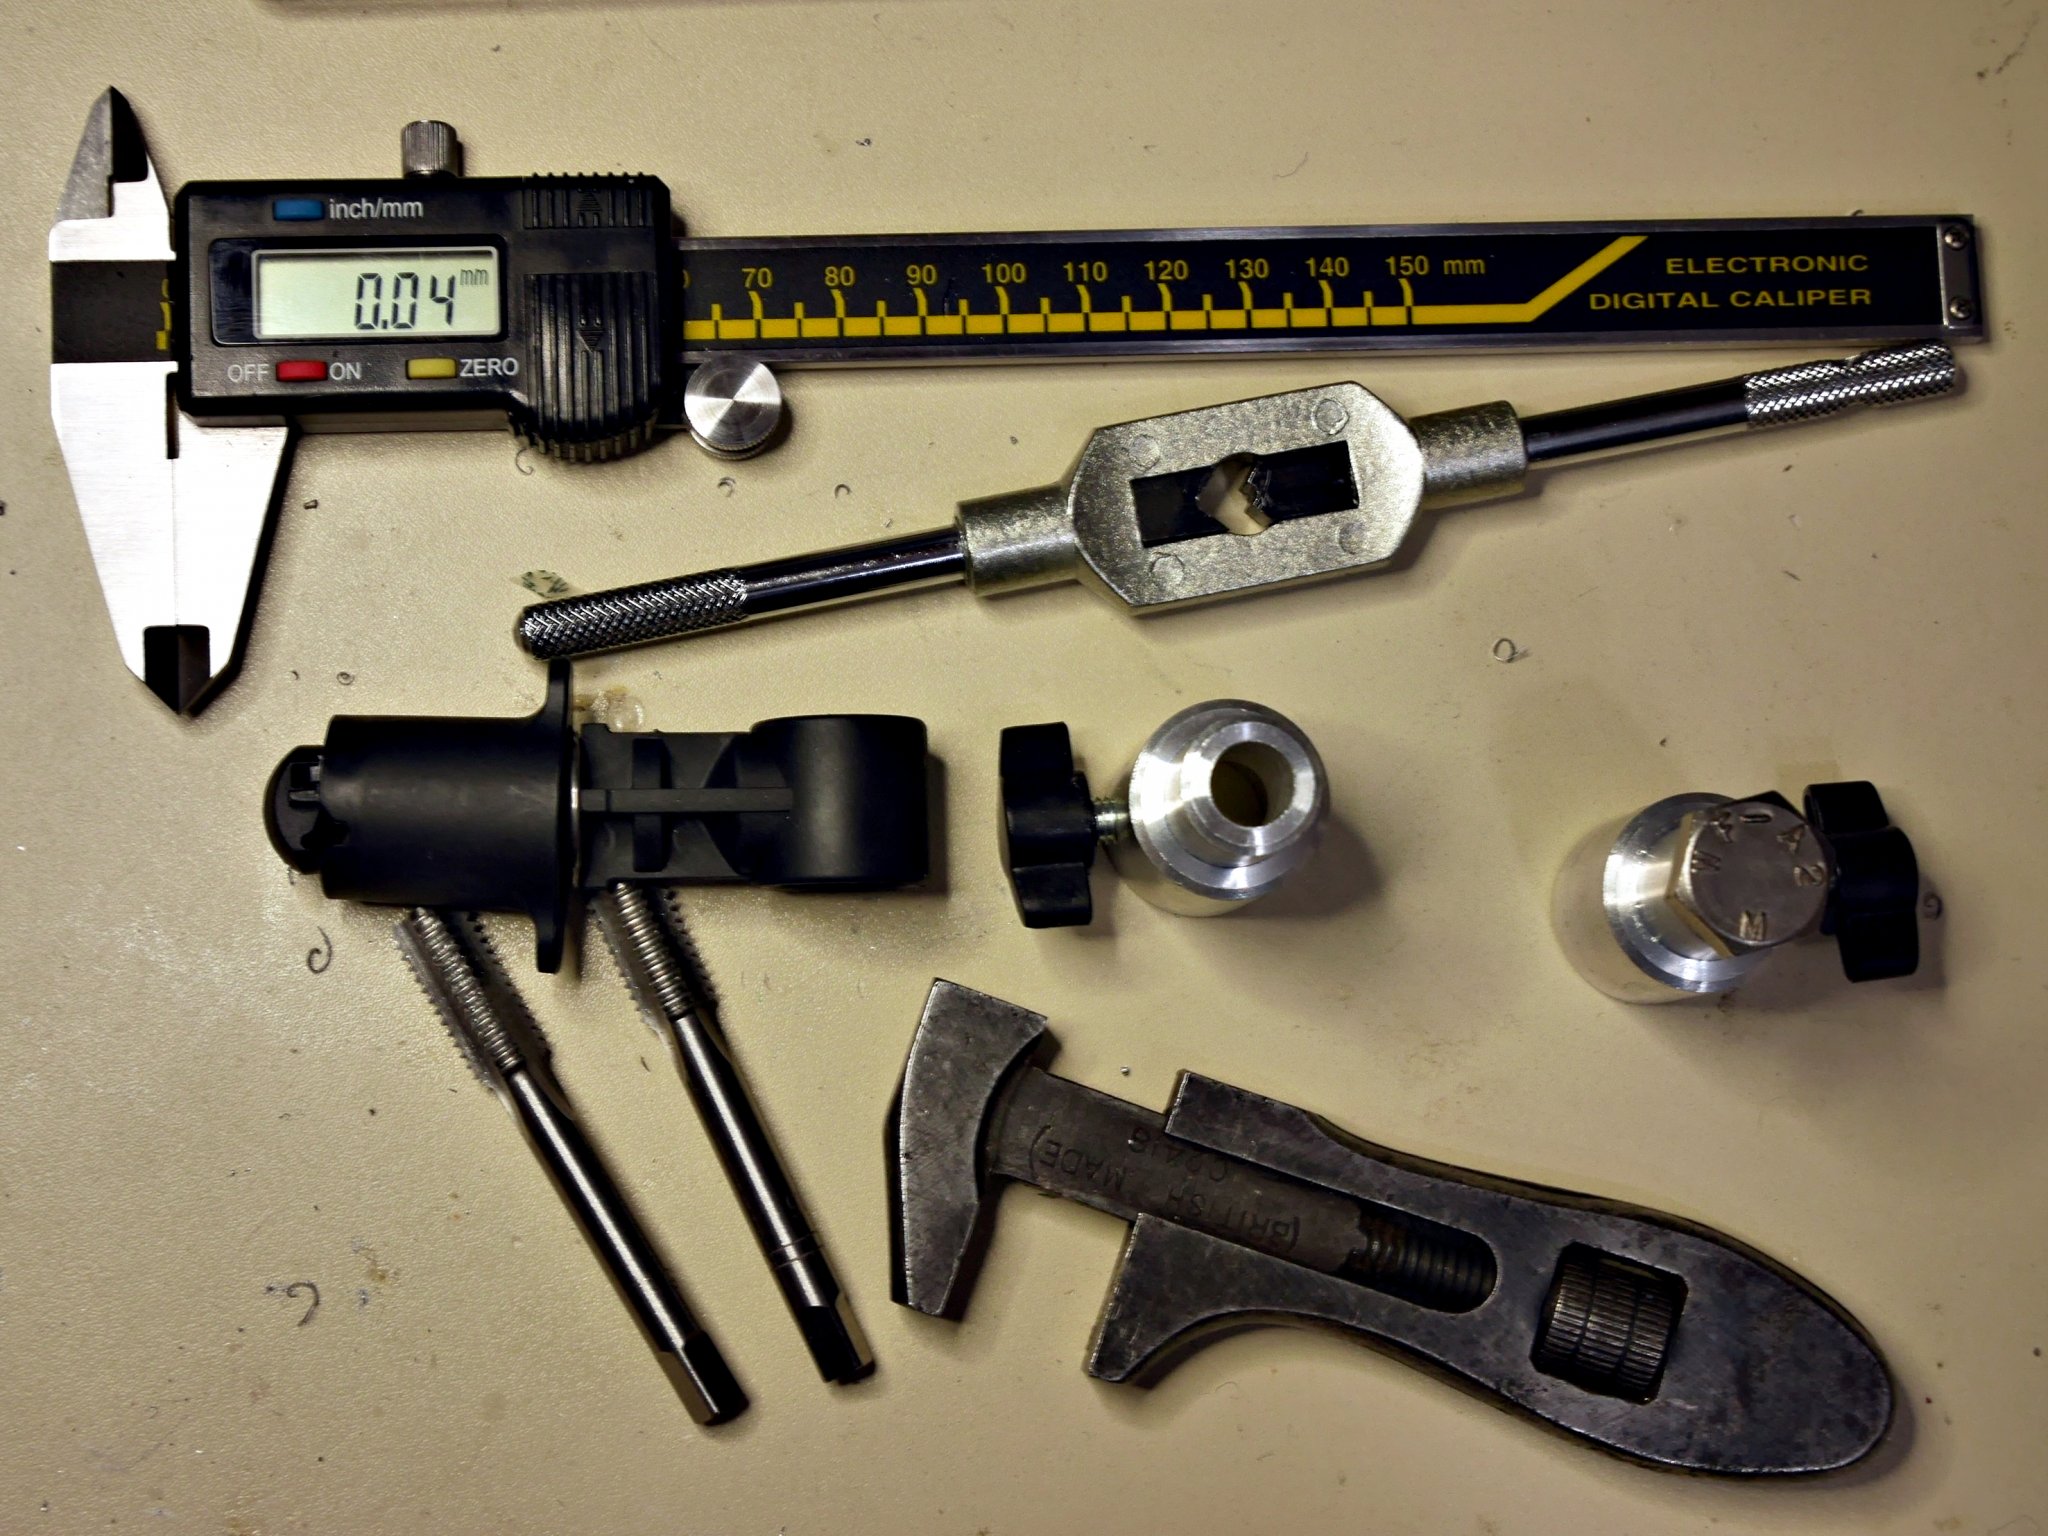
- Vernier or digital caliper,
- M10 ISO metric taps.
- Suitable spanner (17mm AF).
- Bench vice.
- Electrician’s screwdriver and wire strippers, to make the electrical connections.
Every LED floodlight unit will need:-
- Suitable socket to fit on standard 16mm studio lighting spigots.
- M10 ISO metric bolt.
- Some form of electrical connection or junction box.
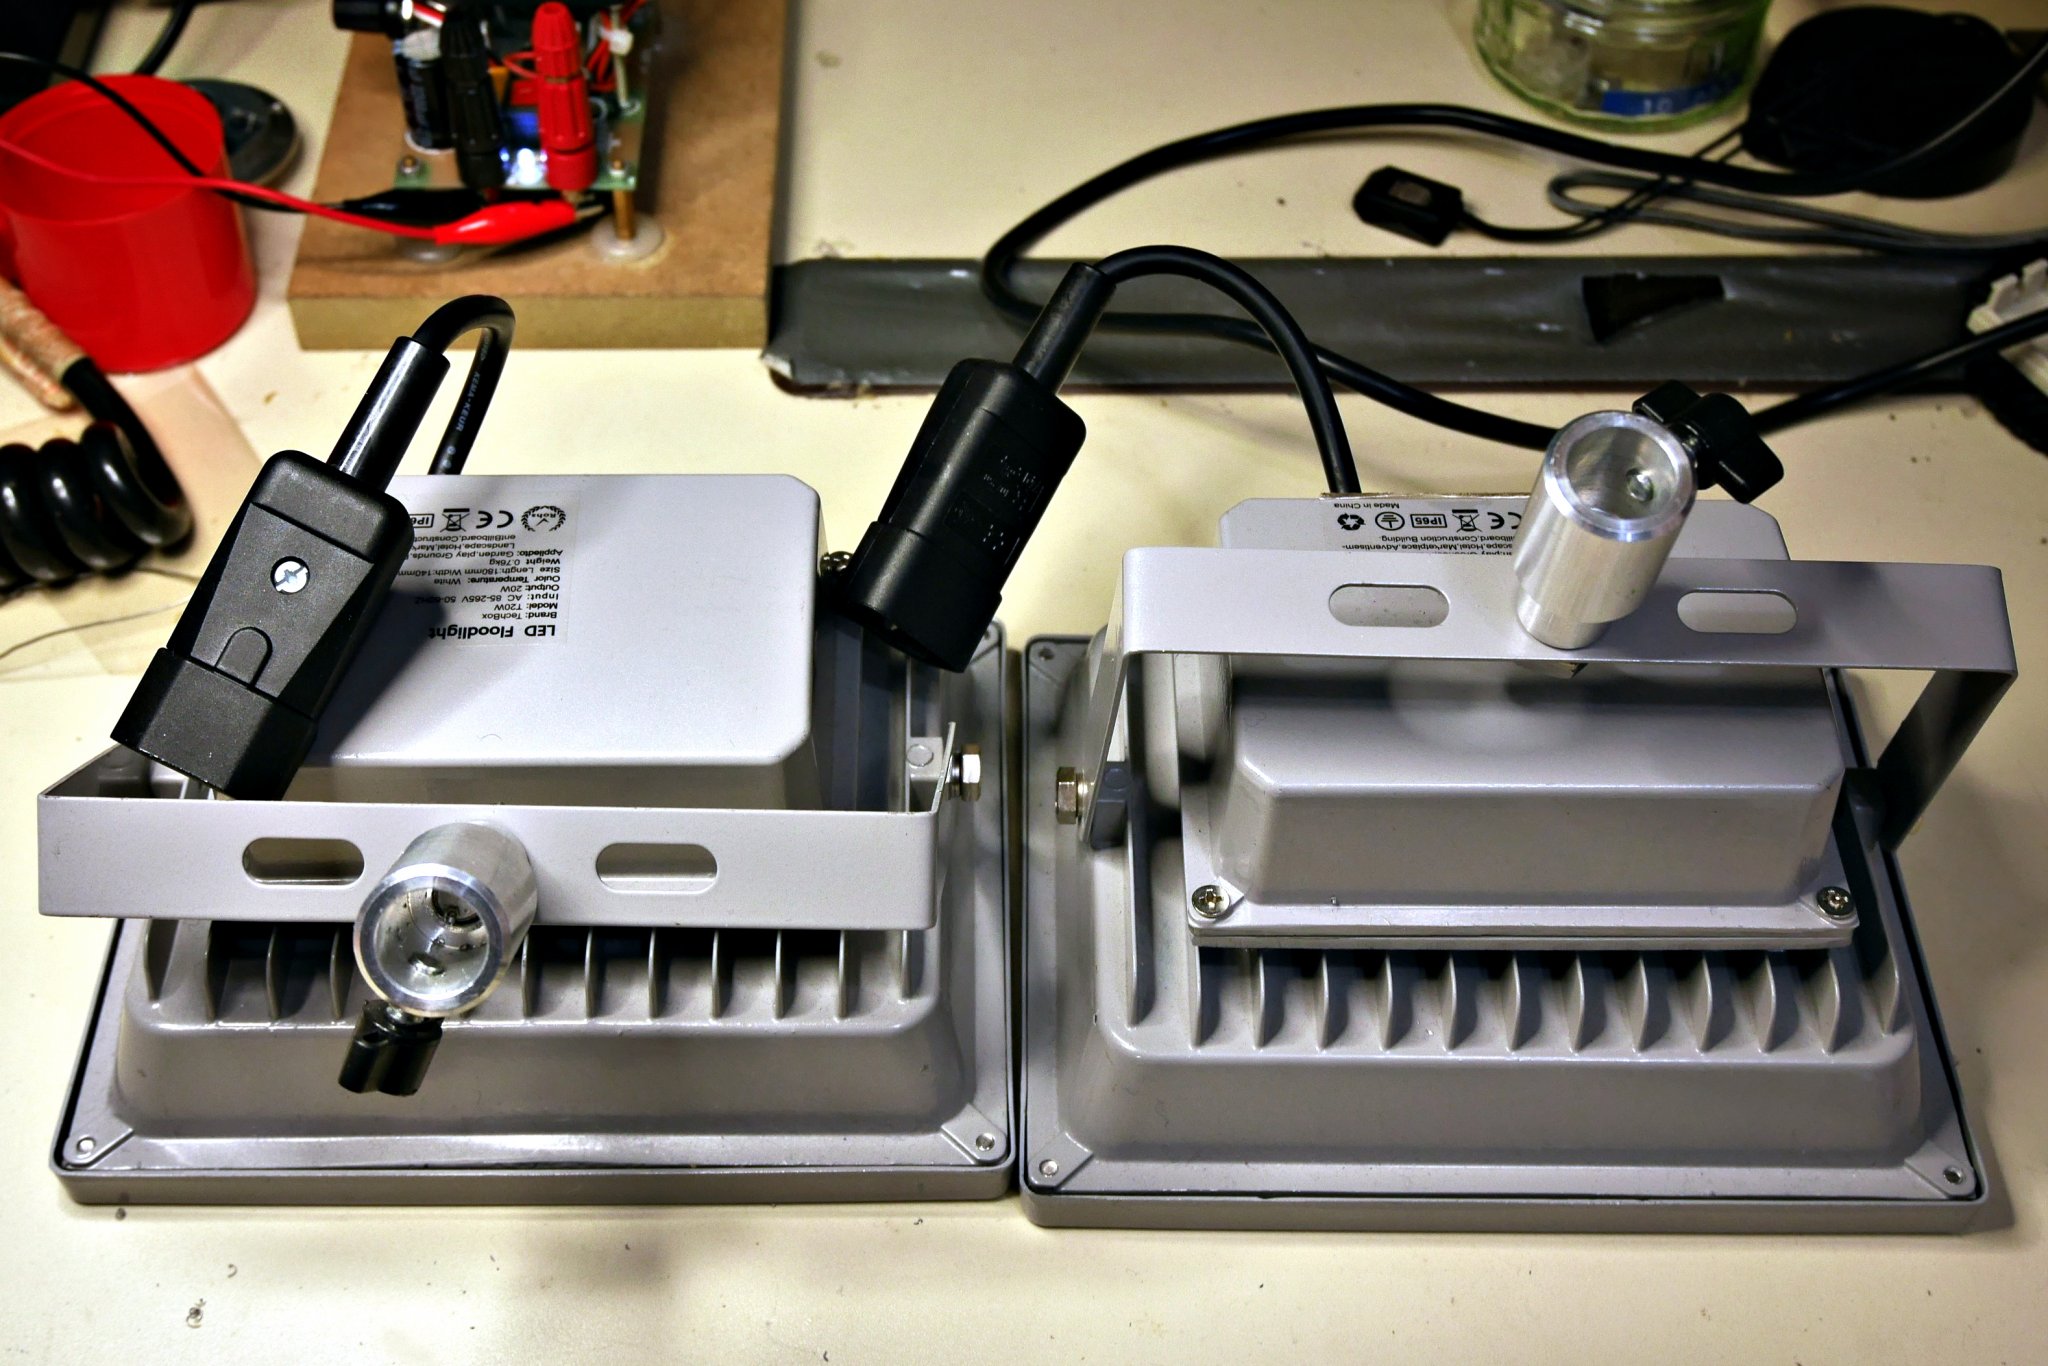
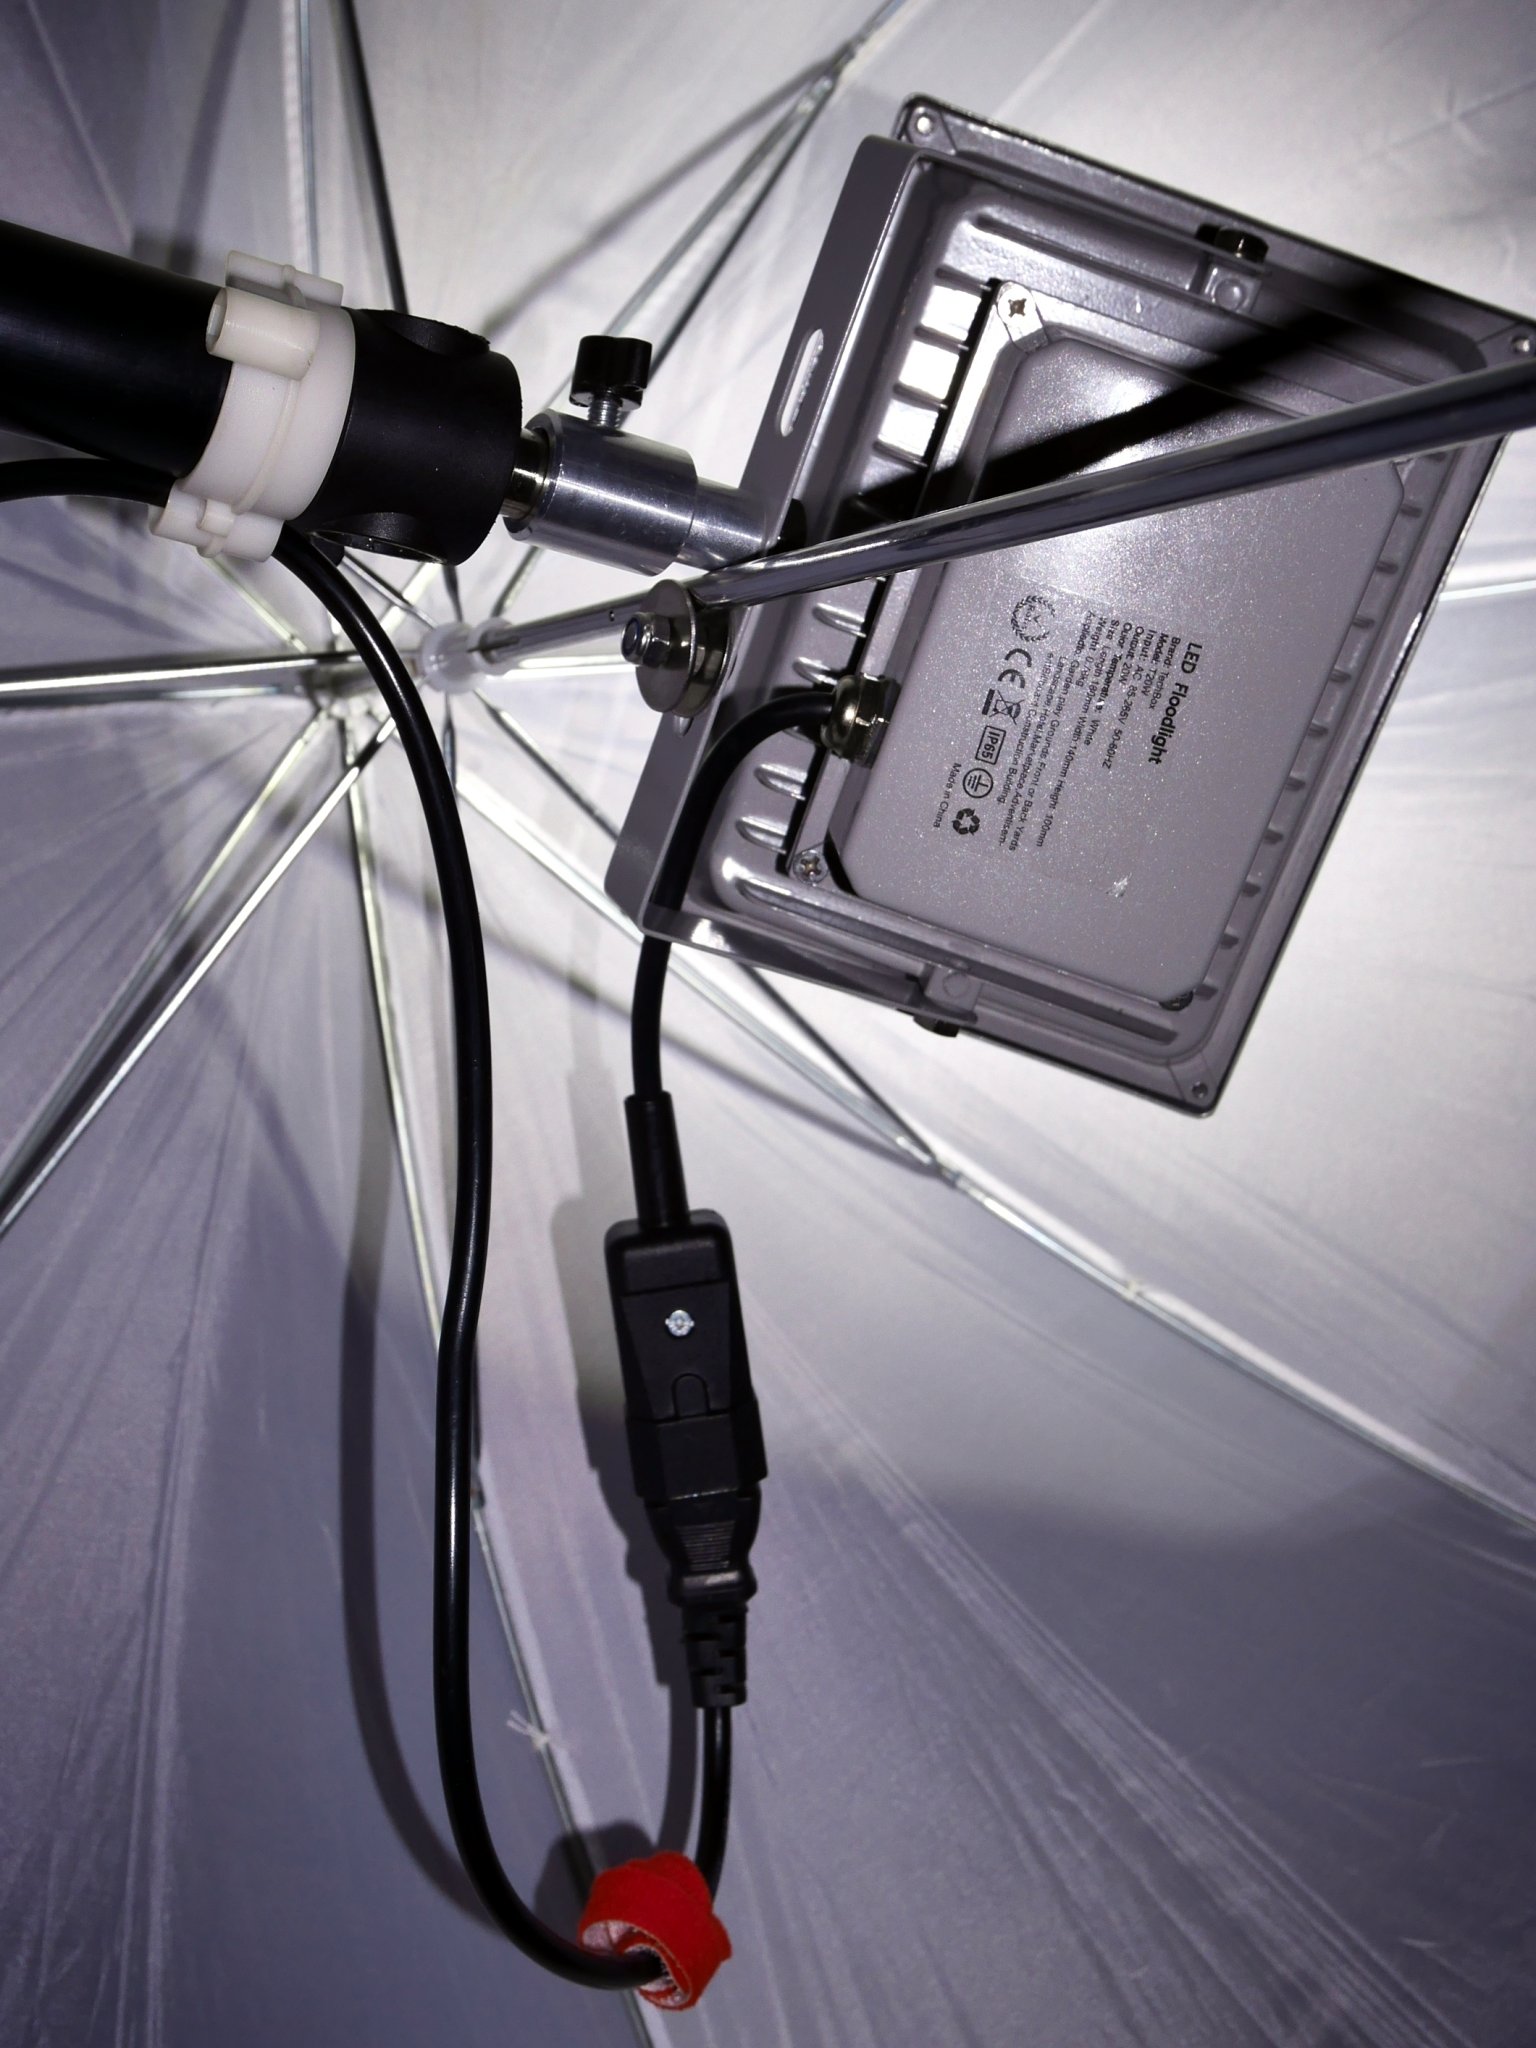
Firstly, I found some nice solid aluminium 16mm studio lighting type sockets. These came fitted to some cheap scenery holders (£2 each on eBay) . It was cheaper to purchase them this way than to purchase the sockets separately.
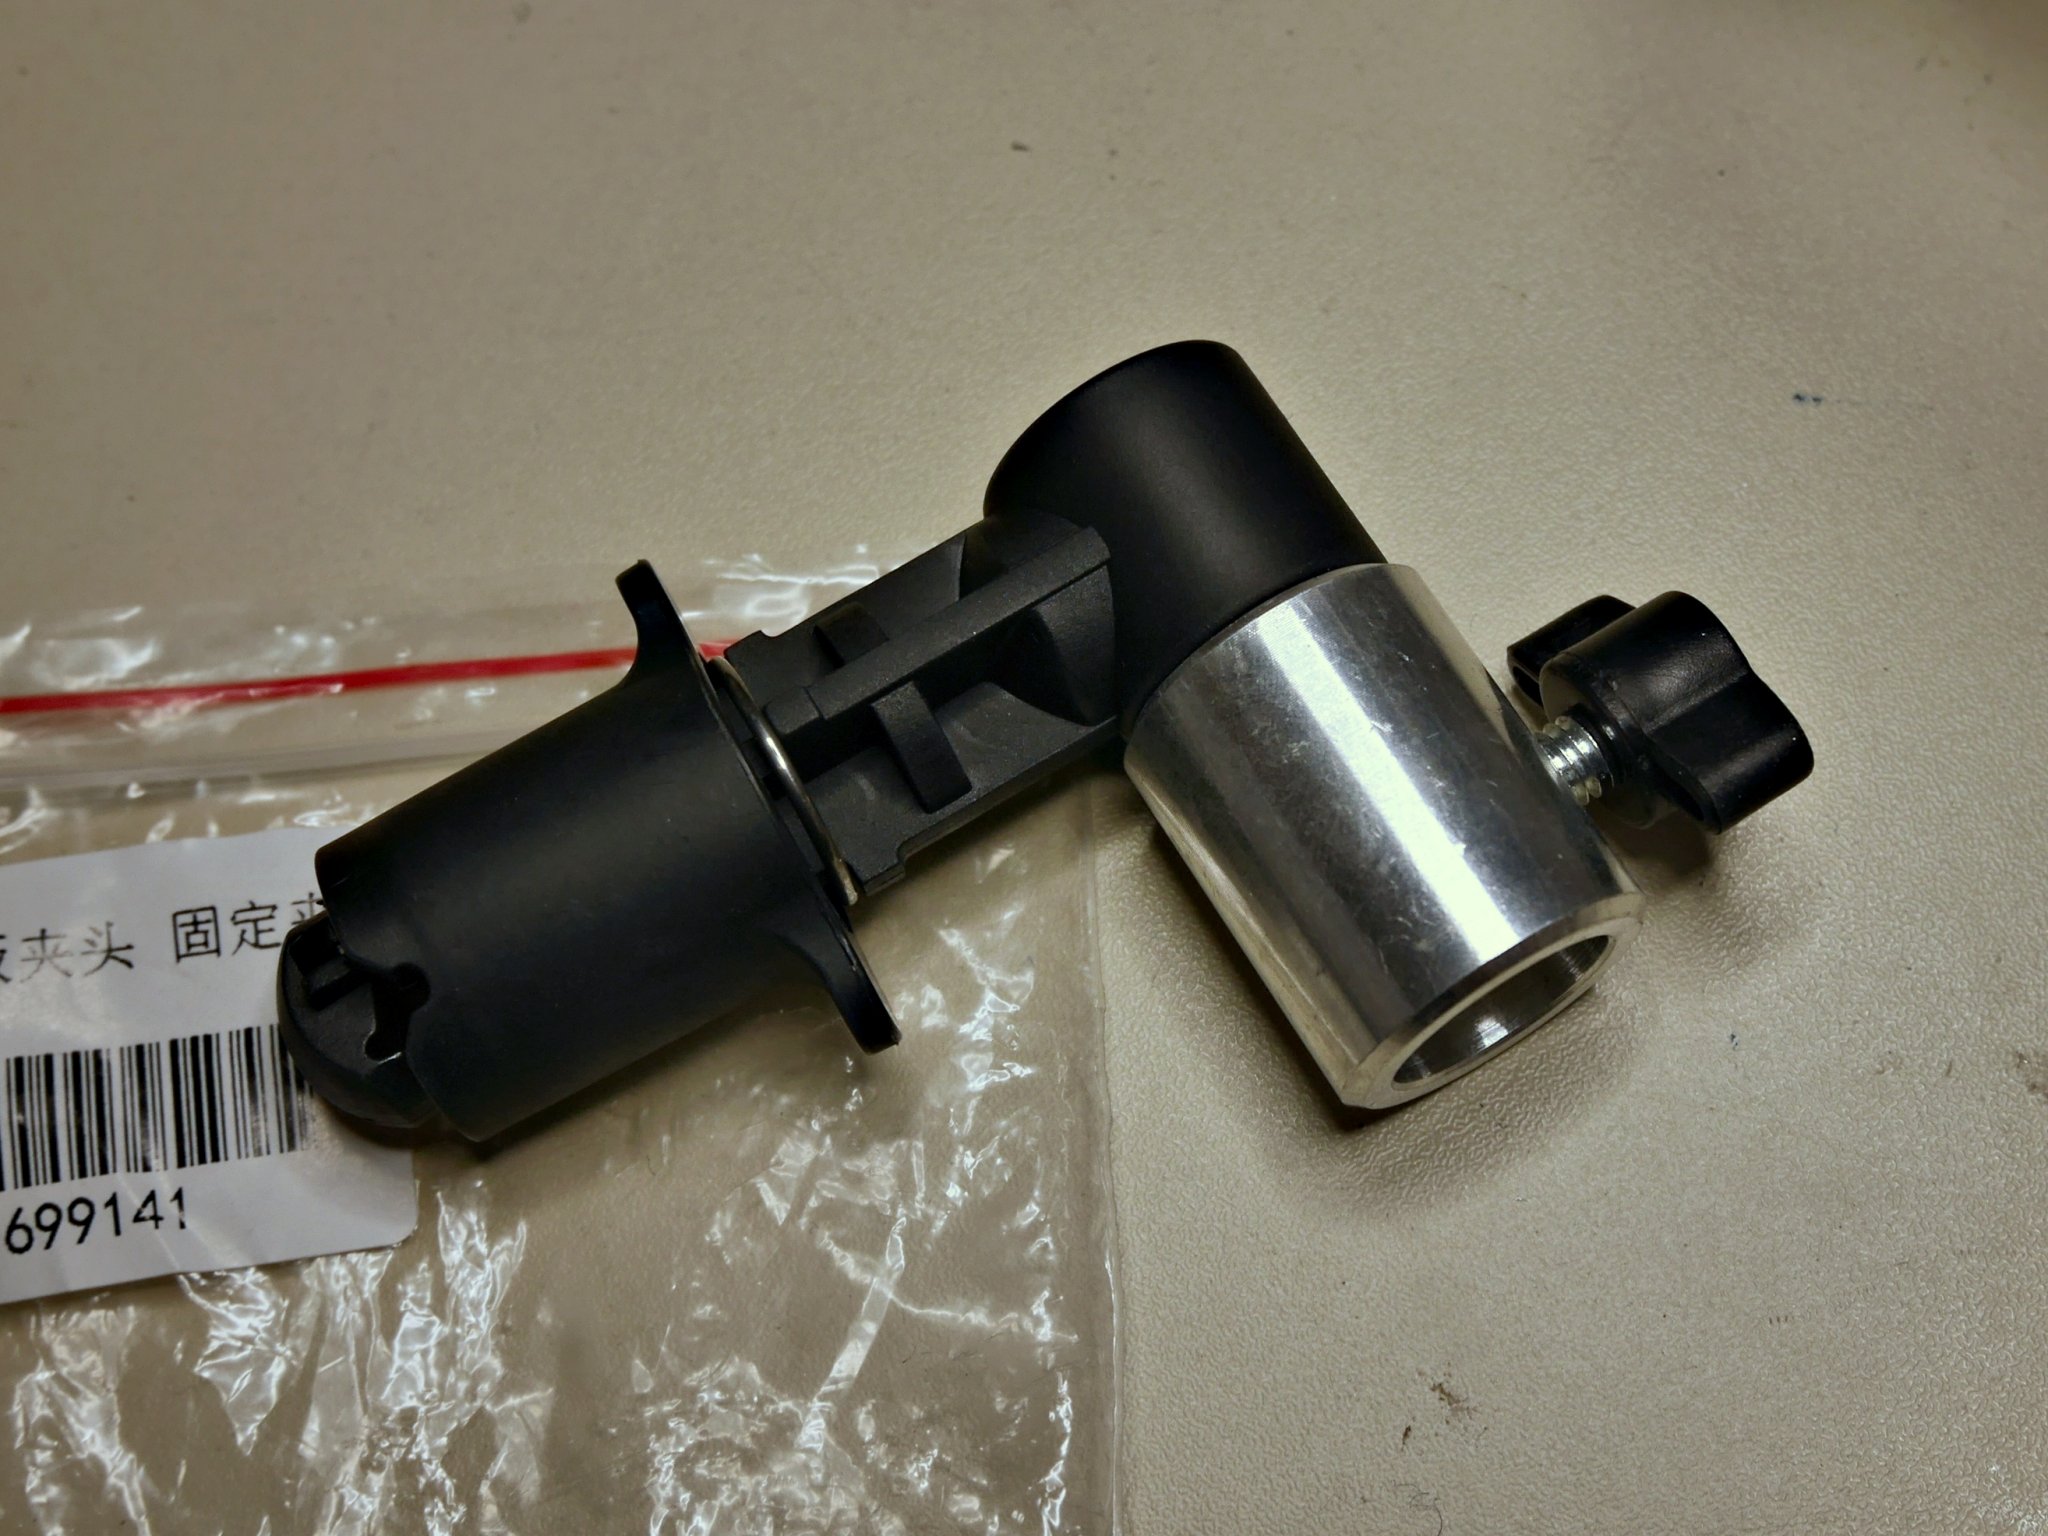
I removed the plastic part of the scenery holders and binned them. Then I tapped M10 x 1.5mm threads into the small-ends of the remaining aluminium sockets.
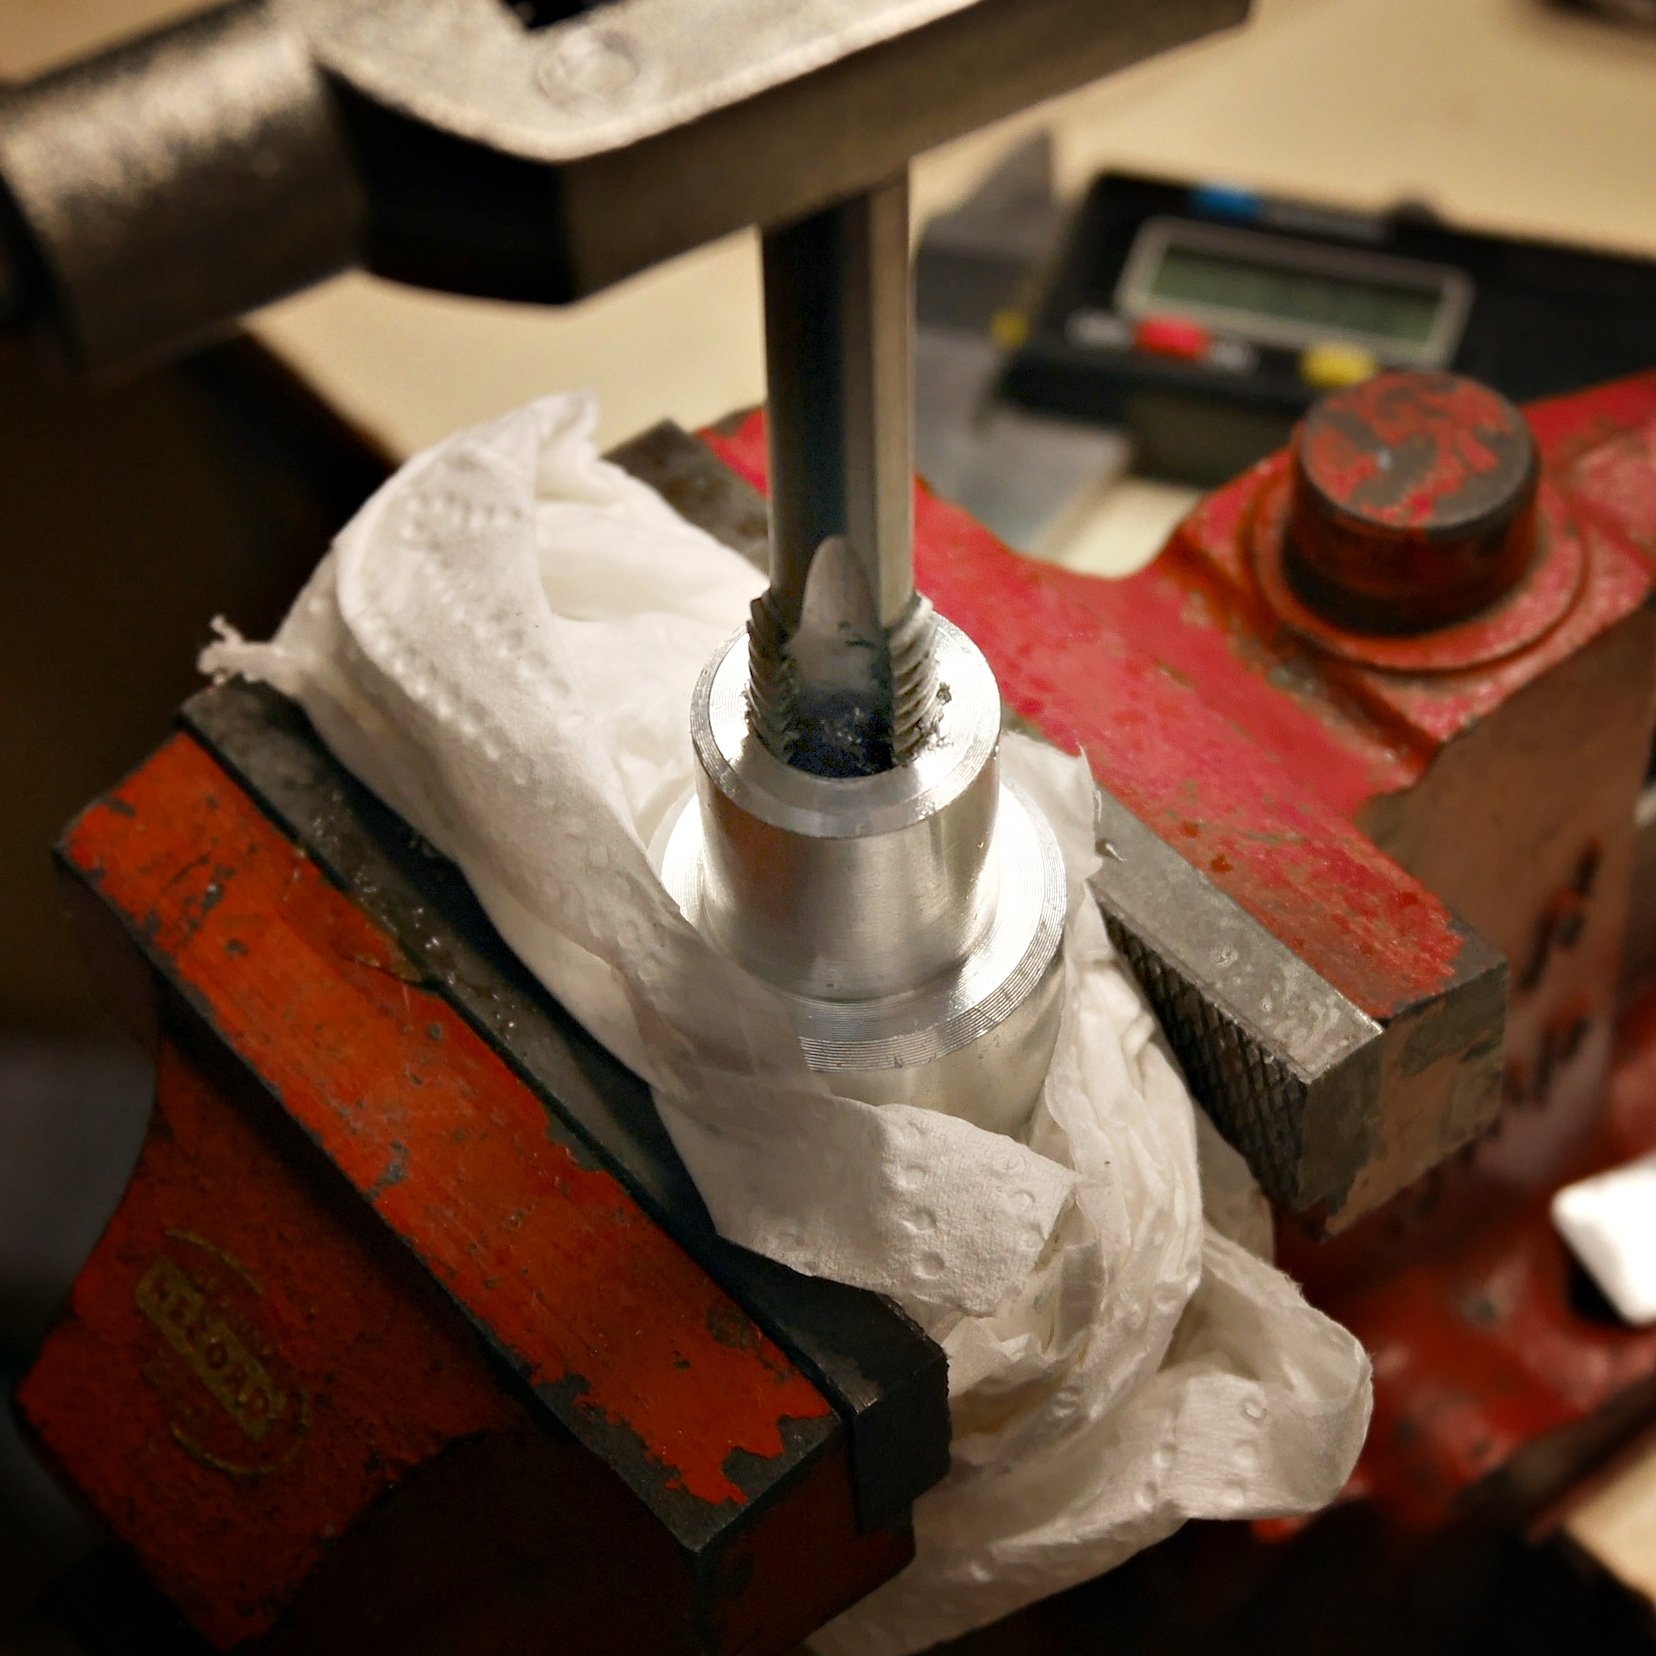
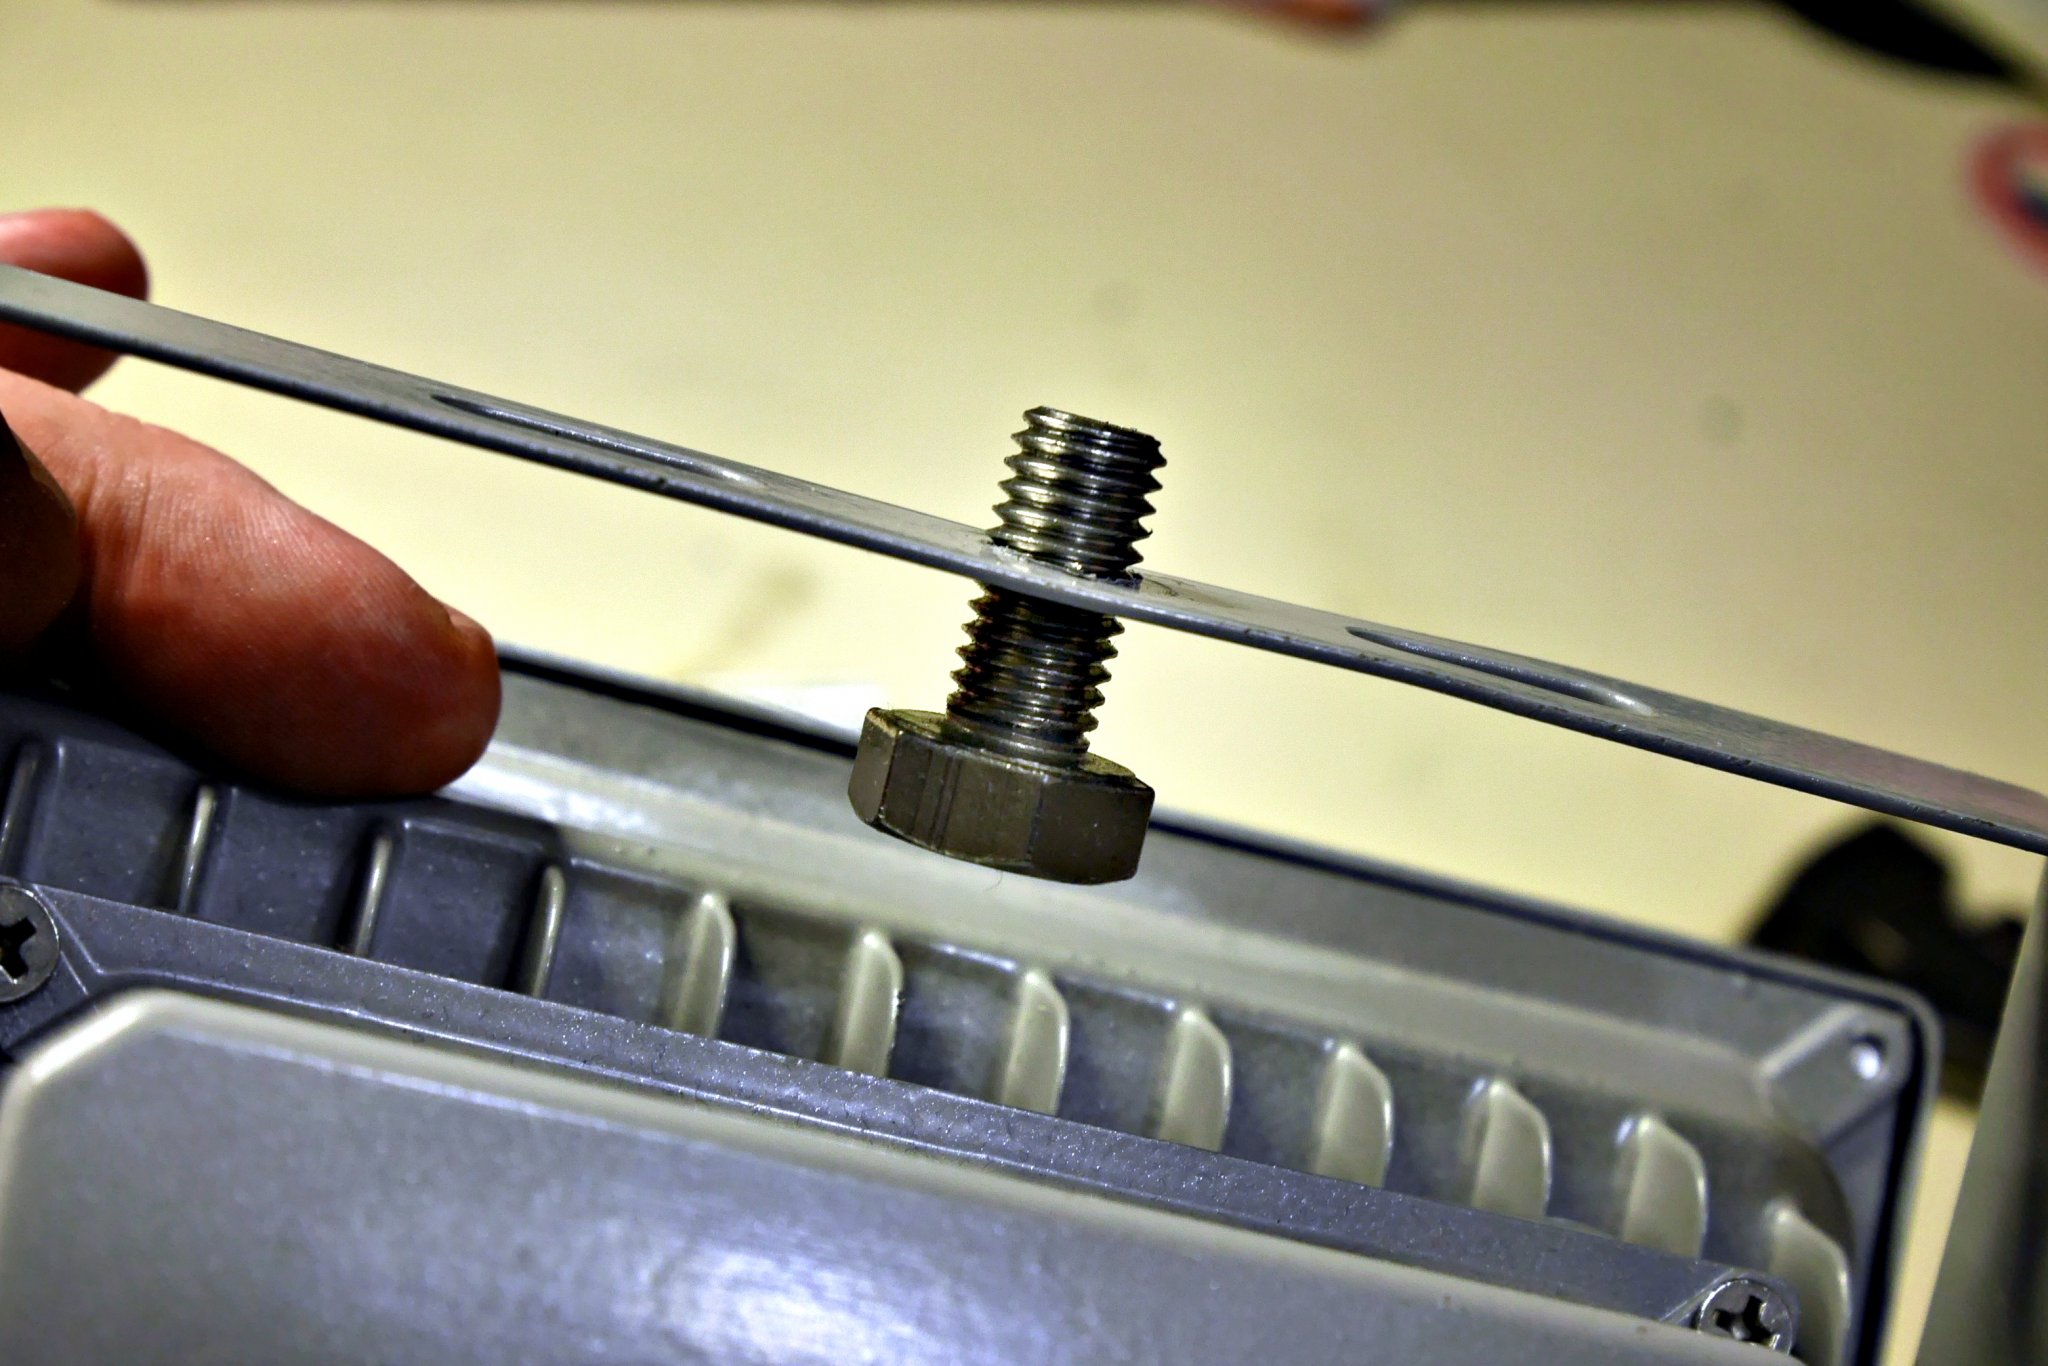
I also tapped M10 threads into the lamps’ mounting brackets. This thread effectively acts as a “captive” lock-nut and prevents the bolt from working loose.
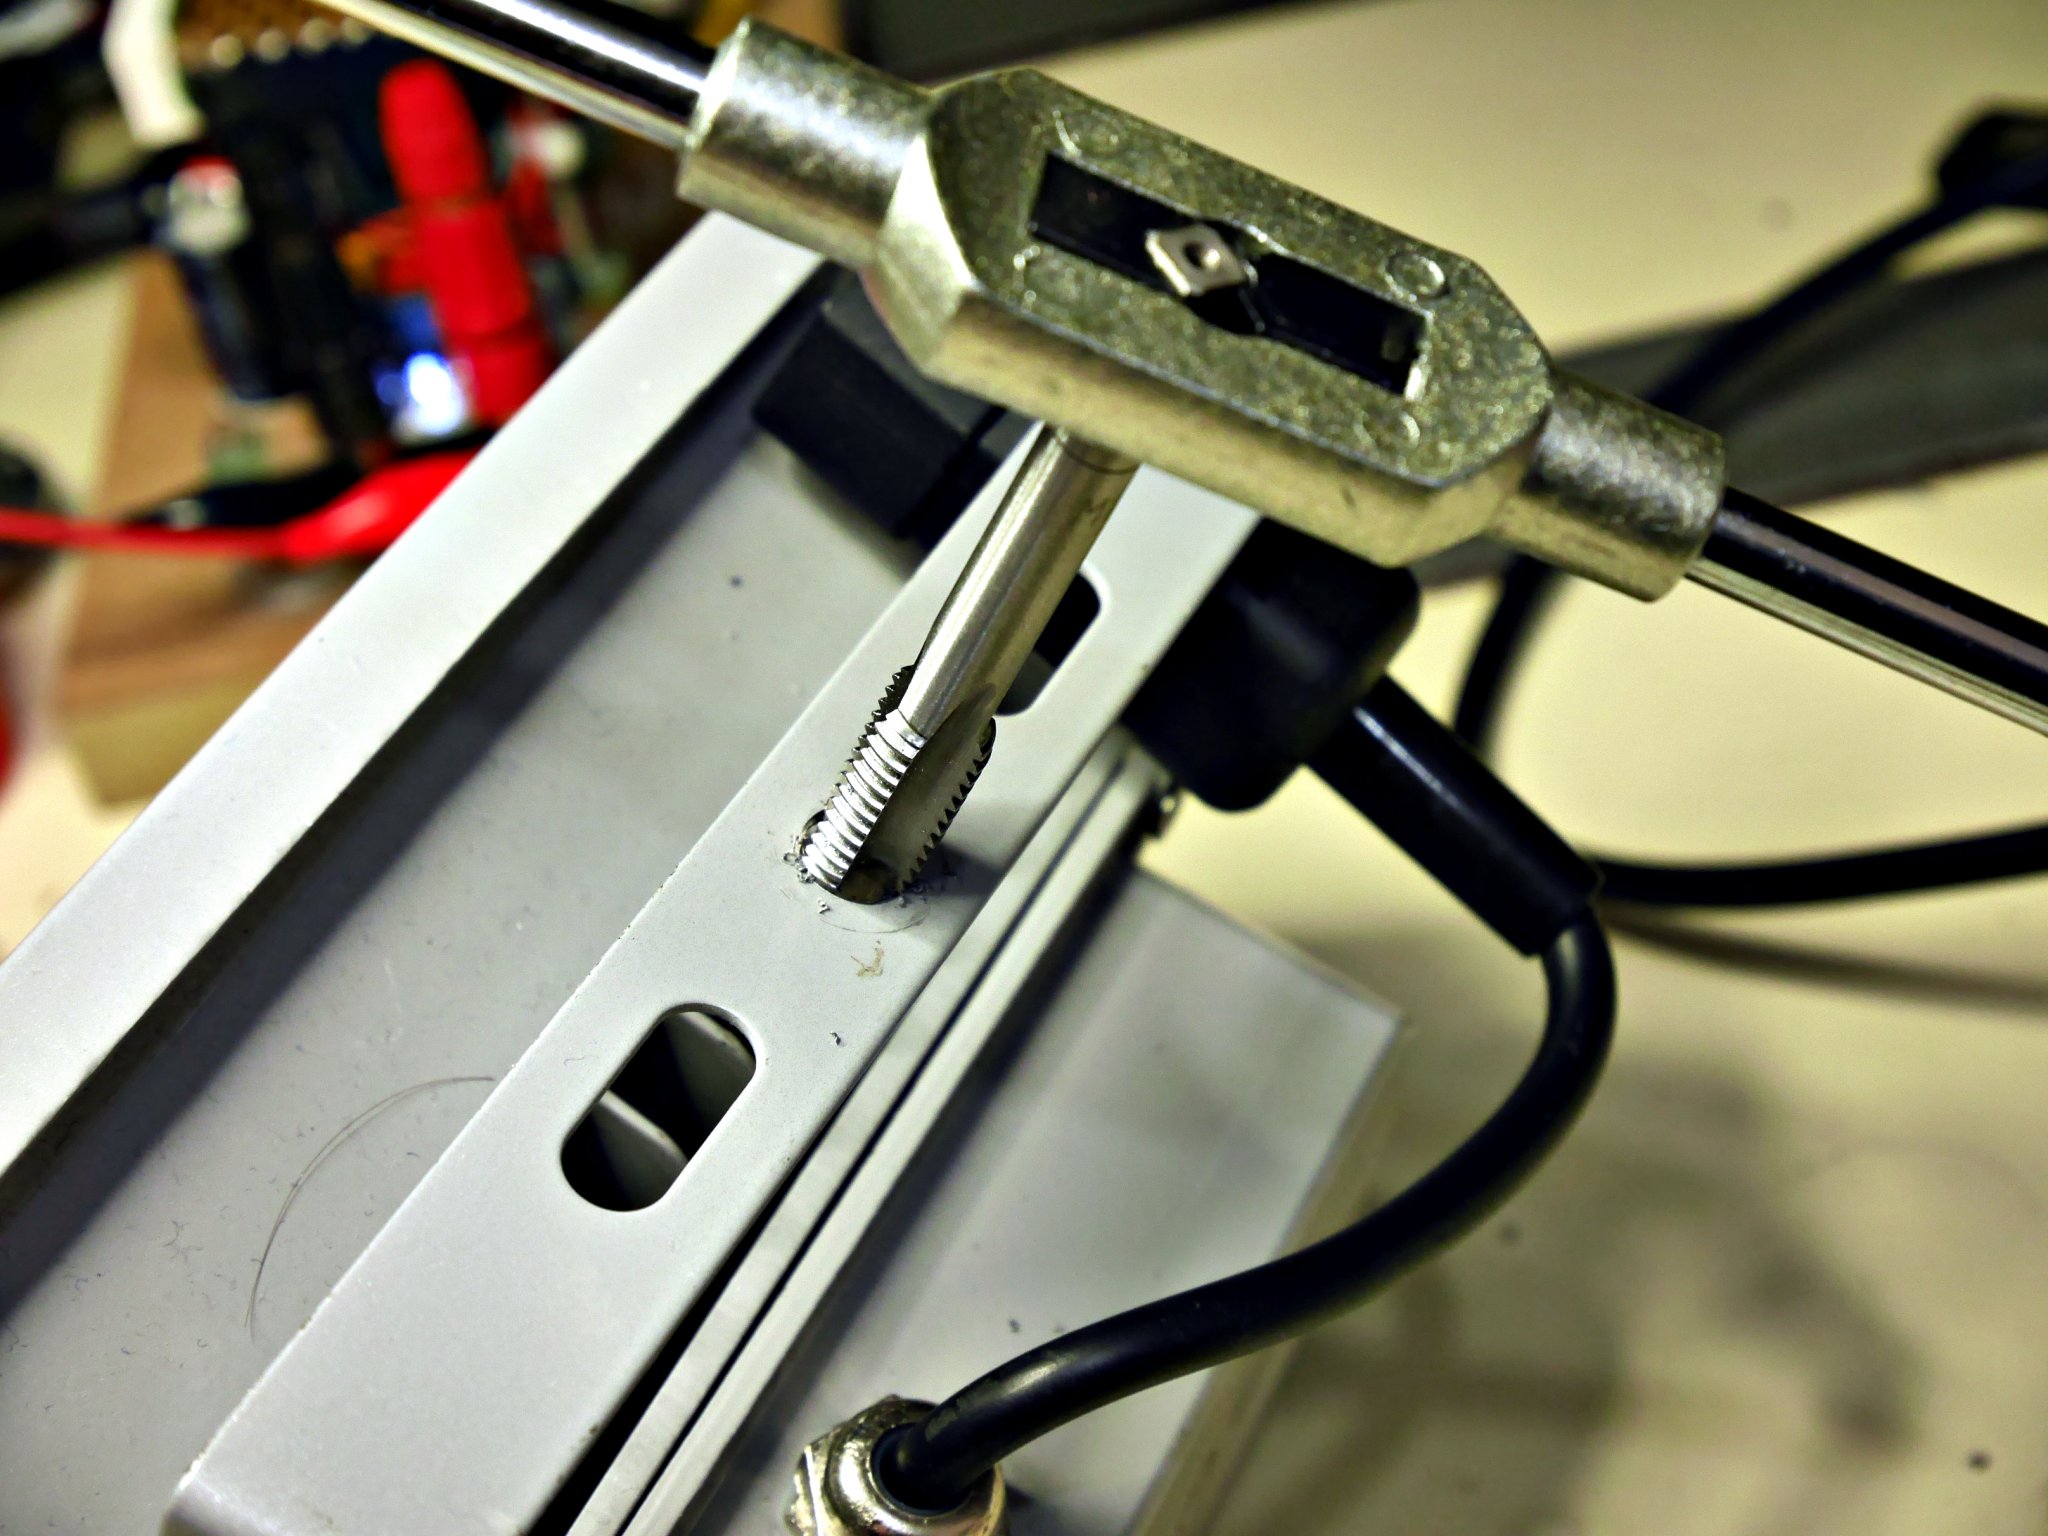
I then used some left-over M10 x 25mm stainless steel bolts to bolt the tapped spigot sockets to the tapped lamp bracket.
Then I needed to make some sort of electrical connection. There are various ways to do this. I chose rewirable three-pin IEC 60320 C14 male connectors. The connecting cords on these units were only about 30cm long. Normally this connection would go into a junction box. But I wanted to make these units compatible with my other studio kit. My studio flash heads have standard detachable IEC 60320-C13 female PC-type leads, that connect the units to the mains. In fact, all my fixed 16mm-spigot lighting mounts and booms are equipped with compatible IEC 60320-C13 leads. So it made sense to use compatible IEC connections on these units too.
Then I cleaned-away all the dust and swarf, and fitted the modified units to the 16mm spigots on my studio booms. Finally, I connected the units to mains and enjoyed a jolly good play…
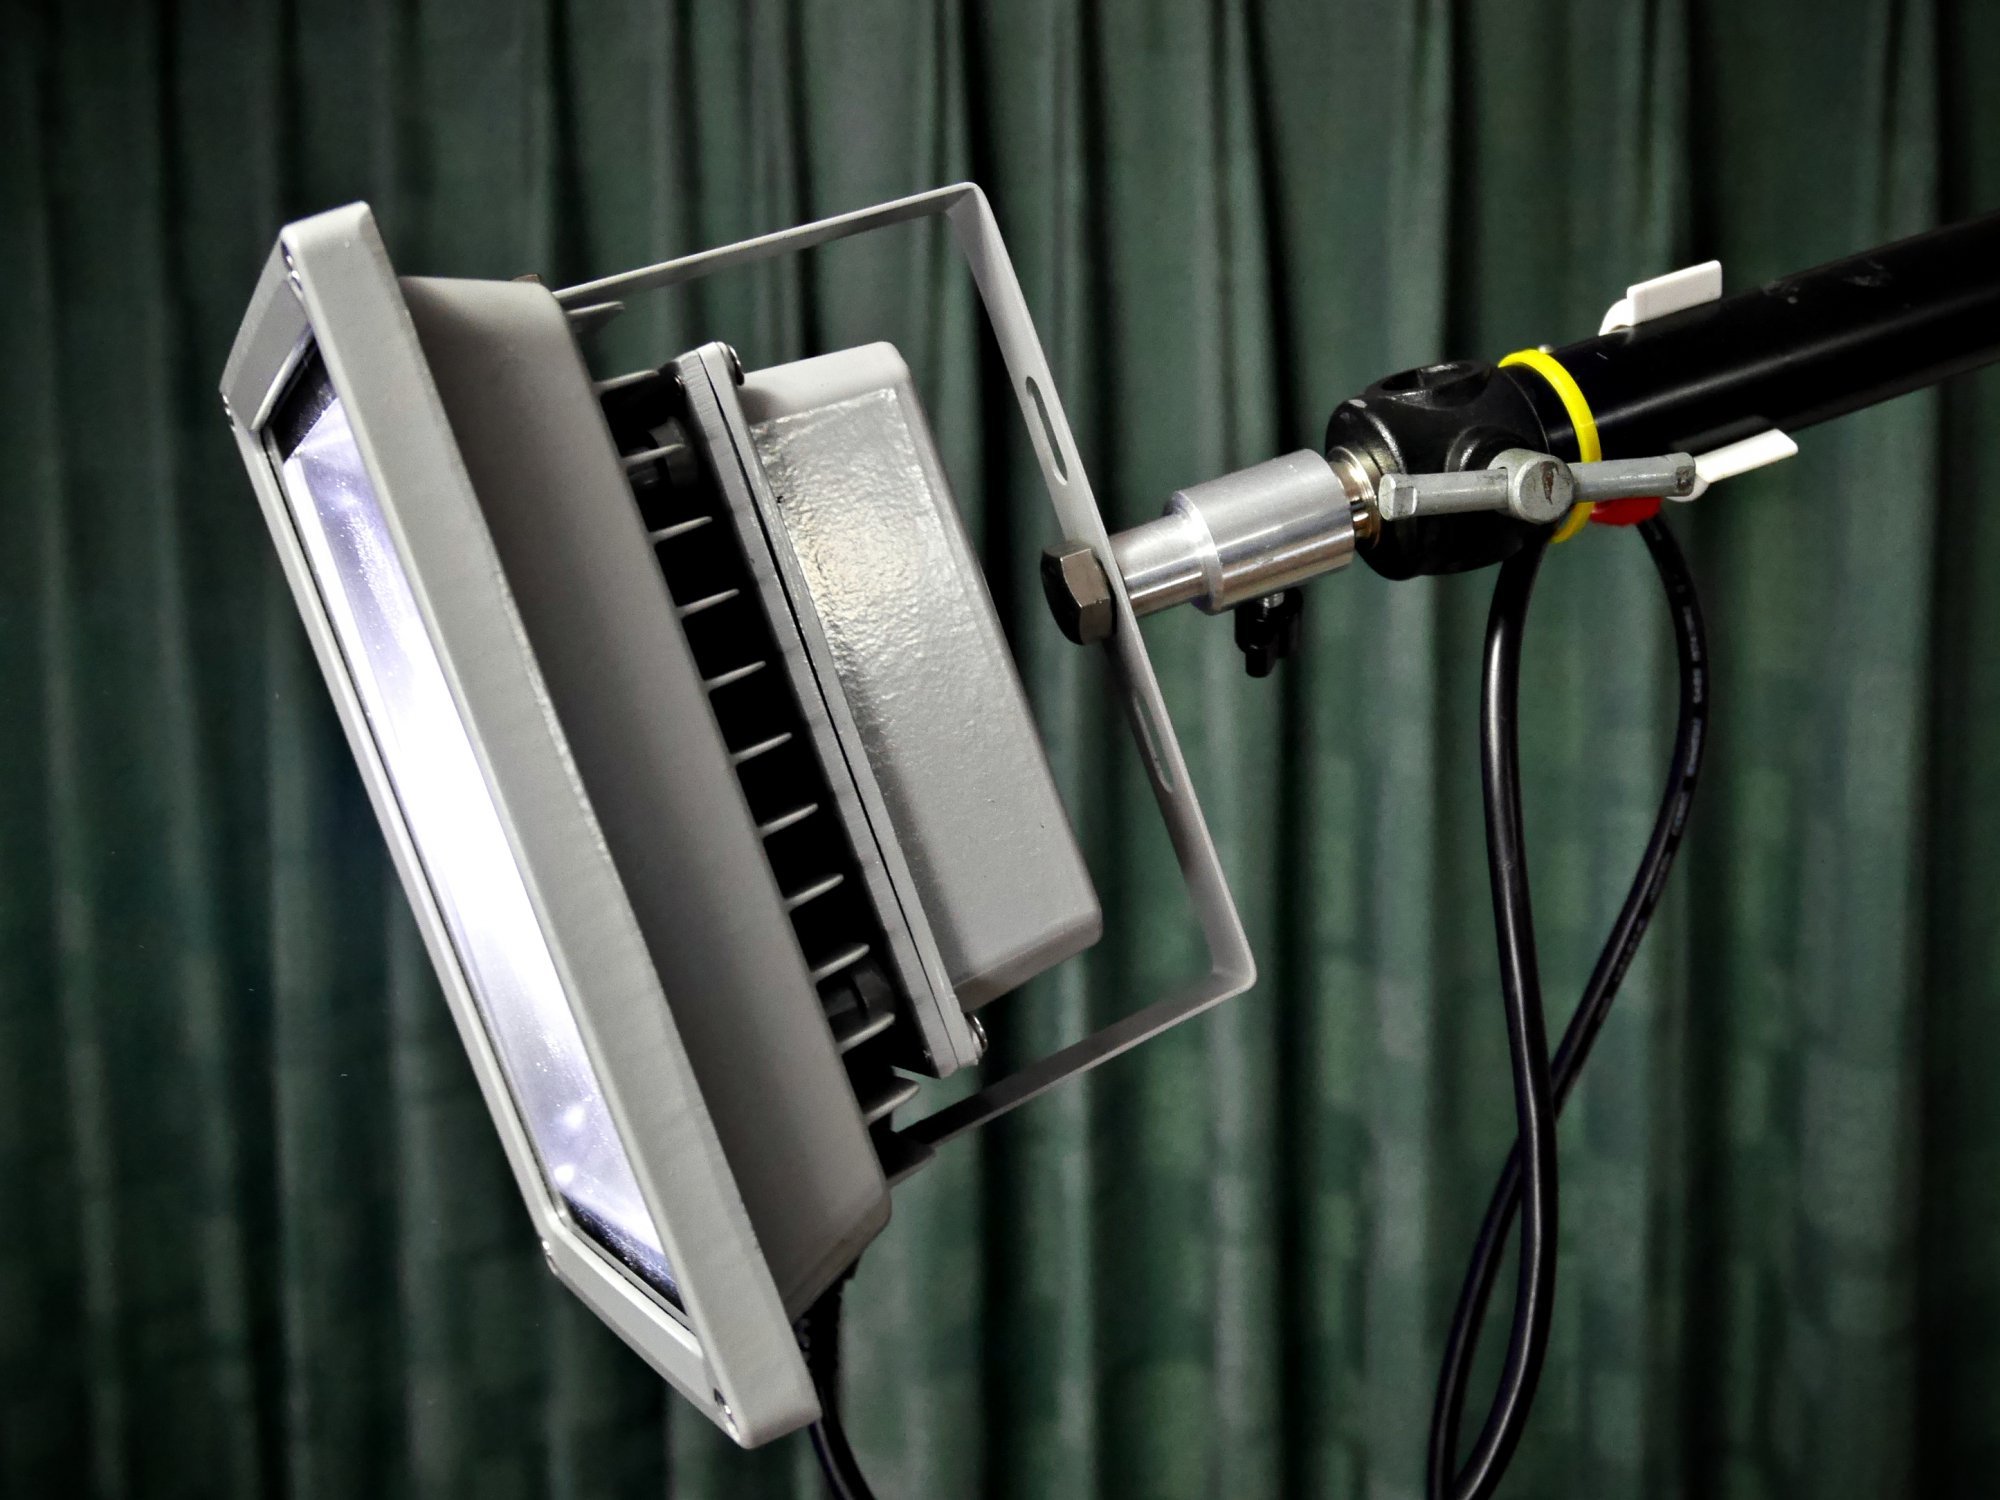
Granted, it is a bit of of a hassle making the studio brollies fit. I am working on a better solution for this than the one shown below. However, for the time being, I have committed a little bodge, consisting of an M6 x 25mm stainless steel bolt, two 6mm x 25mm stainless “penny” washers and an M6 “NyLock” stainless steel nut. The brolly tube slides in snugly between the two 25mm penny washers. It is somewhat inelegant, but thus far it has proven perfectly adequate.
More importantly, if you scroll down a little, then you can see the very convenient IEC 60320 electrical connection too. My modified LED floodlight is powered by the same mains lead that I normally use for my studio flash.
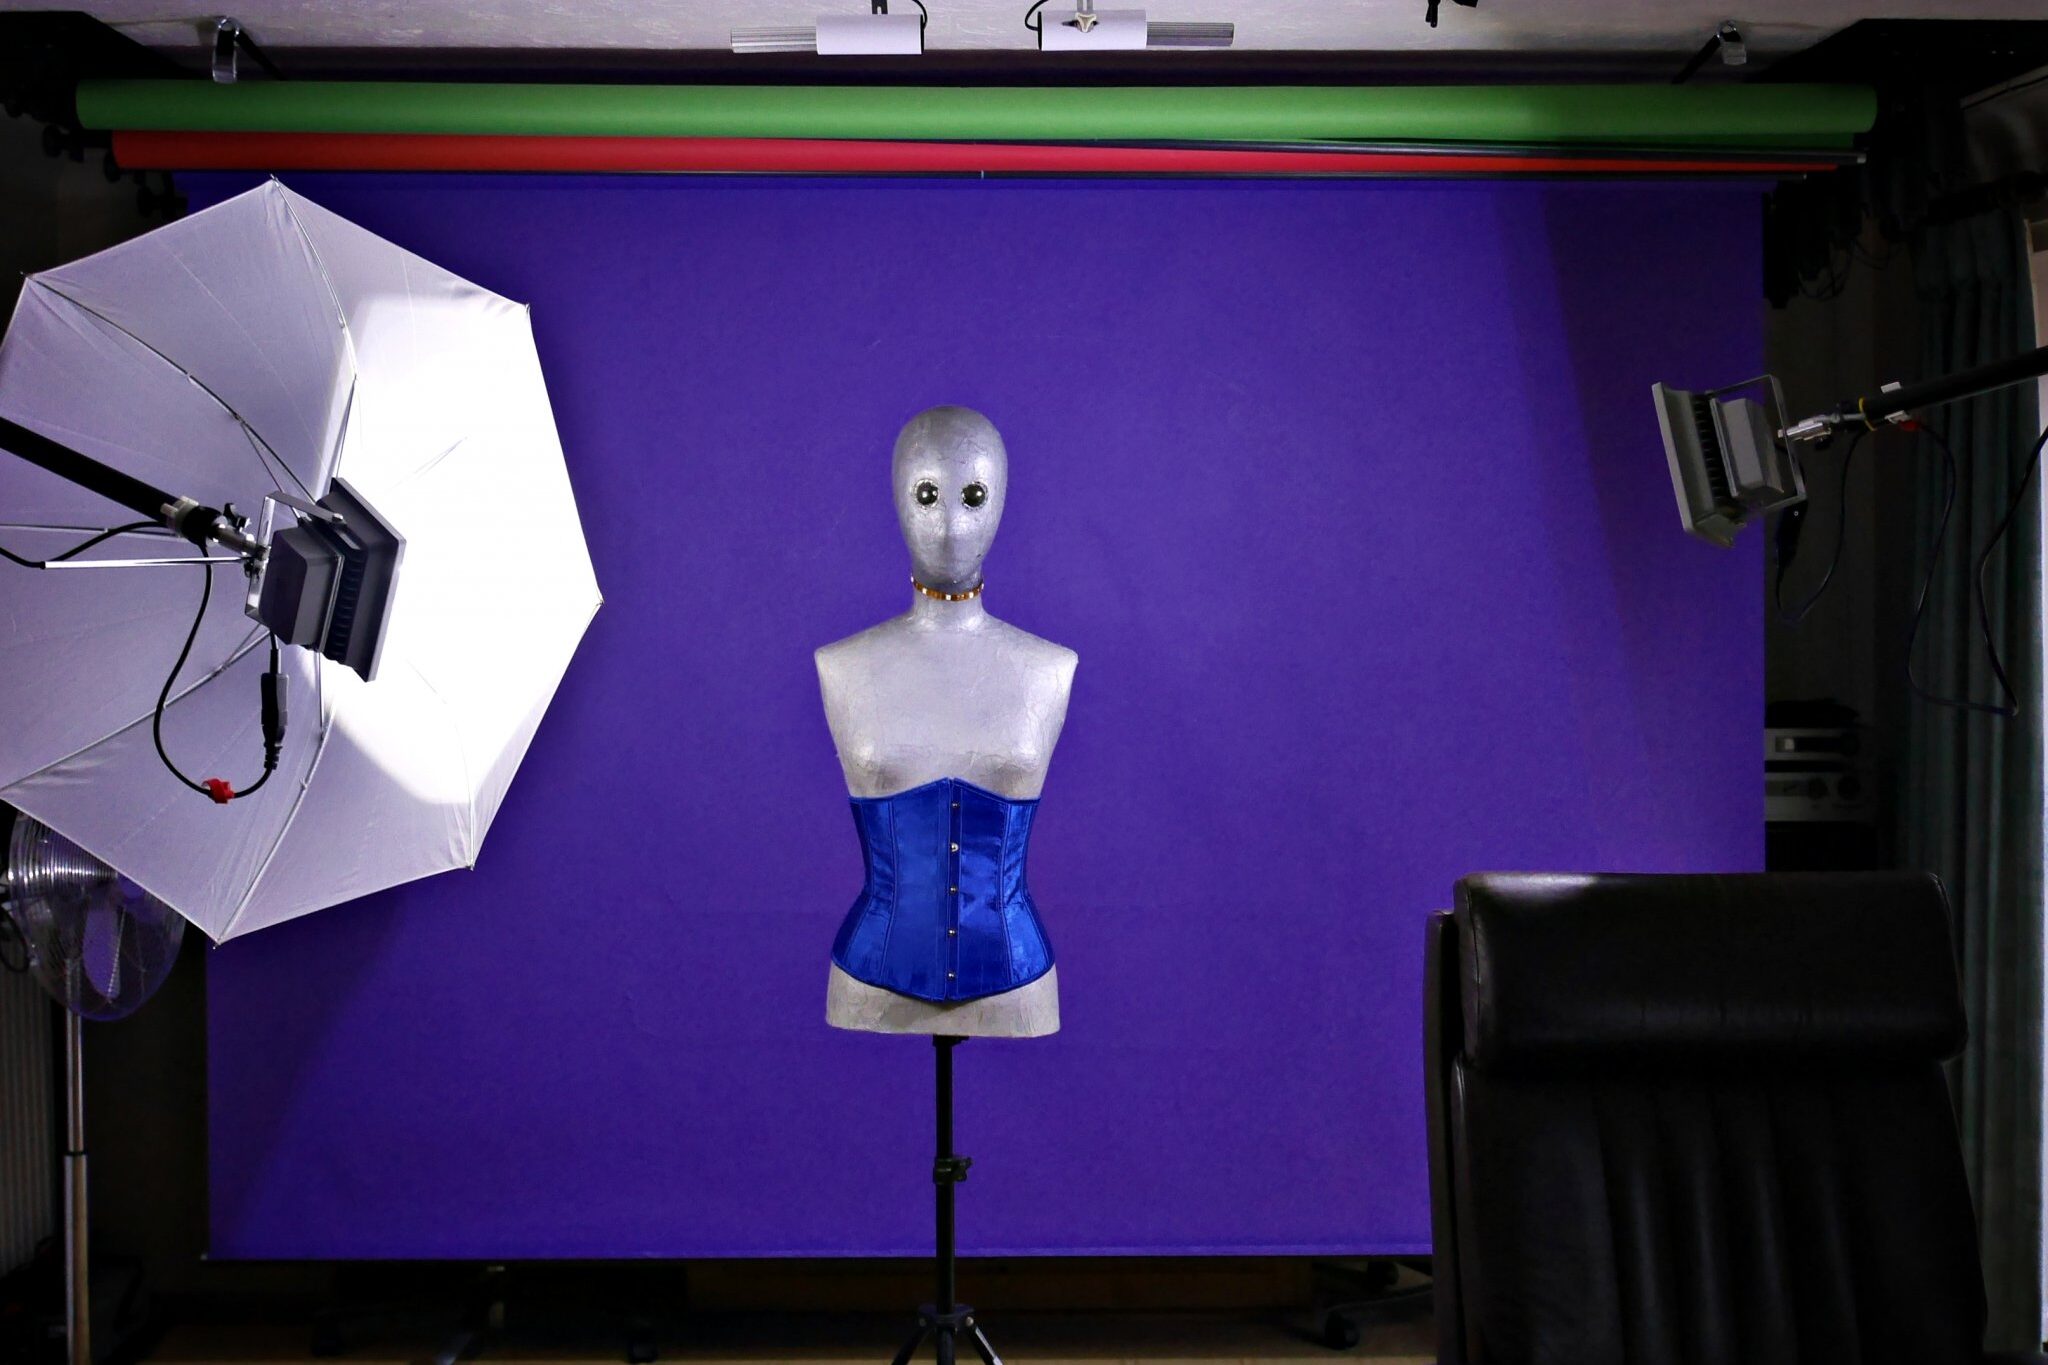
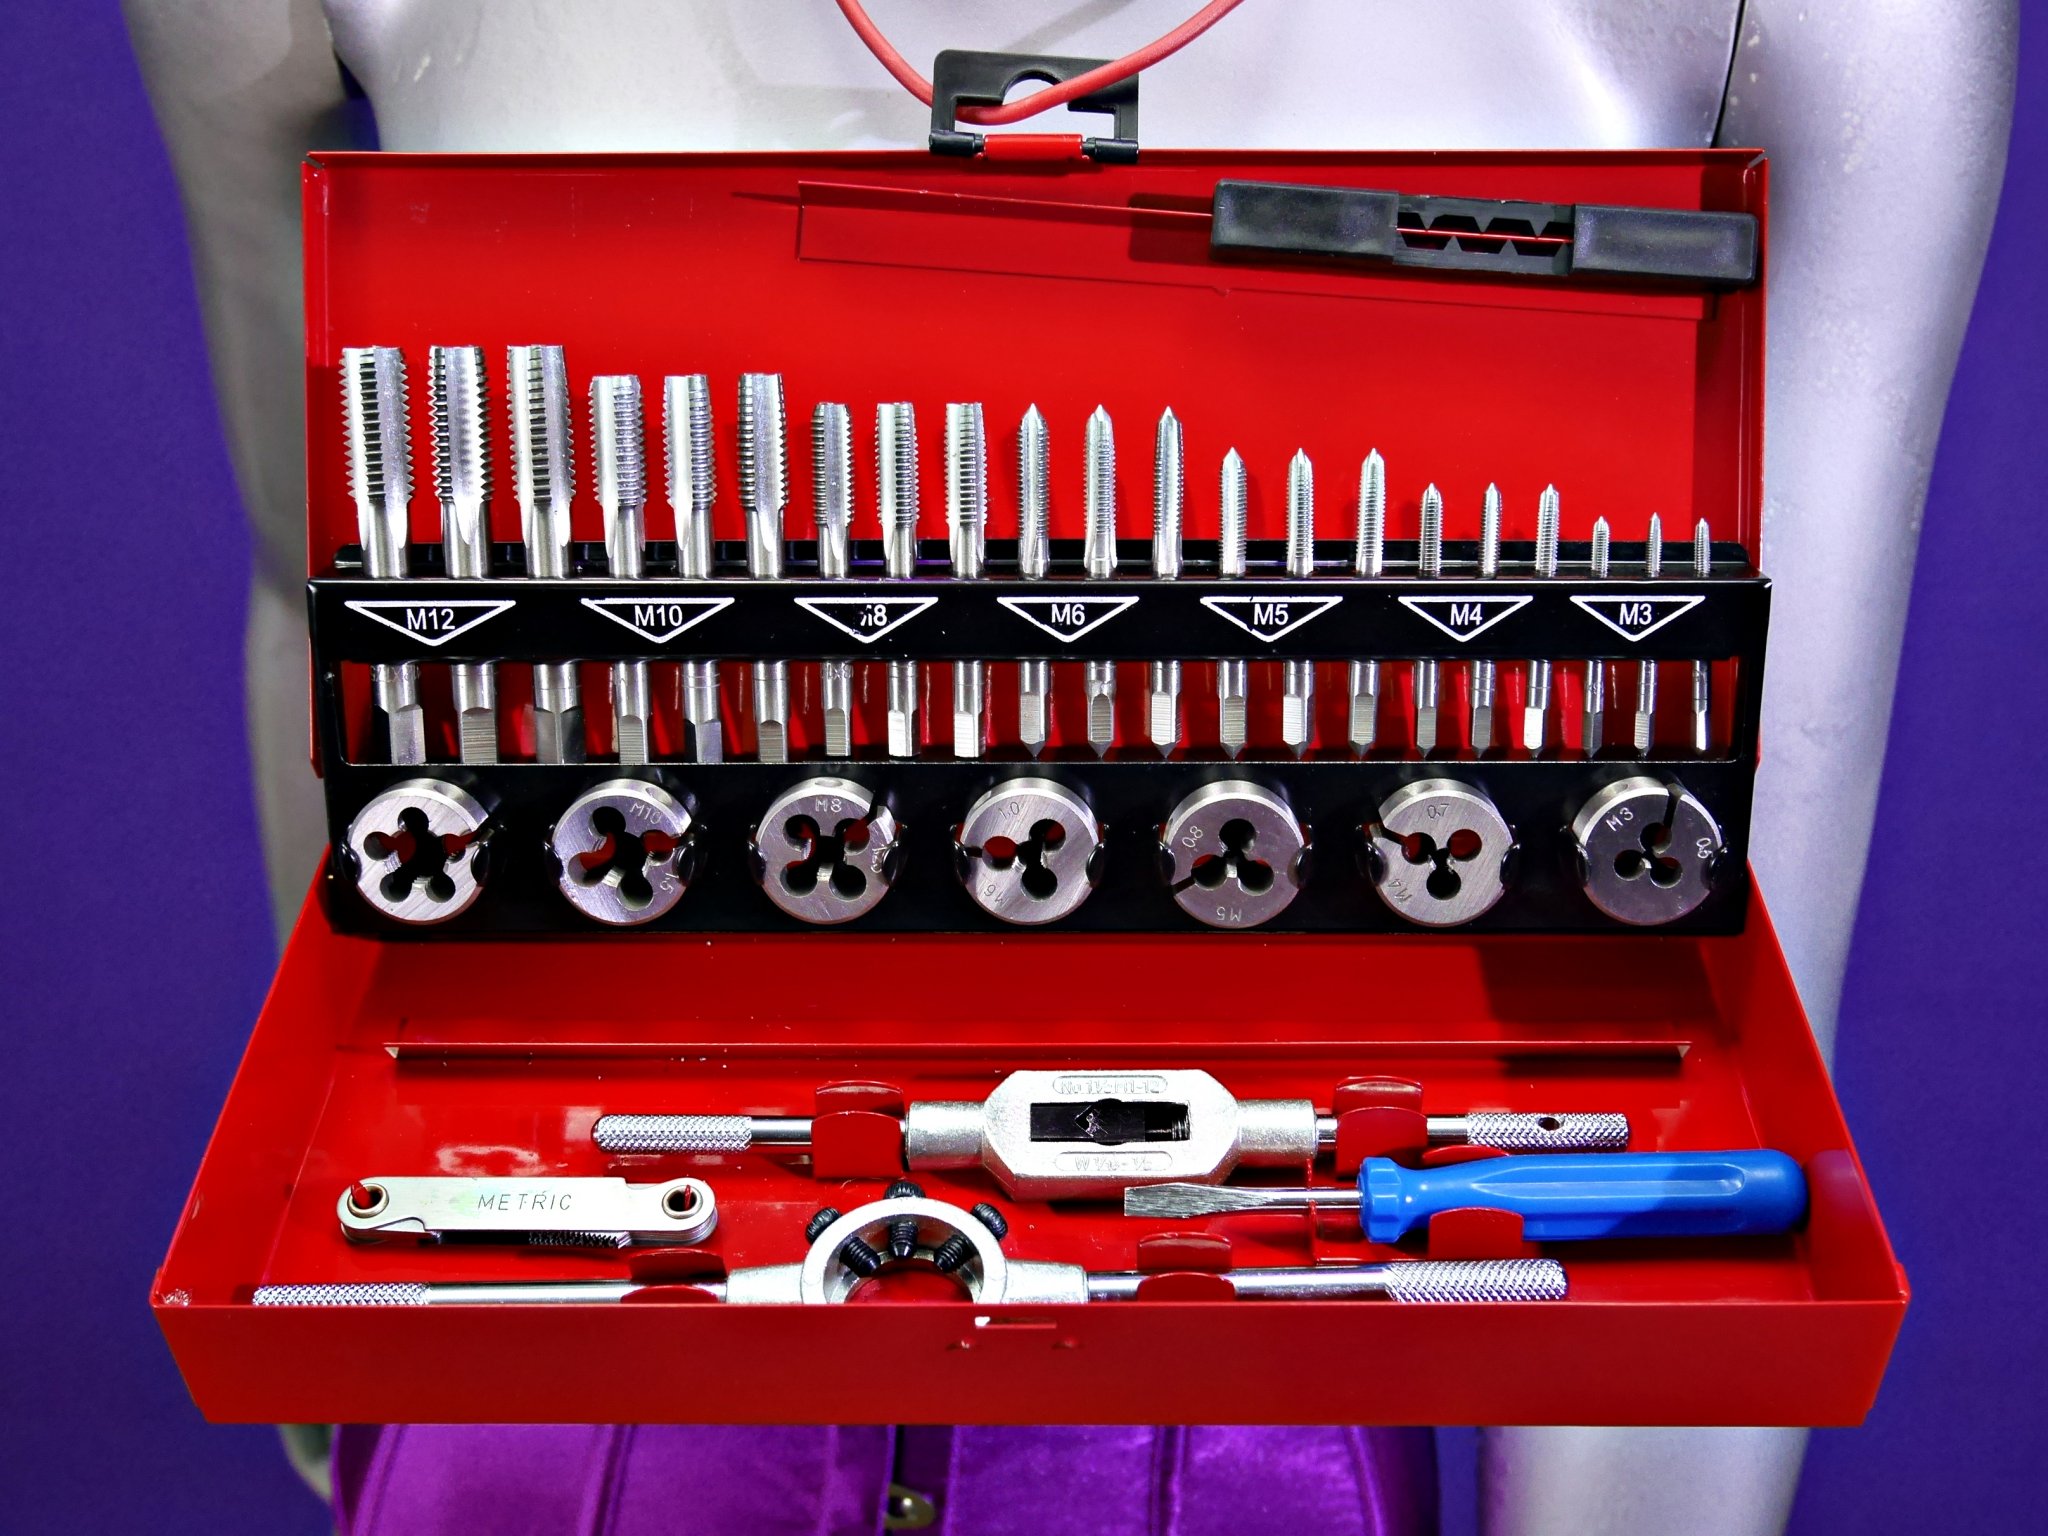
In order to test my new budget-priced continuous lighting, here is a a snap of my trusty metric tap-and-die set. I chose this because one of the advantages of continuous lighting becomes apparent when one is taking pictures of small shiny things. It’s very hard to read the numbers on tools such as this when using studio flash. But these LED lamps are nigh-on perfect for the task, because you can move them around in real time to eliminate the glare. This was quite literally pin-it-up then point-and-shoot…
Disclaimers
- It is your responsibility to ensure your studio/work area is safe.
- If you are making any electrical connections then you should consult a qualified electrician.
- In the UK, the other end of the IEC lead should be fitted with a BS1363A plug and a fuse of a suitable current value for the cable’s current rating, usually 3 or 5 amp.
- Eye protection should be worn when drilling or tapping metals.
- I have no relationship with either the supplier or manufacturer of the units described above.
- This is just one type of daylight LED currently on the market. Other types are available and may or may not be more suited to your needs.


2 Comments