Building and testing my 3D camera module
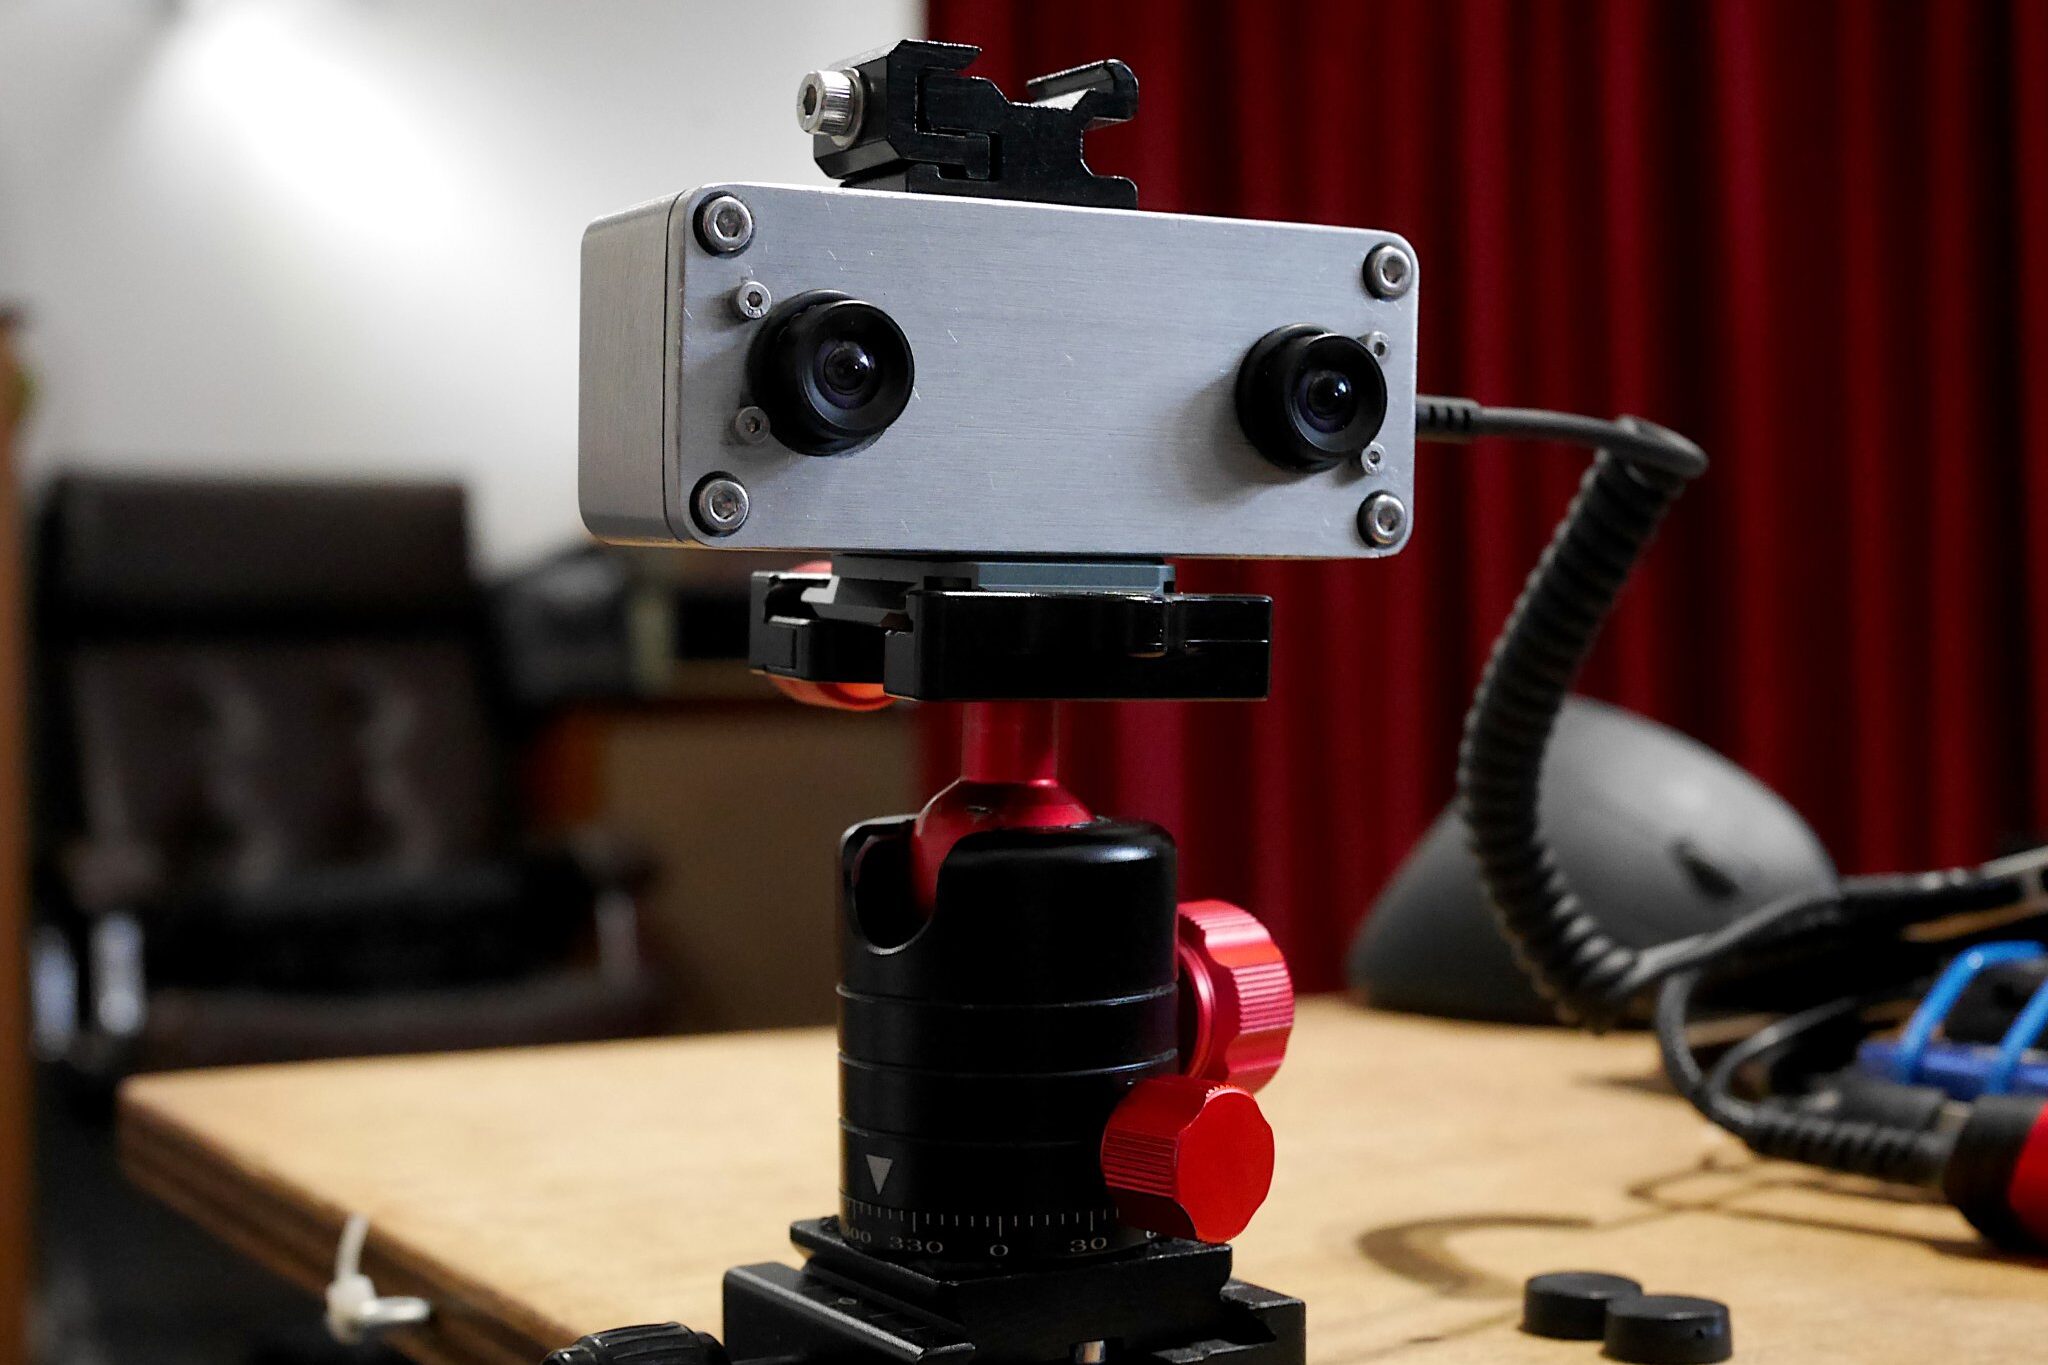
[Jump to Gallery] As part of my embryonic GNU/Linux digital camera project, I recently built a 3D camera module. Basically its a ELP board, in an aluminium 1590A type stomp box with a short internal USB3 extension lead. This is a small collection of processed images I created while I was testing my 3D camera module. I have also included some images of its construction.
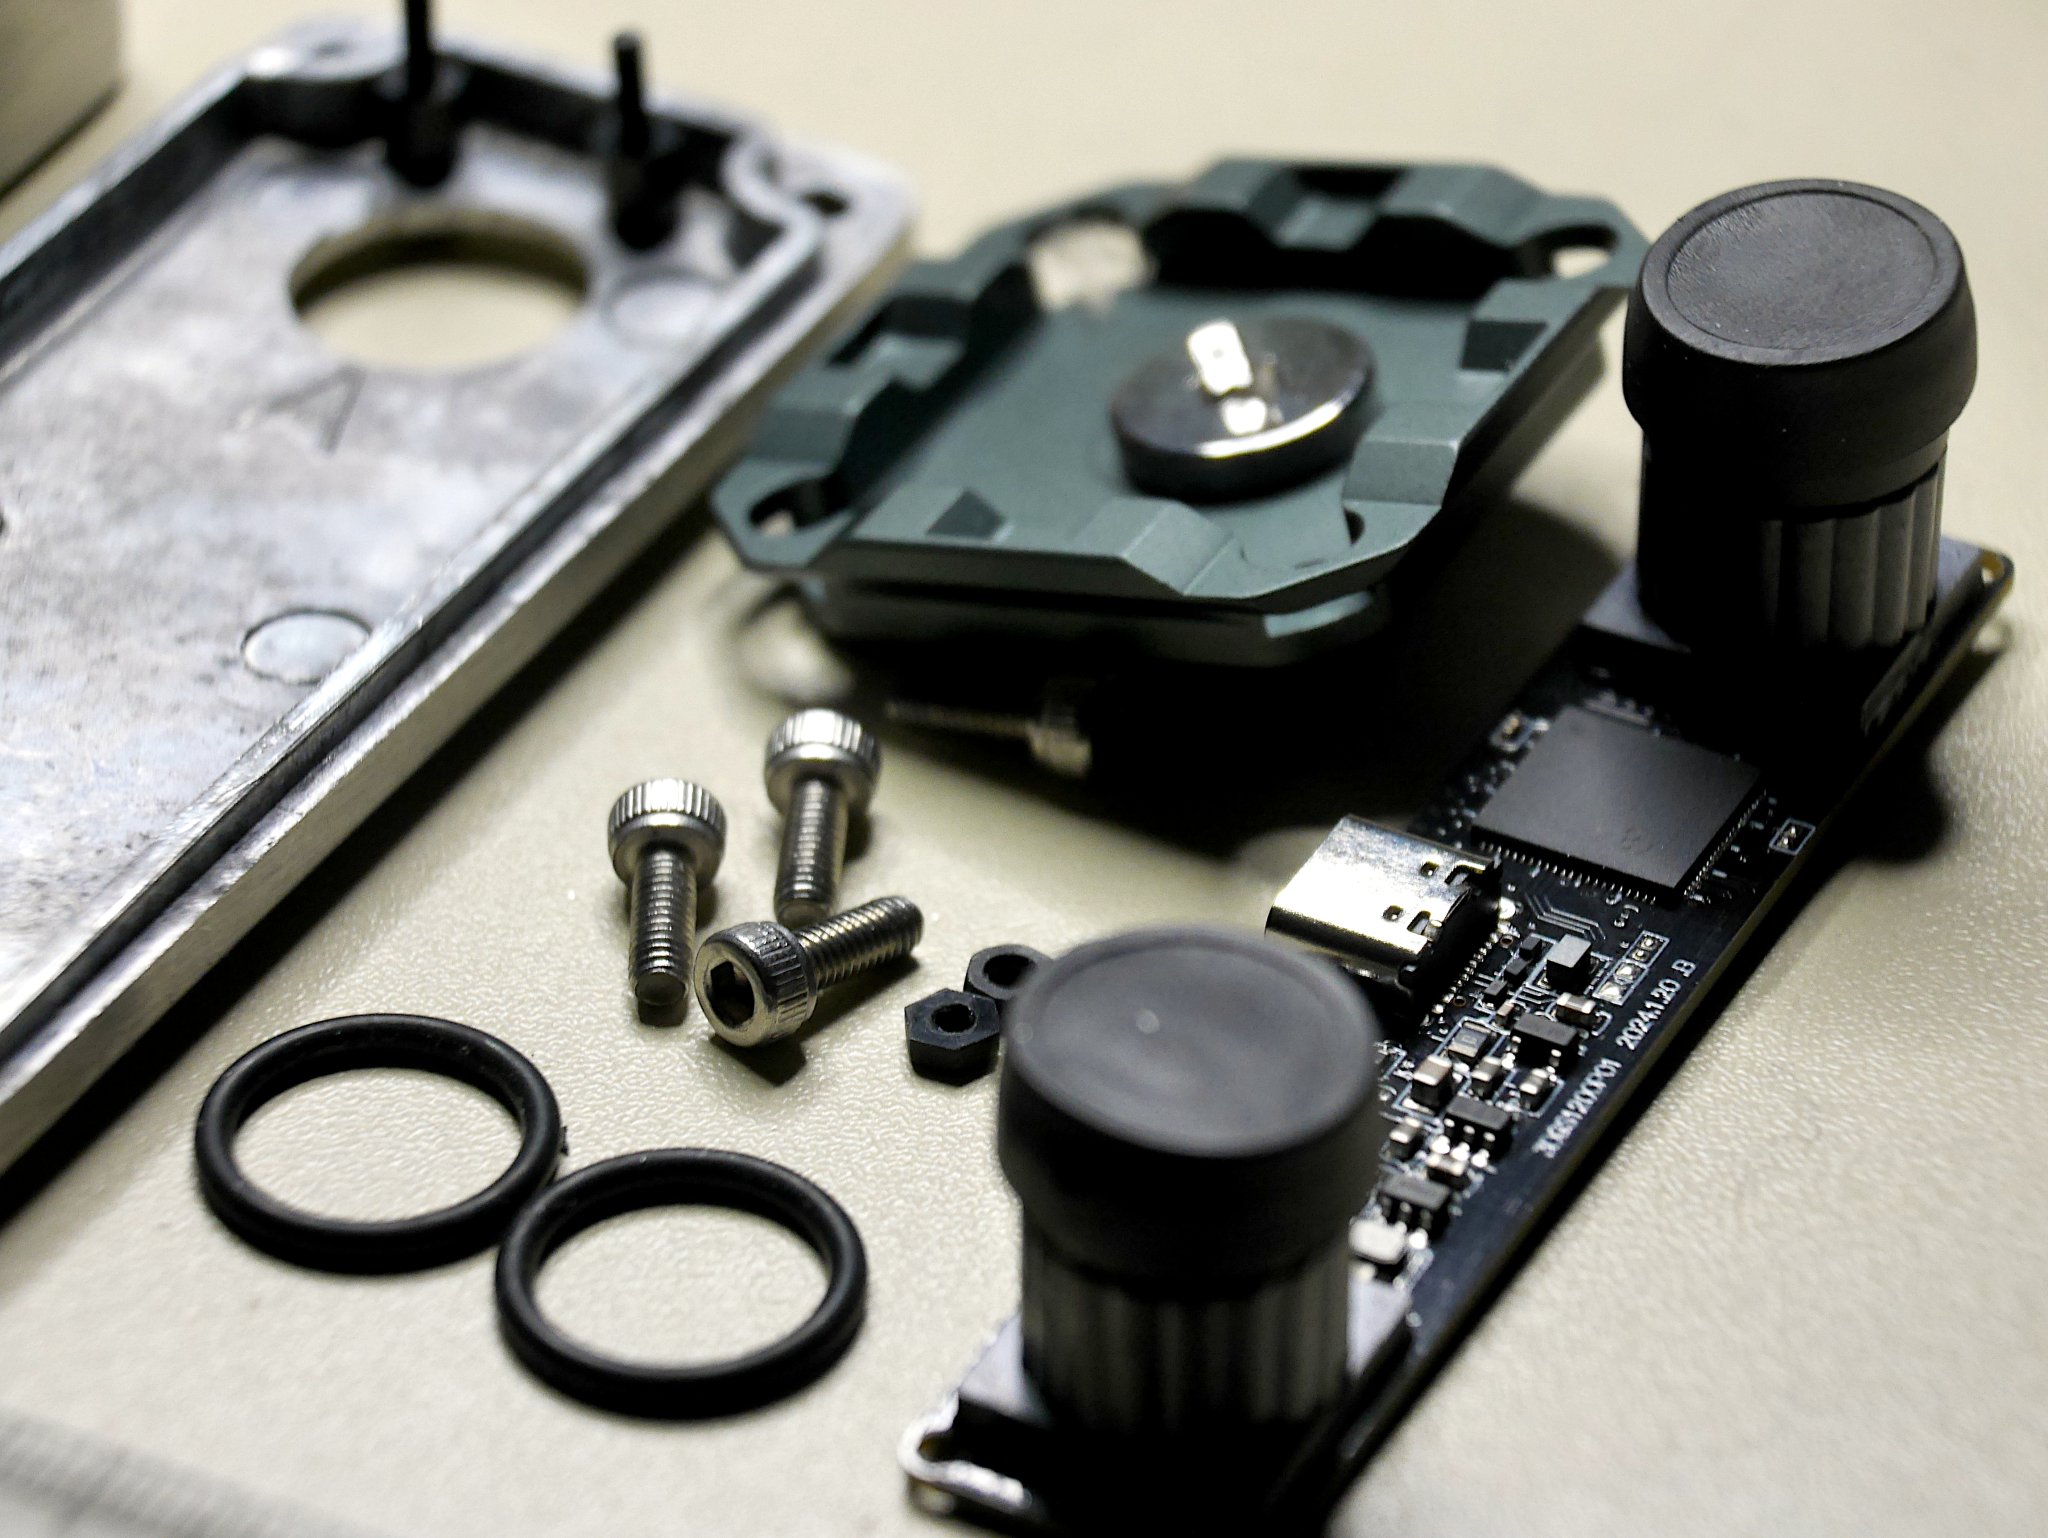
The die-cast “stomp box” is a compact and robust enclosure, 92 mm x 38 mm x 31 mm and weighs around 90 grams. These enclosures are literally a few quid, available from a variety of Chinese suppliers. I replaced the default M3 Phillips screws used to retain the lid with some rather nice hex head stainless steel ones. You will also notice the 38 mm x 38 mm arca plate. Ironically this arca place cost more than the aluminium box. Its ¼”-20 UNC screw is one of two non-metric fittings on this device. In fact I tapped ¼”-20 UNC threads on what became the top and the bottom of the enclosure for compatibility with tripods and ‘cold-shoe’ mounts.
Construction
I took a few snaps with an ordinary µ4/3 camera while I was building and testing the thing. The unit itself is a simple design, with the main circuit board mounted inside a die-cast enclosure on four M2 nylon pillars. Thus the lid of the enclosure became the front of the camera…
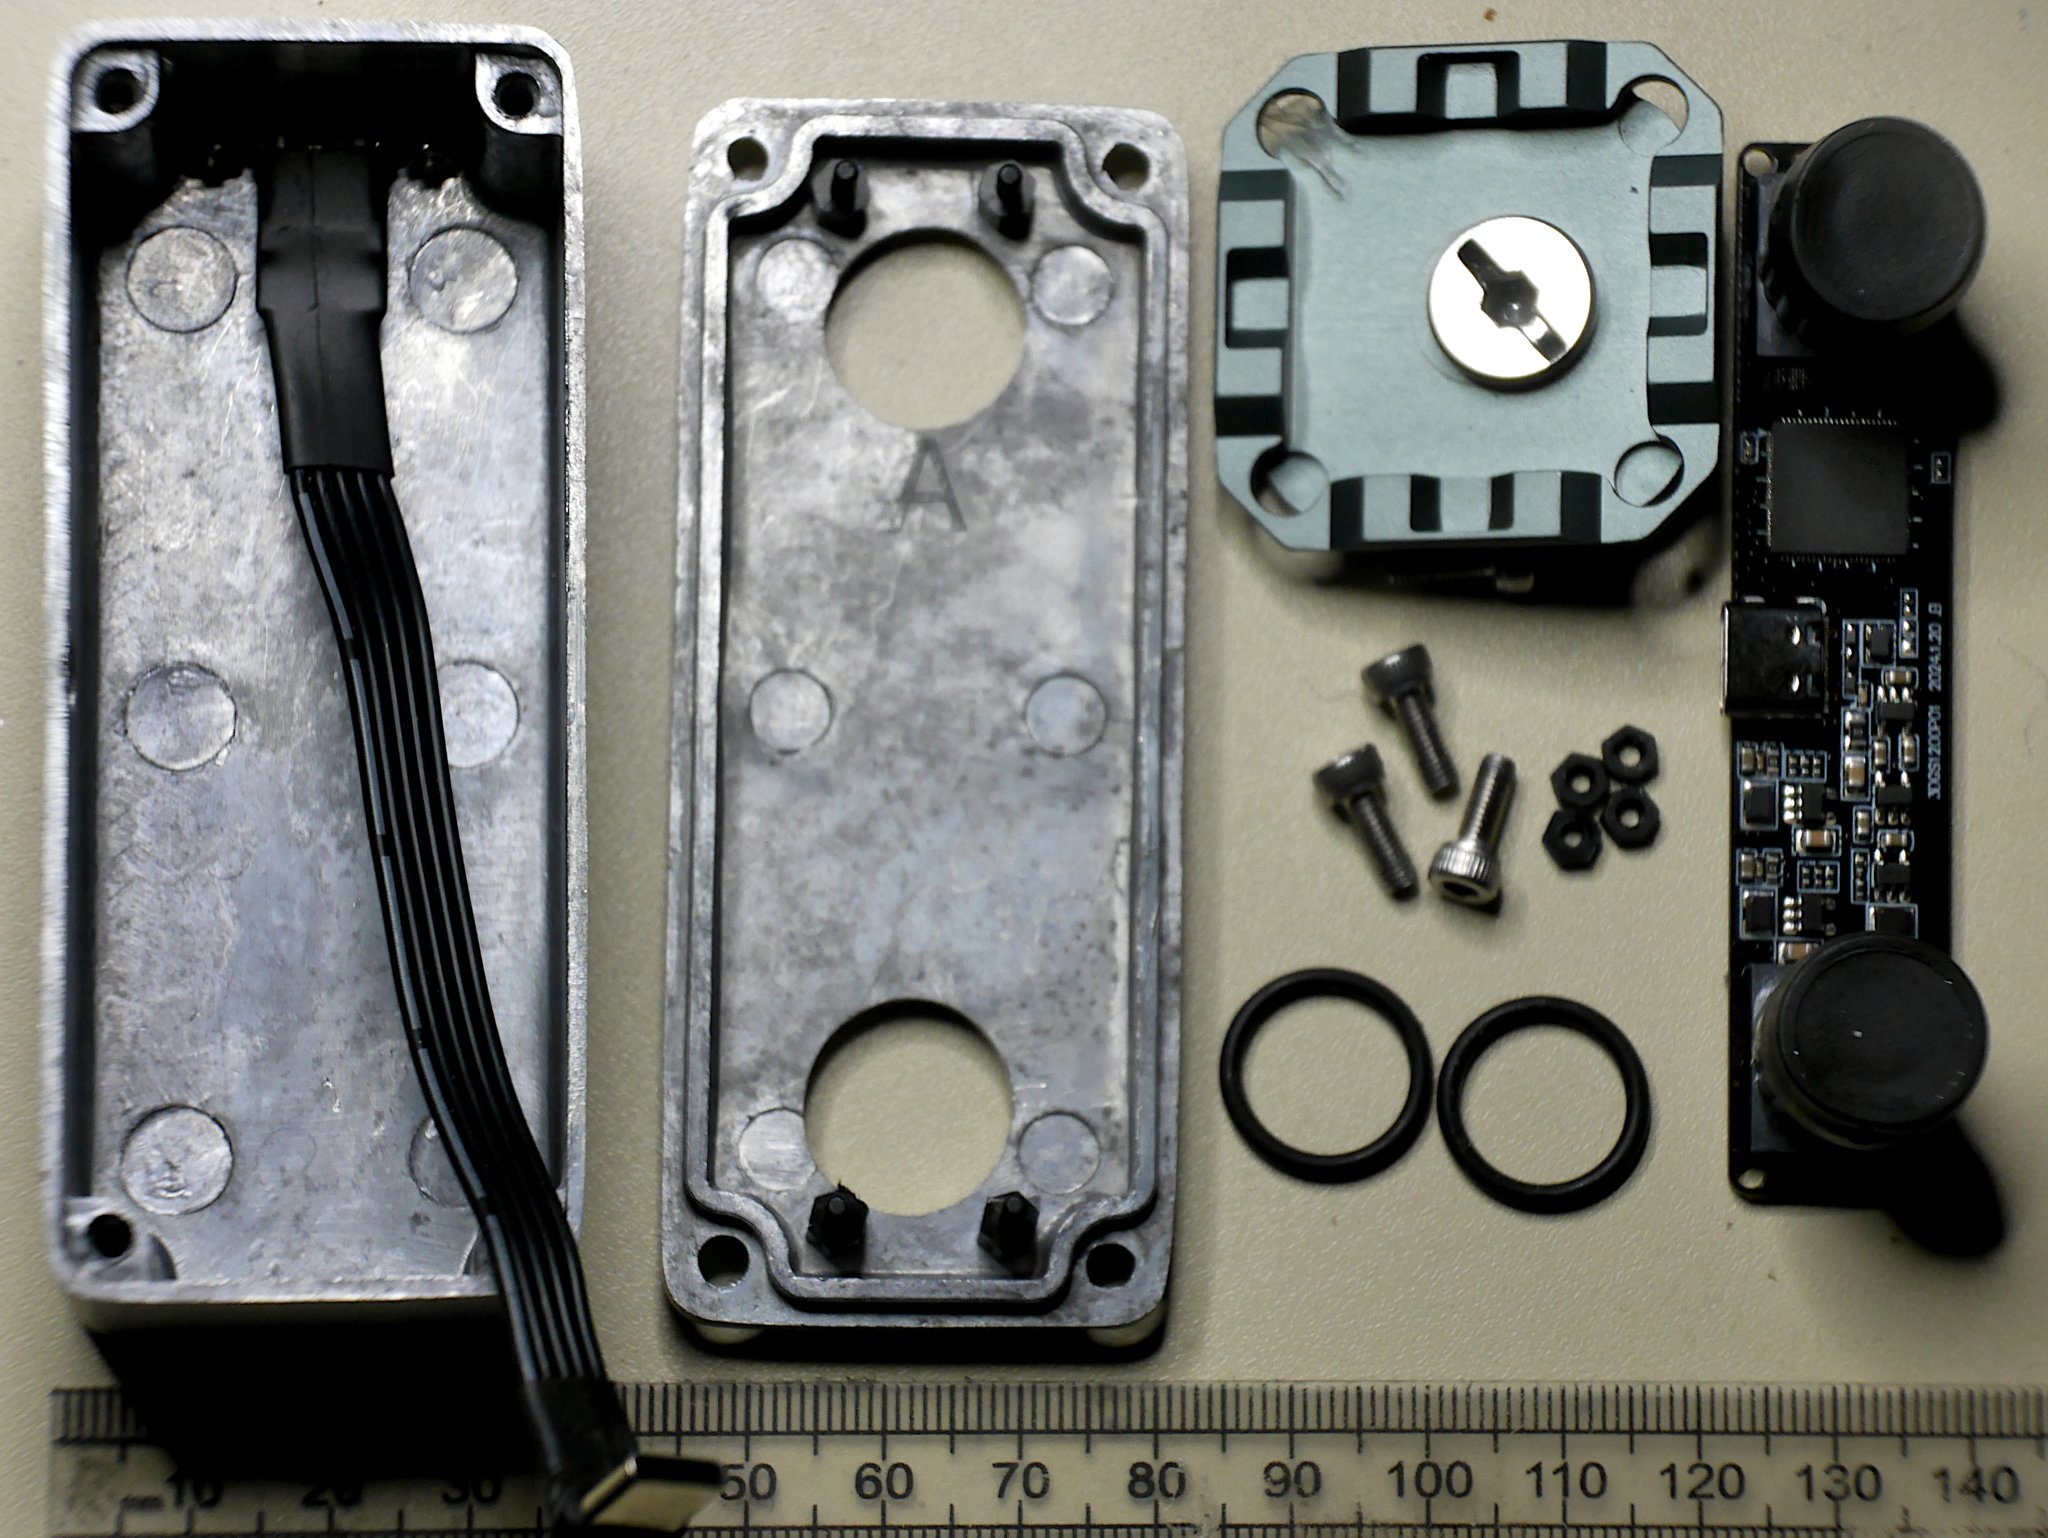
The camera module is branded “ELP”, though similar devices are available. It is tiny, just 80 mm x 16.5 mm and weighs just 16 grams including lens caps. There is a link at the end of this article if you are interested in purchasing one yourself. The only component that proved tricky to source was the 100mm USB C type internal extension lead. This was needed because the socket on the board is in a most inconvenient place.
Sample and construction gallery
This gallery shows a collection of stereo pairs, modified slightly using a shell script I published earlier so the left and right images are crossed over and alignment dots to assist the viewer have been included. Readers trying to view these stereograms on a mobile may wish to turn your device through 90°. They do need quite a wide screen in order to work properly. Later in the set you can also find some early attempts at creating anaglyphs using the shell script I published here. Then finally, a few snaps of the device, under construction.


Viewing the crossover stereograms
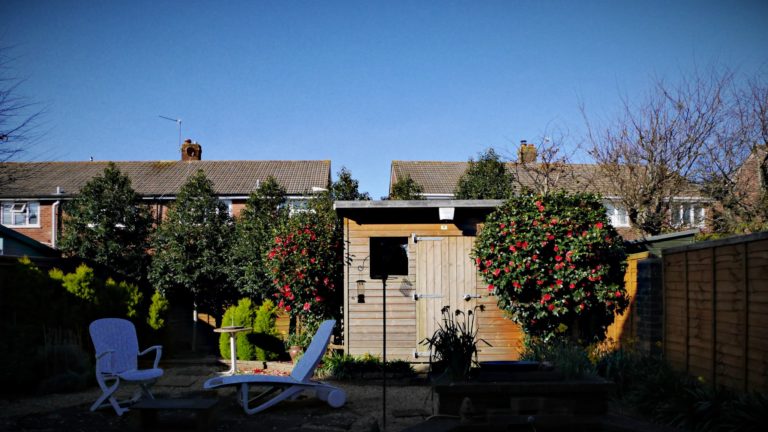
These are the two-frames images at the start of the gallery. To view them in 3D simply cross your eyes slightly until a third image appears between the two photos. If you are doing it correctly then this third image will be in 3D. For example in the pictures featuring Estella Rose, the silver-coloured mannequin and model Estella Rose will clearly be in the foreground.
Viewing red-cyan anaglyphs
These are the slightly fuzzy images in the middle of the gallery with strange red or cyan borders around parts of the image. Anaglyphs enable the left and right eye view to be combined. However to separate the left right and frame requires special red and cyan filtered anaglyph glasses, cheaply available from places such as AliExpress and eBay.
Image Capture
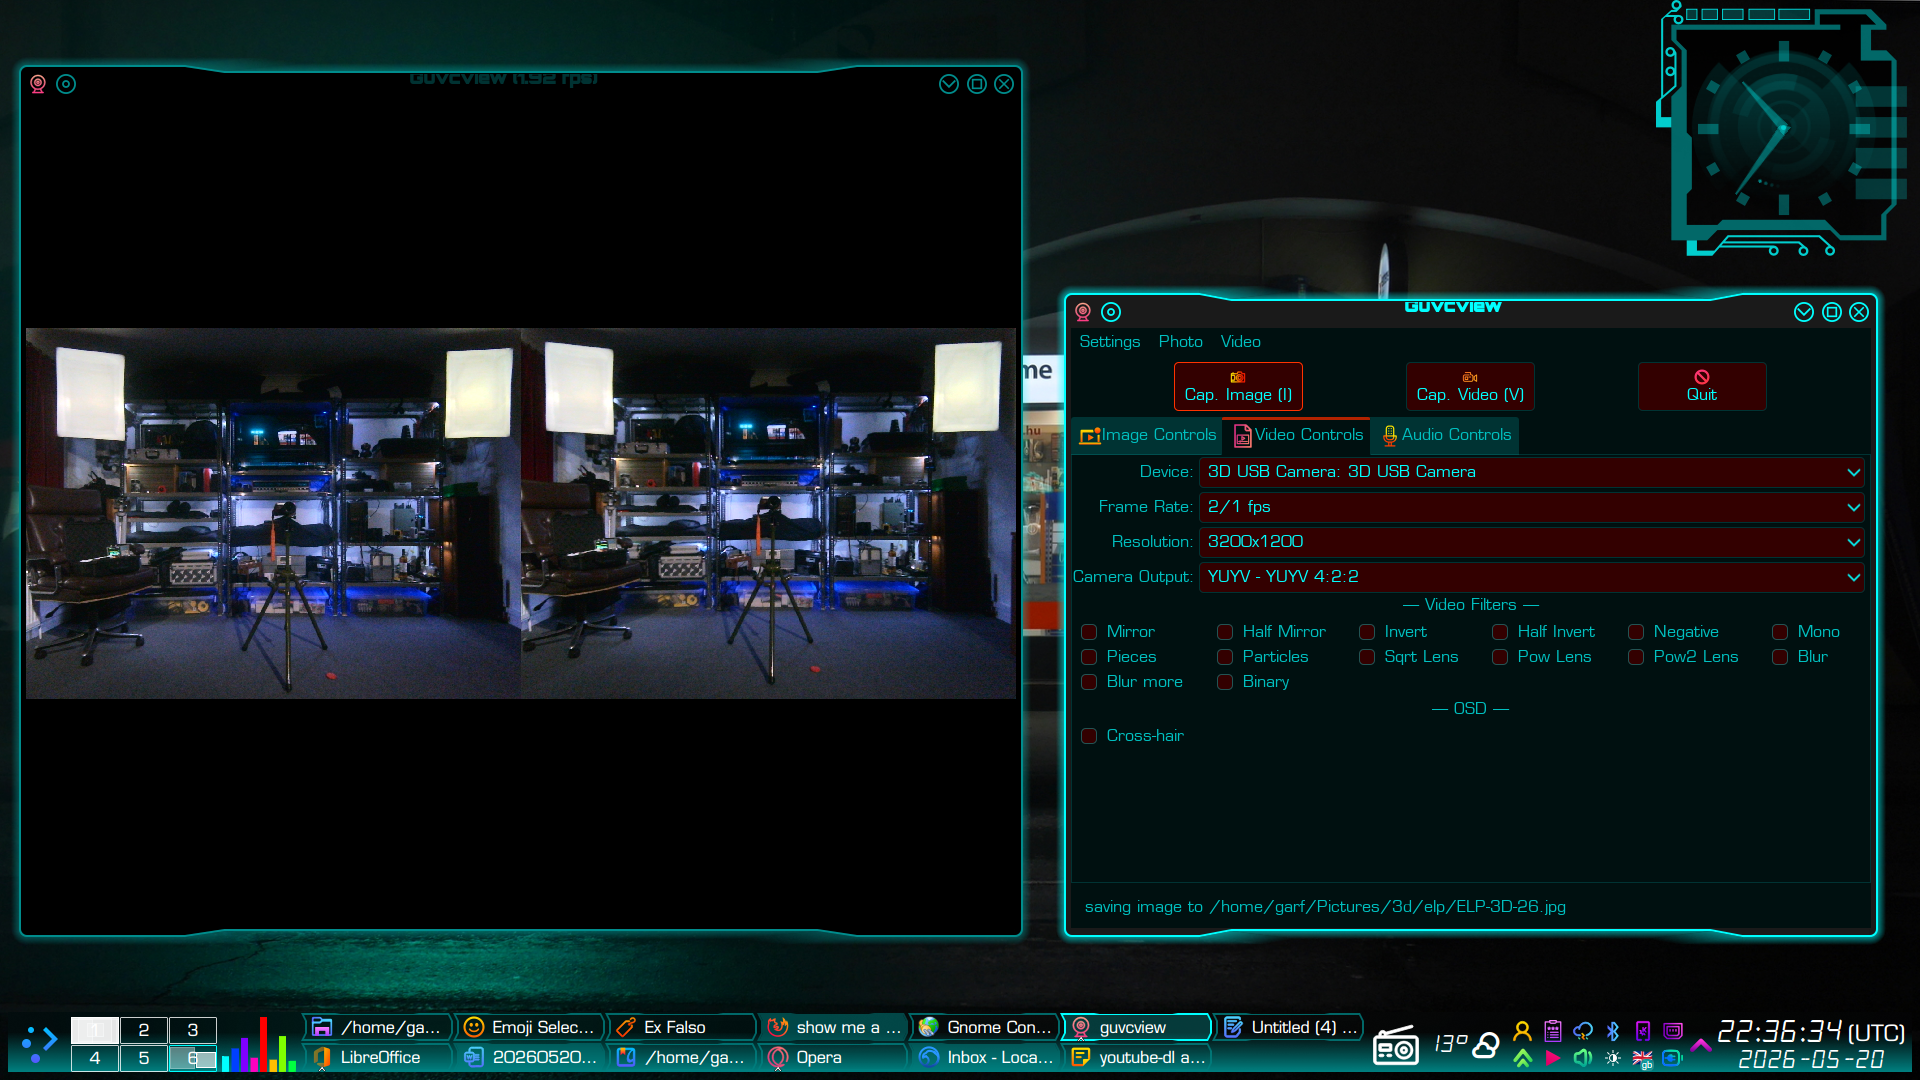
Images were captured using a free open source package called GUVCView, working in still image mode. The settings tweaked so the fame-rate was slow but the image quality was high. Note the stream was YUYV not MJPEG. These have to be selected in the ‘video settings’ even if one is only capturing still images.
BASH scripts
These are the BASH scripts I wrote to bulk process the 3D images from the 3D camera board at various stages of production, c/w a gallery of resulting images. They are not particularly clever scripts. They simply leverage basic Unix tools such as ImageMagick and EXIFTool – very much products of the “good enough is perfect” school of coding. Nevertheless, they are fairly well commented. I felt that some readers might find these helpful as starting points for their own image processing scripts.
- Adding some EXIF
https://garfnet.org.uk/cms/2026/03/28/3d-sooc/#script - Swapping left and right images
https://garfnet.org.uk/cms/2026/04/02/3d-sooc-swapped/#script - Creating 3D stereograms with alignment circles
https://garfnet.org.uk/cms/2026/05/01/3d-stereograms/#script - Creating anaglyphs
https://garfnet.org.uk/cms/2026/05/07/3d-anaglyphs/#script - Creating square-framed 3D crossover stereograms
https://garfnet.org.uk/cms/2026/05/23/3d-square-stereograms-and-bash-script/#script
Information
- How to view stereoscopic images
https://stereoscopy.blog/2019/08/04/how-to-view-stereoscopic-3-d-images-basic-tutorial/ - How to free view stereoscopic pairs
https://stereosite.com/basic-tutorials/how-to-free-view-stereoscopic-pairs/
Software
- ExifTool by Phil Harvey
- GUVCView
Suppliers
- ELP Camera module
https://www.aliexpress.com/item/1005007554551092.html - USB 10 CM extension internal lead
https://www.aliexpress.com/item/1005005372667998.html
Special credit
With many thanks to my friend and model Estella Rose for her help and encouragement and for dressing up in her “Dorothy Gale” costume and posing for these sample images.