A surprisingly straightforward studio flash repair
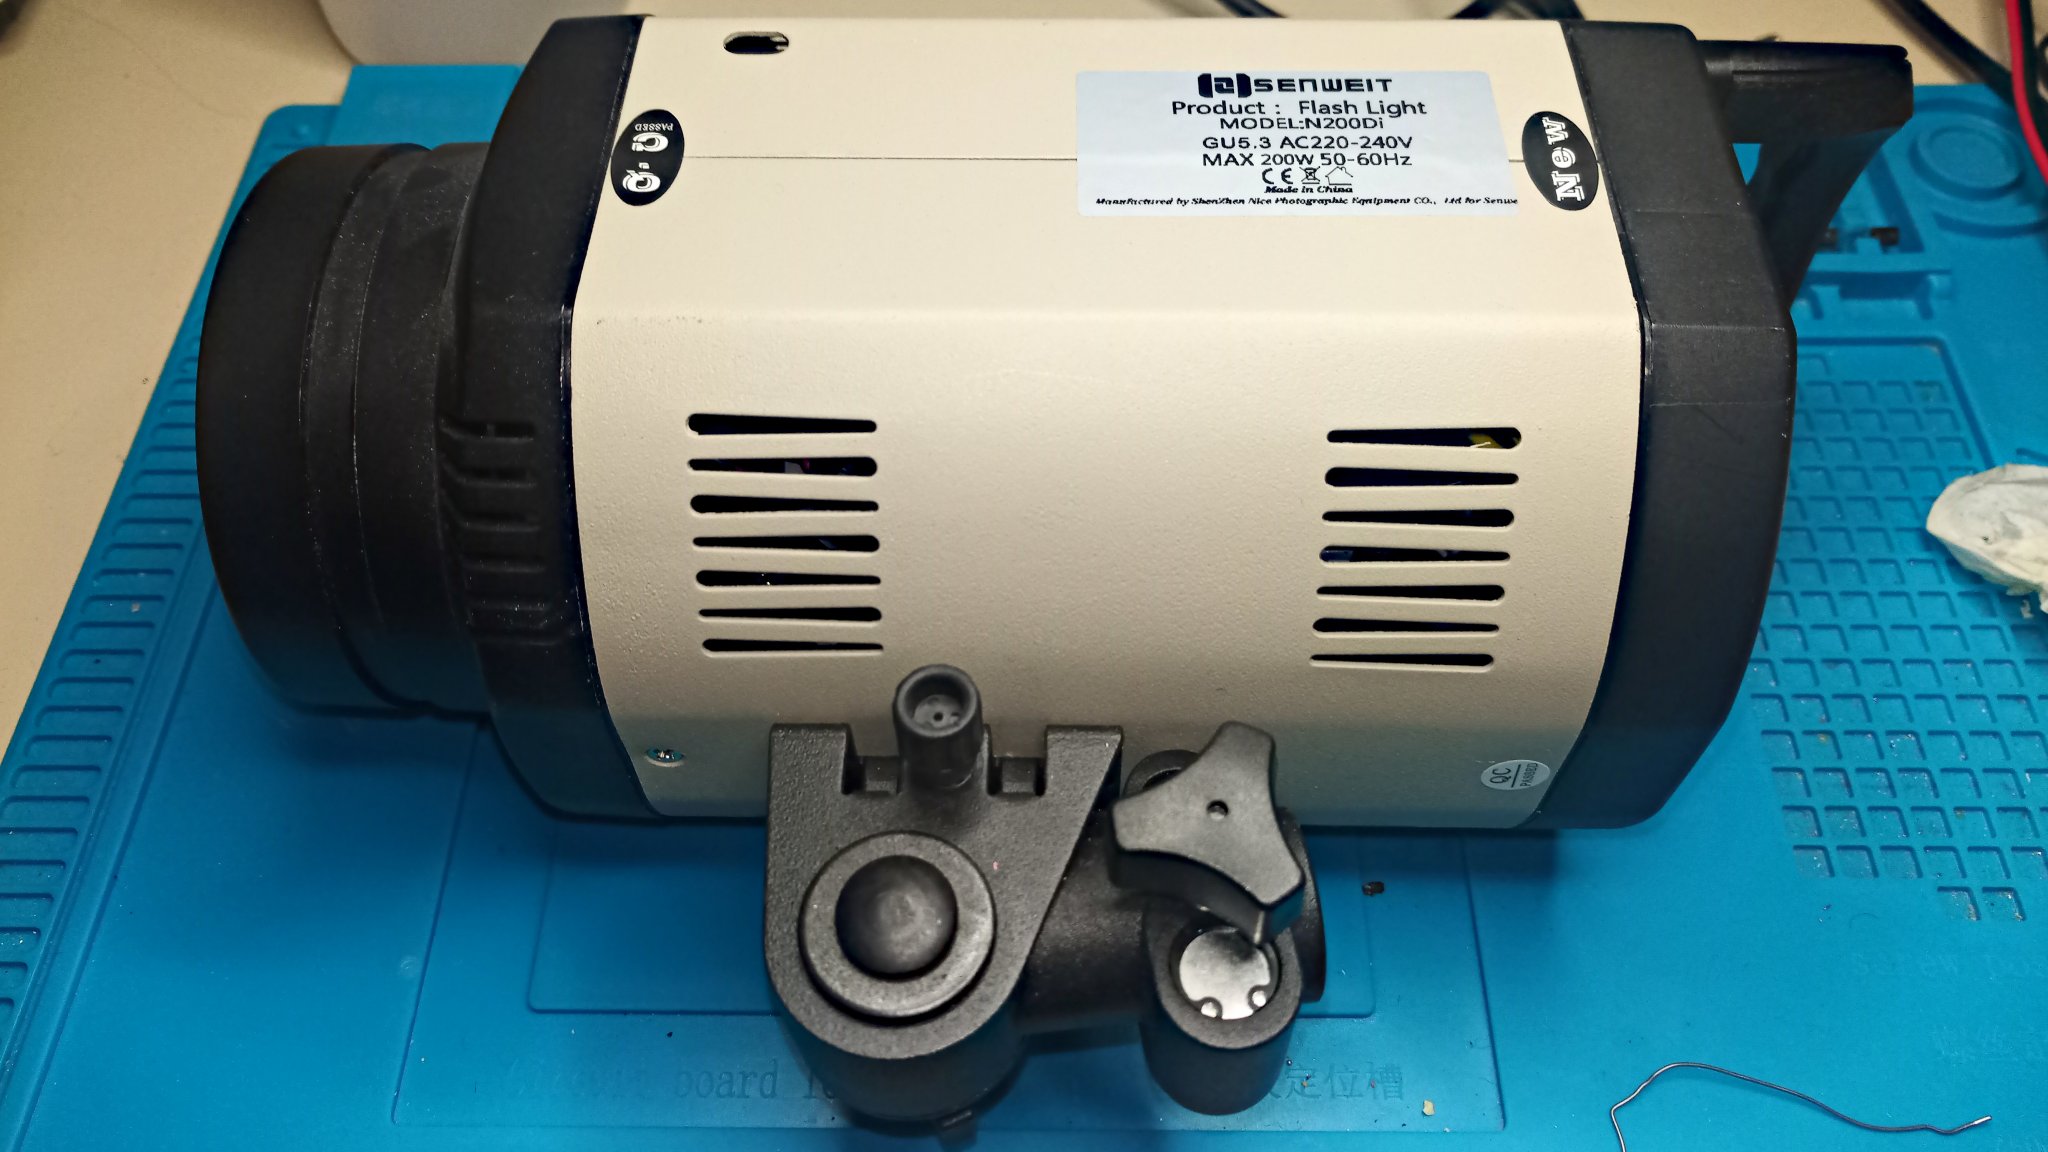
Back in 2015 I bought 3 pairs of studio flash heads (one pair 400 joule, one pair 360 joule and one pair 200 joule). They were supplied as bargain bundles, complete with stands, brollies etc. via sellers on eBay. They were quite a bargain. Each flash head worked out at approximately £50 per unit, They are branded “Senweit” but were actually manufactured by Shenzhen Nice Photographic Equipment Co.,Ltd. They were “end of line” products. In fact, I understand the product was discontinued in or around 2014. They are also beautifully made with (mostly ) metal casing and all-metal 16mm mounting clamp c/w safety catch.
- Please read warnings at end of this article before attempting any sort of studio flash repair. This article is aimed at those competent to undertake such a repair.
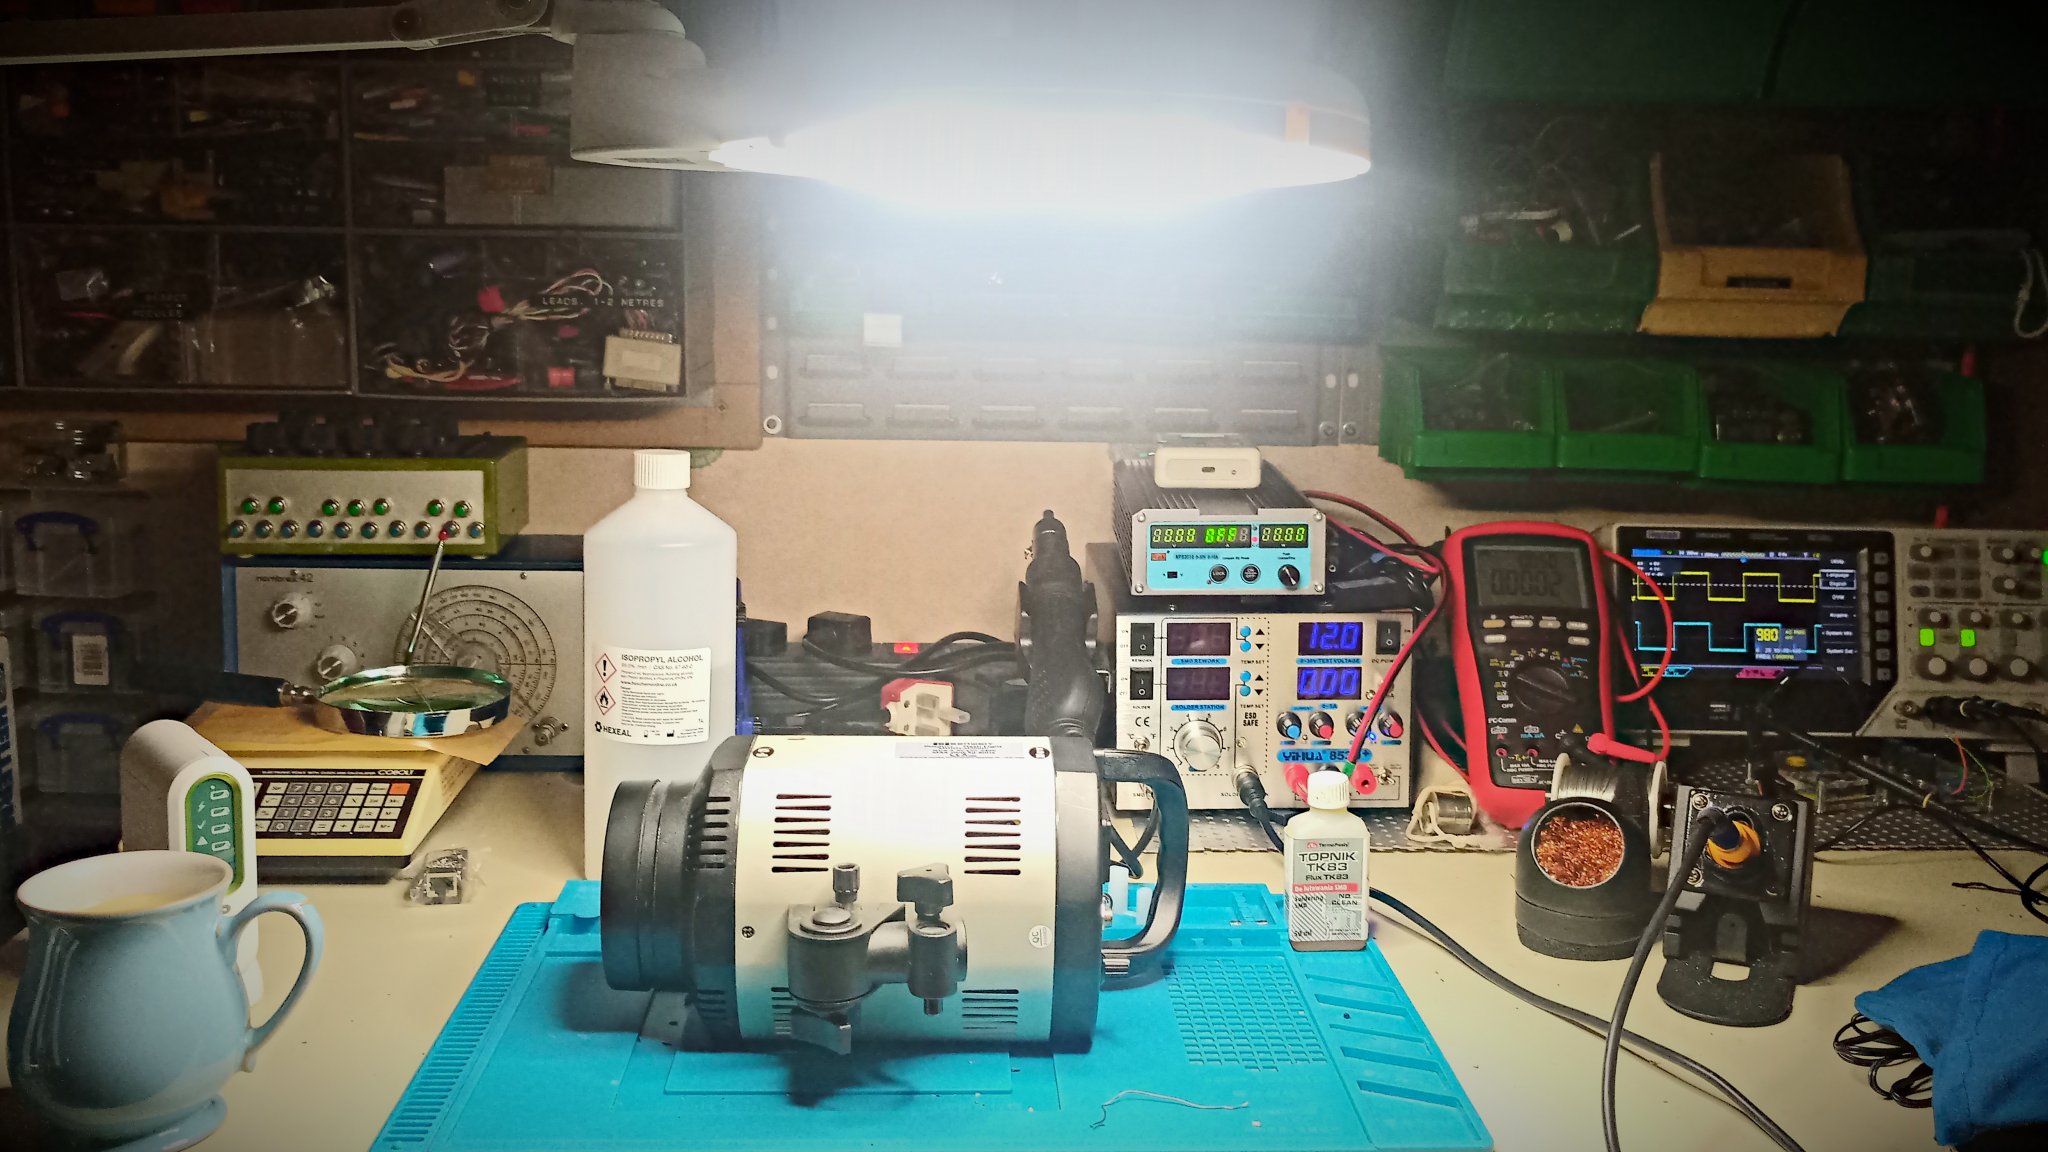
Senweit/Nicefoto 200 joule flash head on my workbench awaiting repair
I bought six flash heads rather than the three that I actually needed because they were very cheap and because the prevailing wisdom at the time was that Chinese flash heads were unreliable. I figured I should keep a few spares. As it happens all six units are performing just as well today as they did when they were new.
The problem
One of the 200 joule heads was dead on arrival. Actually it wasn’t quite dead. The mains switch lit up. But it would not actually flash. I reported this to the seller, who very quickly sent out a replacement and told me to bin the faulty one, or keep it for spares. Which is what I did. In fact the faulty unit languished in my repairs box for five years, until I finally decided it was time either to fix it or dump it. 🙂
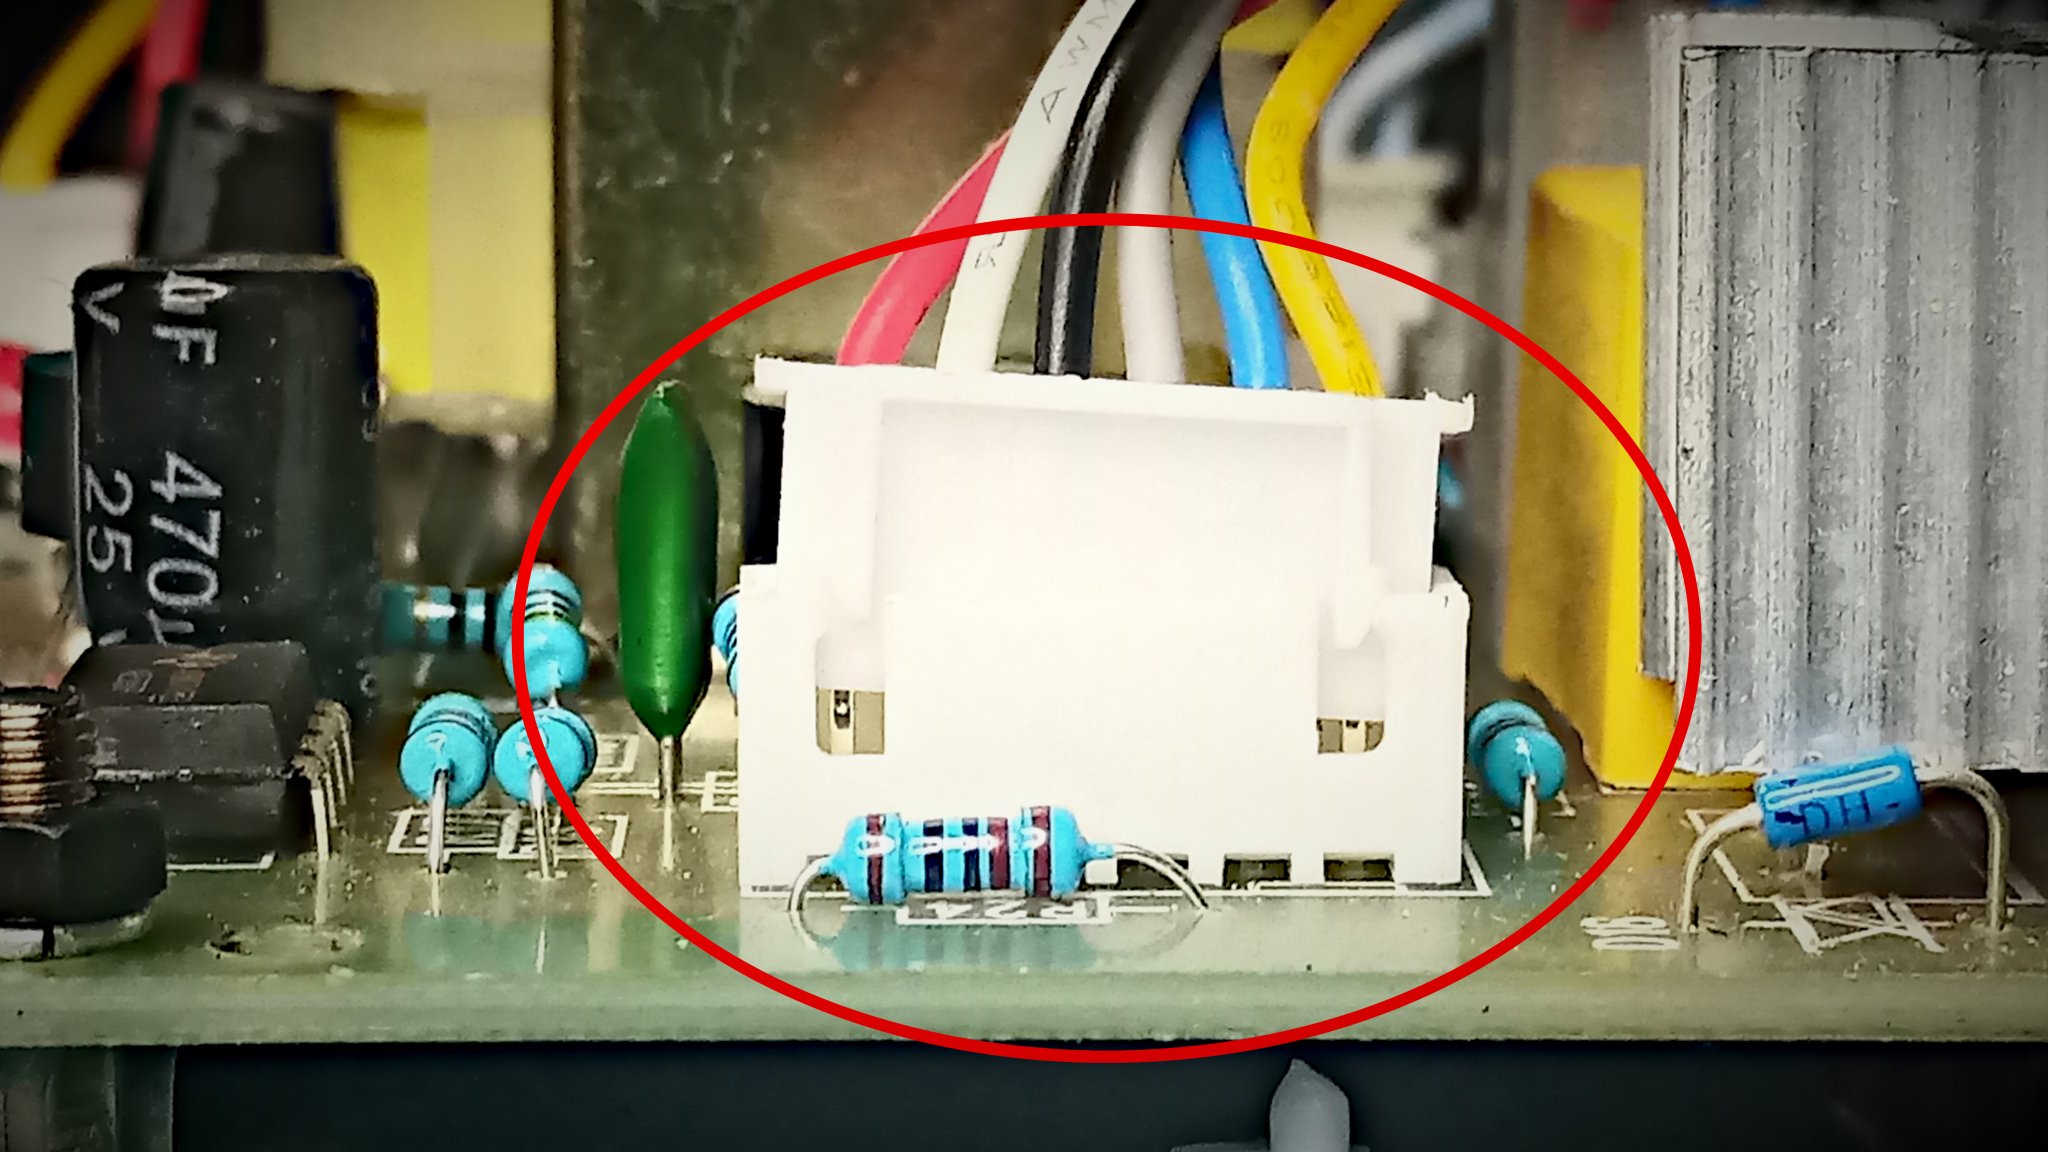
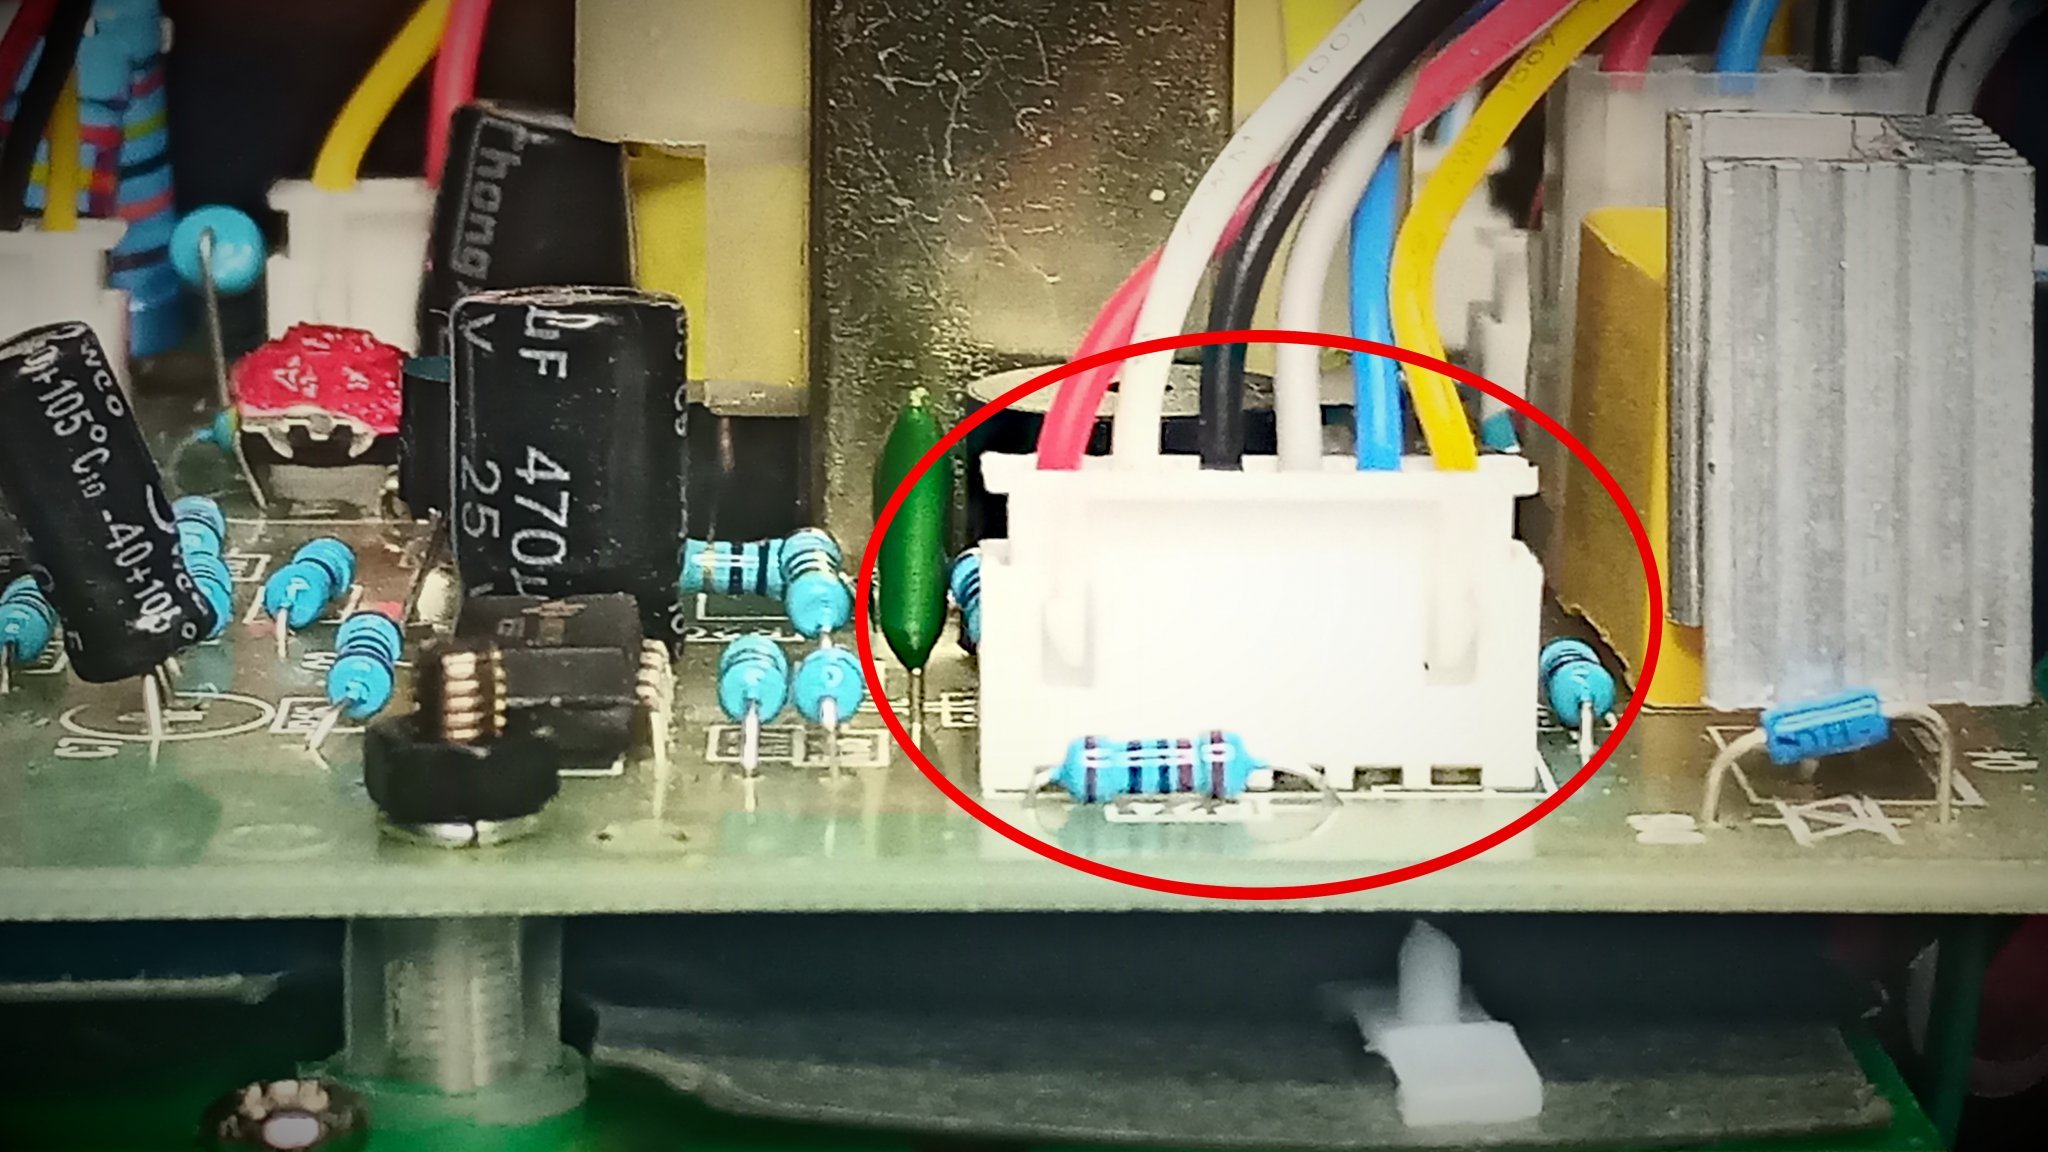
Main circuit board. Note the chunky fibreglass PCB. Also note the the loose and slightly skewed push-on connector, ringed in red.
The thing is, the other lights have proven much more reliable than expected. Aside from a little modification to make the modelling lights safer, none of these units have needed any sort of repair. So I thought I’d use a bit of coronavirus lockdown time to investigate why the rogue light was not working.
The fix
These particular lights are actually very service friendly. The metal top cover is secured by four M3 x 10mm countersunk screws – hidden by little “QC” stickers. First thing I did was a nose test – nothing smelt burnt. Then I looked carefully for loose connectors. I quickly discovered that the cable connecting the rear panel was not pushed home properly. I rectified this, temporarily connected a mains supply and hey presto! It worked.
Main circuit board. Note the the push-on connector, is now pushed fully home.
Safety
Before deploying in the studio, I used my faithful Robin insulation tester to ensure that there were no insulation leaks. It tested fine, even at 1000 volts. I also tested to ensure that the flash trigger socket was not at mains voltage. It was fine too.
Conclusion
If you are binning a flash unit that powers up but does not flash, and you understand the potential risks, then it might just be with popping off the lid and taking a look inside just to make sure none of the internal connectors have come adrift.
- Footnote, I hadn’t actually intended to write about this studio flash repair. In fact, I hadn’t planned to repair it at all. My original idea was to do what the supplier suggested and break this unit for spares. So the photos were purely functional ones, just to remind myself of how it came apart, for future reference. Hence, that’s why they were taken with my Ulefone 3w ruggedised smartphone rather than with a proper camera.
Useful link
- Basic diagram and description of of how a mains-energised studio flash works…
https://www.diyphotography.net/diy-home-made-power-pack-flashes/
Disclaimers and warnings
- As with any repair, you do so at your own risk. I take no responsibility for your ability or inability to perform any such task.
- Studio flash units often contain high value capacitors that can store a large electrical charge at very high voltage. They can also store this charge for considerable periods of time, long after they have been disconnected from the mains. The capacitors in these units are located beneath an insulated panel, just visible at the bottom of the last image. But older units may not be so well protected.
- If you are uncertain about what you are doing then you should consult a qualified electrician.
- It is your responsibility to ensure your workshop and/or studio area is safe.