Install QtDMM on Debian
I have always rather enjoyed plugging test equipment into a PC and capturing the readings. Way back in my early days of using GNU/Linux I had a lot of fun with a program called QtDMM. I still have my old £15 bargain-bin Tenma 72-6870 which worked almost flawlessly with QtDMM on Ubuntu, back in 2008. So I was curious to see if QtDMM was still out there? and if QtDMM would run on a modern GNU/Linux. Well I’m delighted to report, yes, and yes to both questions. Unfortunately QtDMM is not currently in the Debian repositories. So you have to build it for source
Fortunately, however, in this instance, building from source proved to be very straightforward. This guide describes how to obtain the current QtDMM source from GitHub, install the required build dependencies, compile it from source, produce both a Debian package and an -AppImage, and install the resulting *.deb file. The setup I used was:
-
Debian 14 (testing) – though it should work with any modern Debian 13 too.
-
KDE Plasma 6
-
Qt 6
-
Git repositories stored under
~/gits -
QtDMM source repository: https://github.com/tuxmaster/QtDMM.git
The resulting *.deb can then be installed using Debian’s package manager. You can also build an AppImage as a portable alternative. However, I have not included installation of the AppImage as part of this how to, basically because AppImages will work without installation.
Install the build dependencies
Start by installing the required development packages:
sudo apt install build-essential cmake pkg-config qt6-base-dev qt6-serialport-dev qt6-tools-dev libhidapi-dev
These provide the compiler, CMake build system, pkg-config, Qt 6 development files, Qt SerialPort support, Qt development tools and HIDAPI development files. The important QtDMM-specific packages include:
qt6-base-dev qt6-serialport-dev qt6-tools-dev libhidapi-dev
If the build complains about another missing dependency, install the corresponding Debian development package and rerun the build.
Get the QtDMM source code from GitHub
I keep my personal Git repositories are kept in a directory called “gits”. Yours may be elsewhere.
~/gits
Create the directory if necessary:
mkdir -p ~/gits
Change into it:
cd ~/gits
Clone the QtDMM repository:
git clone https://github.com/tuxmaster/QtDMM.git
Enter the source directory:
cd ~/gits/QtDMM
Check the source tree
Before building, it is useful to check that the repository is clean and see which revision is being built:
git status git log -5 --oneline
To make sure an existing checkout is up to date:
git pull
Then check again:
git status git log -1 --oneline
This is particularly useful when building directly from the current GitHub source rather than from a downloaded zipfile or release tarball. Though to be honest, like most people, I skipped that bit and went straight to building the package! 🙂
Build the Debian package
QtDMM provides a build script which can create the Debian package as part of the compile process. From the QtDMM source directory:
cd ~/gits/QtDMM ./compile.sh pack
The build will compile QtDMM and create the distribution packages under:
~/gits/QtDMM/packages/
Inspect the resulting files:
ls -lh packages/
You should find a QtDMM *.deb package there. You can inspect the Debian package before installing it:
dpkg-deb -I packages/*.deb
This is useful for checking the package metadata and dependencies.
Build the AppImage (optional)
The same source tree can optionally also produce an AppImage. From:
~/gits/QtDMM
run:
./compile.sh appimage
The build script creates the AppImage and places it in the packages directory.
Check the result:
ls -lh packages/
You should now have both a Debian package and an AppImage. The exact filenames depend on the current QtDMM version. The AppImage does not need to be installed through apt. It is simply a portable build of the application and can be retained as a fallback or portable copy. This howto does not cover installing or configure the AppImage.
Install the Debian package
My preferred installation uses the *.deb package. Use apt rather than manually using dpkg:
sudo apt install ./packages/QtDMM-*.deb
Using apt install for a local .deb has the advantage that apt can resolve any Debian package dependencies required by QtDMM. If the package filename contains a version number, the wildcard will select the QtDMM .deb in the packages directory.
Verify the installation
After installation, check where the executable was installed:
which qtdmm
You can also ask the shell to locate it:
command -v qtdmm
If necessary, list the files installed by the Debian package:
dpkg -L qtdmm
The exact package/executable naming can be checked from the package information if required.
You can then start QtDMM from the KDE application launcher or from a terminal:
qtdmm
For troubleshooting, QtDMM also supports a debug mode. This can be useful when diagnosing serial-device or DMM communication problems:
qtdmm --debug
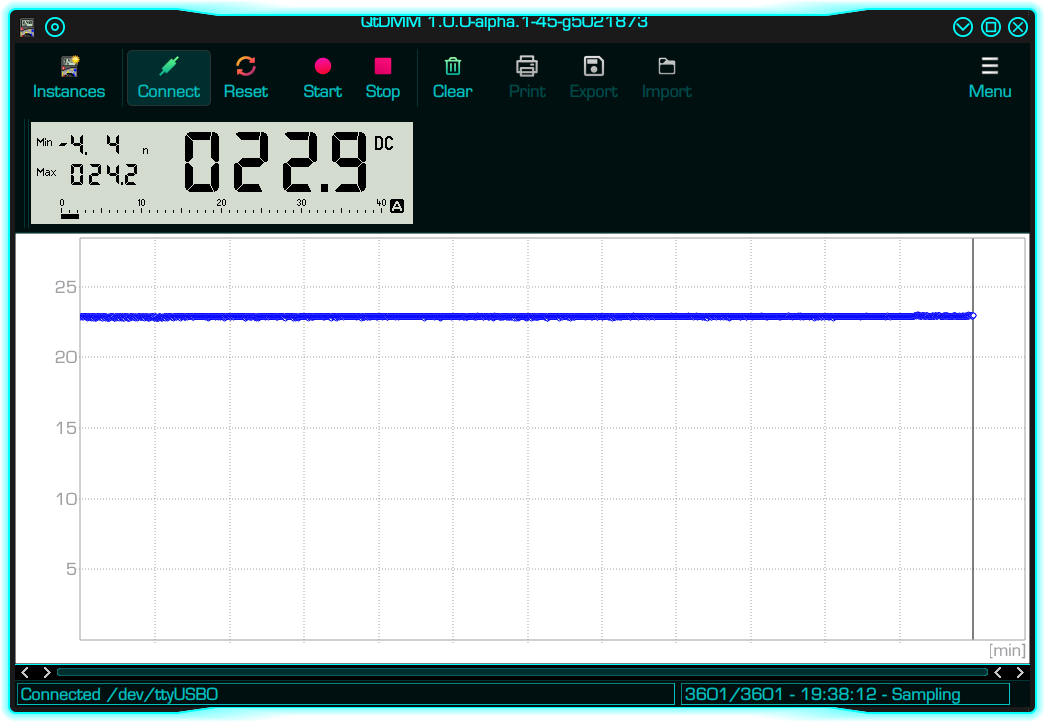
Hopefully by now you should be able to connect a compatible meter, Hit the little menu “hamburger” icon within QtDMM, select your meter and play. You may also find that if you particular meter isn’t listed, a selecting similar meter of the same brand may work for you. But if that still doesn’t work for you, here are some other troubleshooting tips…
Troubleshooting: serial-port permissions
When using a USB-to-serial adaptor, Linux will commonly create a device such as:
/dev/ttyUSB0
or:
/dev/ttyACM0
Check the device:
ls -l /dev/ttyUSB* /dev/ttyACM* 2>/dev/null
A typical USB serial device may look like:
crw-rw---- 1 root dialout ... /dev/ttyUSB0
Normal users generally need access to the dialout group.
Check the current user’s groups:
id
If dialout is not listed, add the current user:
sudo usermod -aG dialout "$USER"
Then log out and back in so that the new group membership is applied to the desktop session. Check again:
id
The output should now include:
dialout
Do not run QtDMM as root merely to get around serial-port permissions. Giving the normal user appropriate access to the serial device is the preferred solution.
Troubleshooting: useful serial-device checks
If QtDMM cannot communicate with the meter, first establish that GNU/Linux can see the adaptor. List USB serial devices:
ls /dev/ttyUSB* /dev/ttyACM* 2>/dev/null
Check the device permissions:
ls -l /dev/ttyUSB0
Test read and write access:
test -r /dev/ttyUSB0 && echo "read OK" test -w /dev/ttyUSB0 && echo "write OK"
Check the current serial settings:
stty -F /dev/ttyUSB0 -a
Check whether another process has the port open:
fuser -v /dev/ttyUSB0
or:
lsof /dev/ttyUSB0
If these show that the device exists and the current user can read and write it, the Linux device-permission side is working and any remaining problem is likely to be related to the serial settings, DMM protocol or QtDMM itself.
Rebuilding after updating the source
If the QtDMM source has been updated, first enter the repository:
cd ~/gits/QtDMM
Update it:
git pull
Then rebuild the Debian package:
./compile.sh pack
Or rebuild the AppImage:
./compile.sh appimage
Or build both:
./compile.sh pack ./compile.sh appimage
The resulting packages will again be placed in:
~/gits/QtDMM/packages/
To install a newly built Debian package:
sudo apt install ./packages/QtDMM-*.deb
Removing the Debian installation
Because QtDMM was installed as a Debian package, it can be removed normally through apt.
First check the installed package name:
dpkg -l | grep -i qtdmm
Then remove it using the package name shown:
sudo apt remove qtdmm
If the package has a different name, substitute that name in the apt remove command.
The source lives at:
~/gits/QtDMM
It is independent of the installed package and can be retained for future rebuilding, or simply deleted. It’s up to you, though personally I like to keep the source code if I can
Conclusion
Basically, that’s it. Franky I was surprised at how simple and straightforward the process was. Enjoy.
Links
- QtDMM on Github
https://github.com/tuxmaster/